
If seeing is believing, then I guess we need to show as much as possible of what you can do with Stratos Tokens App.
TLDR; A complete code example is available on CodeSandbox here.
In this article I’ll show you how to take your design decisions (design tokens) from your design document, publish them to NPMjs and then use them to style React components using Styled Components. This all without even having to open a design tool! Also, I’ll not be using Style Dictionary(!)
In this demo I’ll be using Sketch App, but Figma and InVision Studio are supported as well.
This demo is done completely without opening a design tool!
Publishing to NPMjs
There is no need to open the design file (All you need is to have read access to it). This is just to show you the content of the design file this demo is based upon.

Very important!
Every package name on NPMjs needs to be unique unless it’s a new version of an already existing package. I’ll be naming my NPM package stratostokens-react-demo, which means you can’t name yours stratostokens-react-demo! You have to pick your own name ✅
The magic steps to NPM super-duperness
- Open Stratos Tokens App and, on the start screen, create a new project. This is where you give your project a (great) name, decides where it should live and which design file it should use as input to Stratos Tokens’ render engine.

- Click on the artboard/canvas named Color. This will add color.js and color.json to your Stratos Tokens project.

- Click on the artboard/canvas named Typography. This will add typopgraphy.js and typography.json to your Stratos Tokens project.

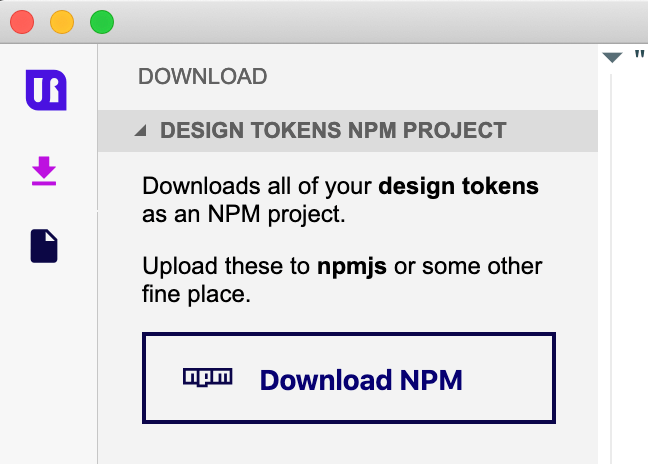
- Click on the download icon to the left and then on Download NPM
- Store the project anywhere you like
- Open the file package.json in your downloaded NPM project’s folder using your favorite code editor
- Enter a name on line 2 (this will be the name of the NPM package)

- Open Terminal App
- Go to your downloaded NPM project’s folder (I’ve named mine demo-npm-tokens)

- If this is your first time uploading a package to NPM you need to login
- Enter npm login and enter your credentials (you need an account at www.npmjs.com)
- Enter npm install (a bunch of texts will flash by, no worries, this is ok)
- Enter npm run build (more text will flash by, this is also ok)
- Enter npm publish (even more ok text)
- The design tokens are now available on NPMjs as the package stratostokens-react-demo!
Installing the NPM package
You install your NPM package by, in the root folder of the React project you would like to use your design tokens in, enter:
npm install –save stratostokens-react-demo

Styling React components with your design tokens
In your code you can access your design tokens like this:

or using Styled Components’ ThemeProvider

A complete example
You can find a complete example on CodeSandbox. This example styles React components in two different ways:
- Directly in your React Styled Component
- Via Styled Components’ ThemeProvider
Related articles
https://medium.com/sketch2react/the-nine-rules-of-stratos-tokens-8ed208f38ba9
Thanks for reading!
/Fredrik — Team Sketch2React
Thanks for writing this up 👍🏻
I just came across a job listing that asked about this, and I wasn’t sure exactly what they meant.
Now I know, and luckily it’s just another name for using styled-components theming.
I love the typography on your site too.
Great job 👍🏻
You are welcome Peter, we’re always really happy to get some feedback on our articles and tutorials. We are nothing without our community 🧡
Thanks, we have tweaked and tweaked the design of our blog for ages. Totally worth it 😺💪