

Hey guys! The last year or so, I have been busy learning SwiftUI together with my mostly best friend, ChatGPT. Made some apps just for fun, and now it’s time to write about my latest one, SpringUI, which, I think, is my absolute favorite one so far.
What is SpringUI?
It’s a free macOS animation app that removes the guesswork when working with so-called spring animations in SwiftUI. I was personally perplexed and curious about spring, so I built this primarily for myself to better understand it. Spring deals with strange things like mass, stiffness, damping, and my favorite one, bounce!
I come from a keyframe based animation workflow, so dealing with the above is very odd, but strangely rewarding.
Who is this app for?
Anyone curious about creating spring animations for any of Apple’s platforms, be it iOS, macOS, watchOS, tvOS, or even spatialOS. I guess most users will be either designers or developers, but hey, what do I know?
The best thing is, you do not need to be a master animator or a ninja developer to create animations, just play around with all the controls, export, and you are done.
Superpowers built-in
- Advanced transformation controls like 3D rotation, hue and saturation, blur, opacity, scaling etc.
- It has built-in support for the whole Apple SF Symbols library, which sports around 5000+ icons so far!
- Not only that, but it exports production-ready SwiftUI animation code and an animation example with one click.
- Support for adding custom images instead of SF symbols. Perfect for animating your custom icon library or just an illustration, card, whatever.
- The animation data can be used with anything that can be animated in SwiftUI, your imagination will be the only limit here.
Animation time!
Bored to death with all the uninspiring icon animations in your current Apple ecosystem app? Look no further, experiment with all the funky animation controls we have inside SpringUI.
Best thing, you do not need to know a single line of code to animate with SpringUI, everything is handled with easy to understand sliders for experimentation.
Lets create something similar to this animation:
Make sure you have first downloaded Apples SF Symbols 5 app, since we are using it in this tutorial.

Search for ”music” and copy the names of ”music.mic.circle” and ”music.mic.circle.fill” out to clipboard, or just paste them into SpringUI like this, name of symbol, name of second symbol. Easy peasy!
Preview the animation
Just hit the Preview button or tap directly on the symbol itself, and you will see how the animation looks right now, out of the box. We can do much better, let’s play with some advanced animation controls that we have.
Let’s go nuts!
Try playing around with hue rotation, 3D rotation, the amount of bounce etc. and you will find yourself creating something like this in a couple of seconds:
A little hidden gem: If you feel lost and want to revert a specific parameter to the original value, just click on the icon attached to said parameters name and it will revert.
Lets copy out to code
You have two ways of exporting animation code from SpringUI, either you just copy the animation parameters, or my favorite one, specially for playing around with it more, you copy an entire SwiftUI file example. Let’s do that!
Make sure you have installed also Swift Playgrounds, we are going to copy the code out of SpringUI into a default app template.
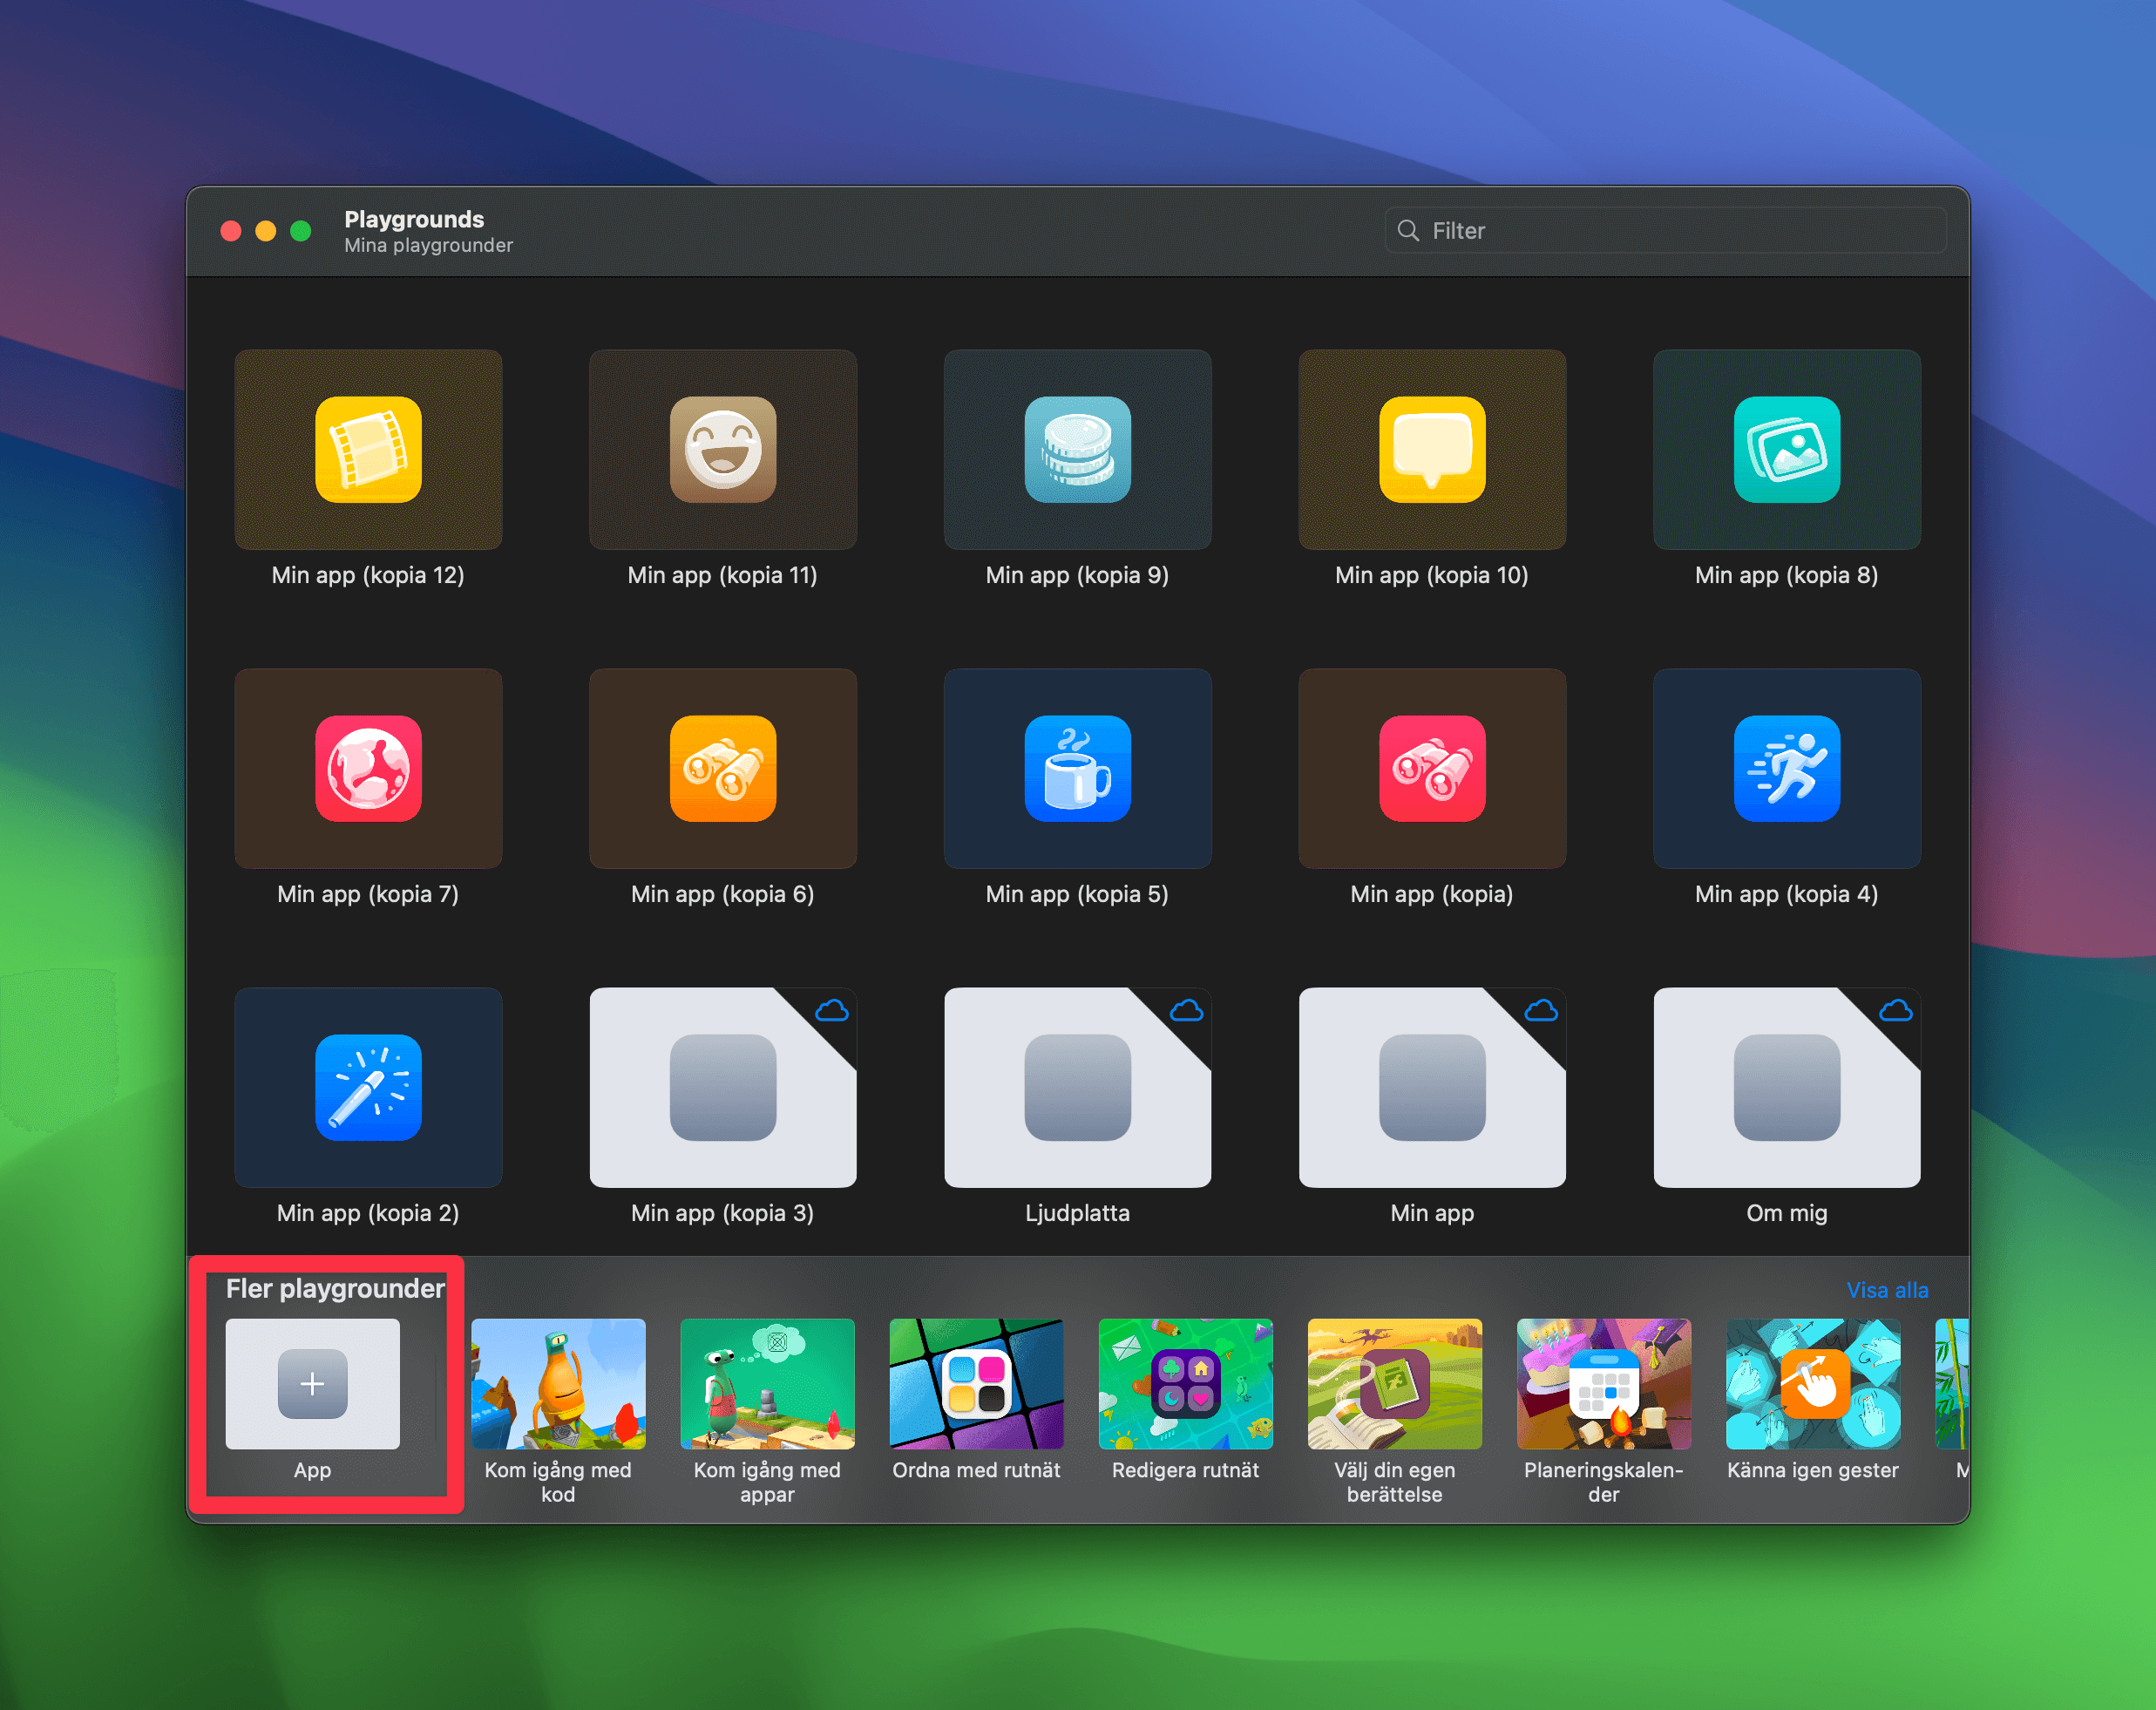
- Fire up Swift Playgrounds
- Select ”App”
- Jump back to SpringUI and click on the Copy code button. Everything you need is now copied out to Macs clipboard memory.
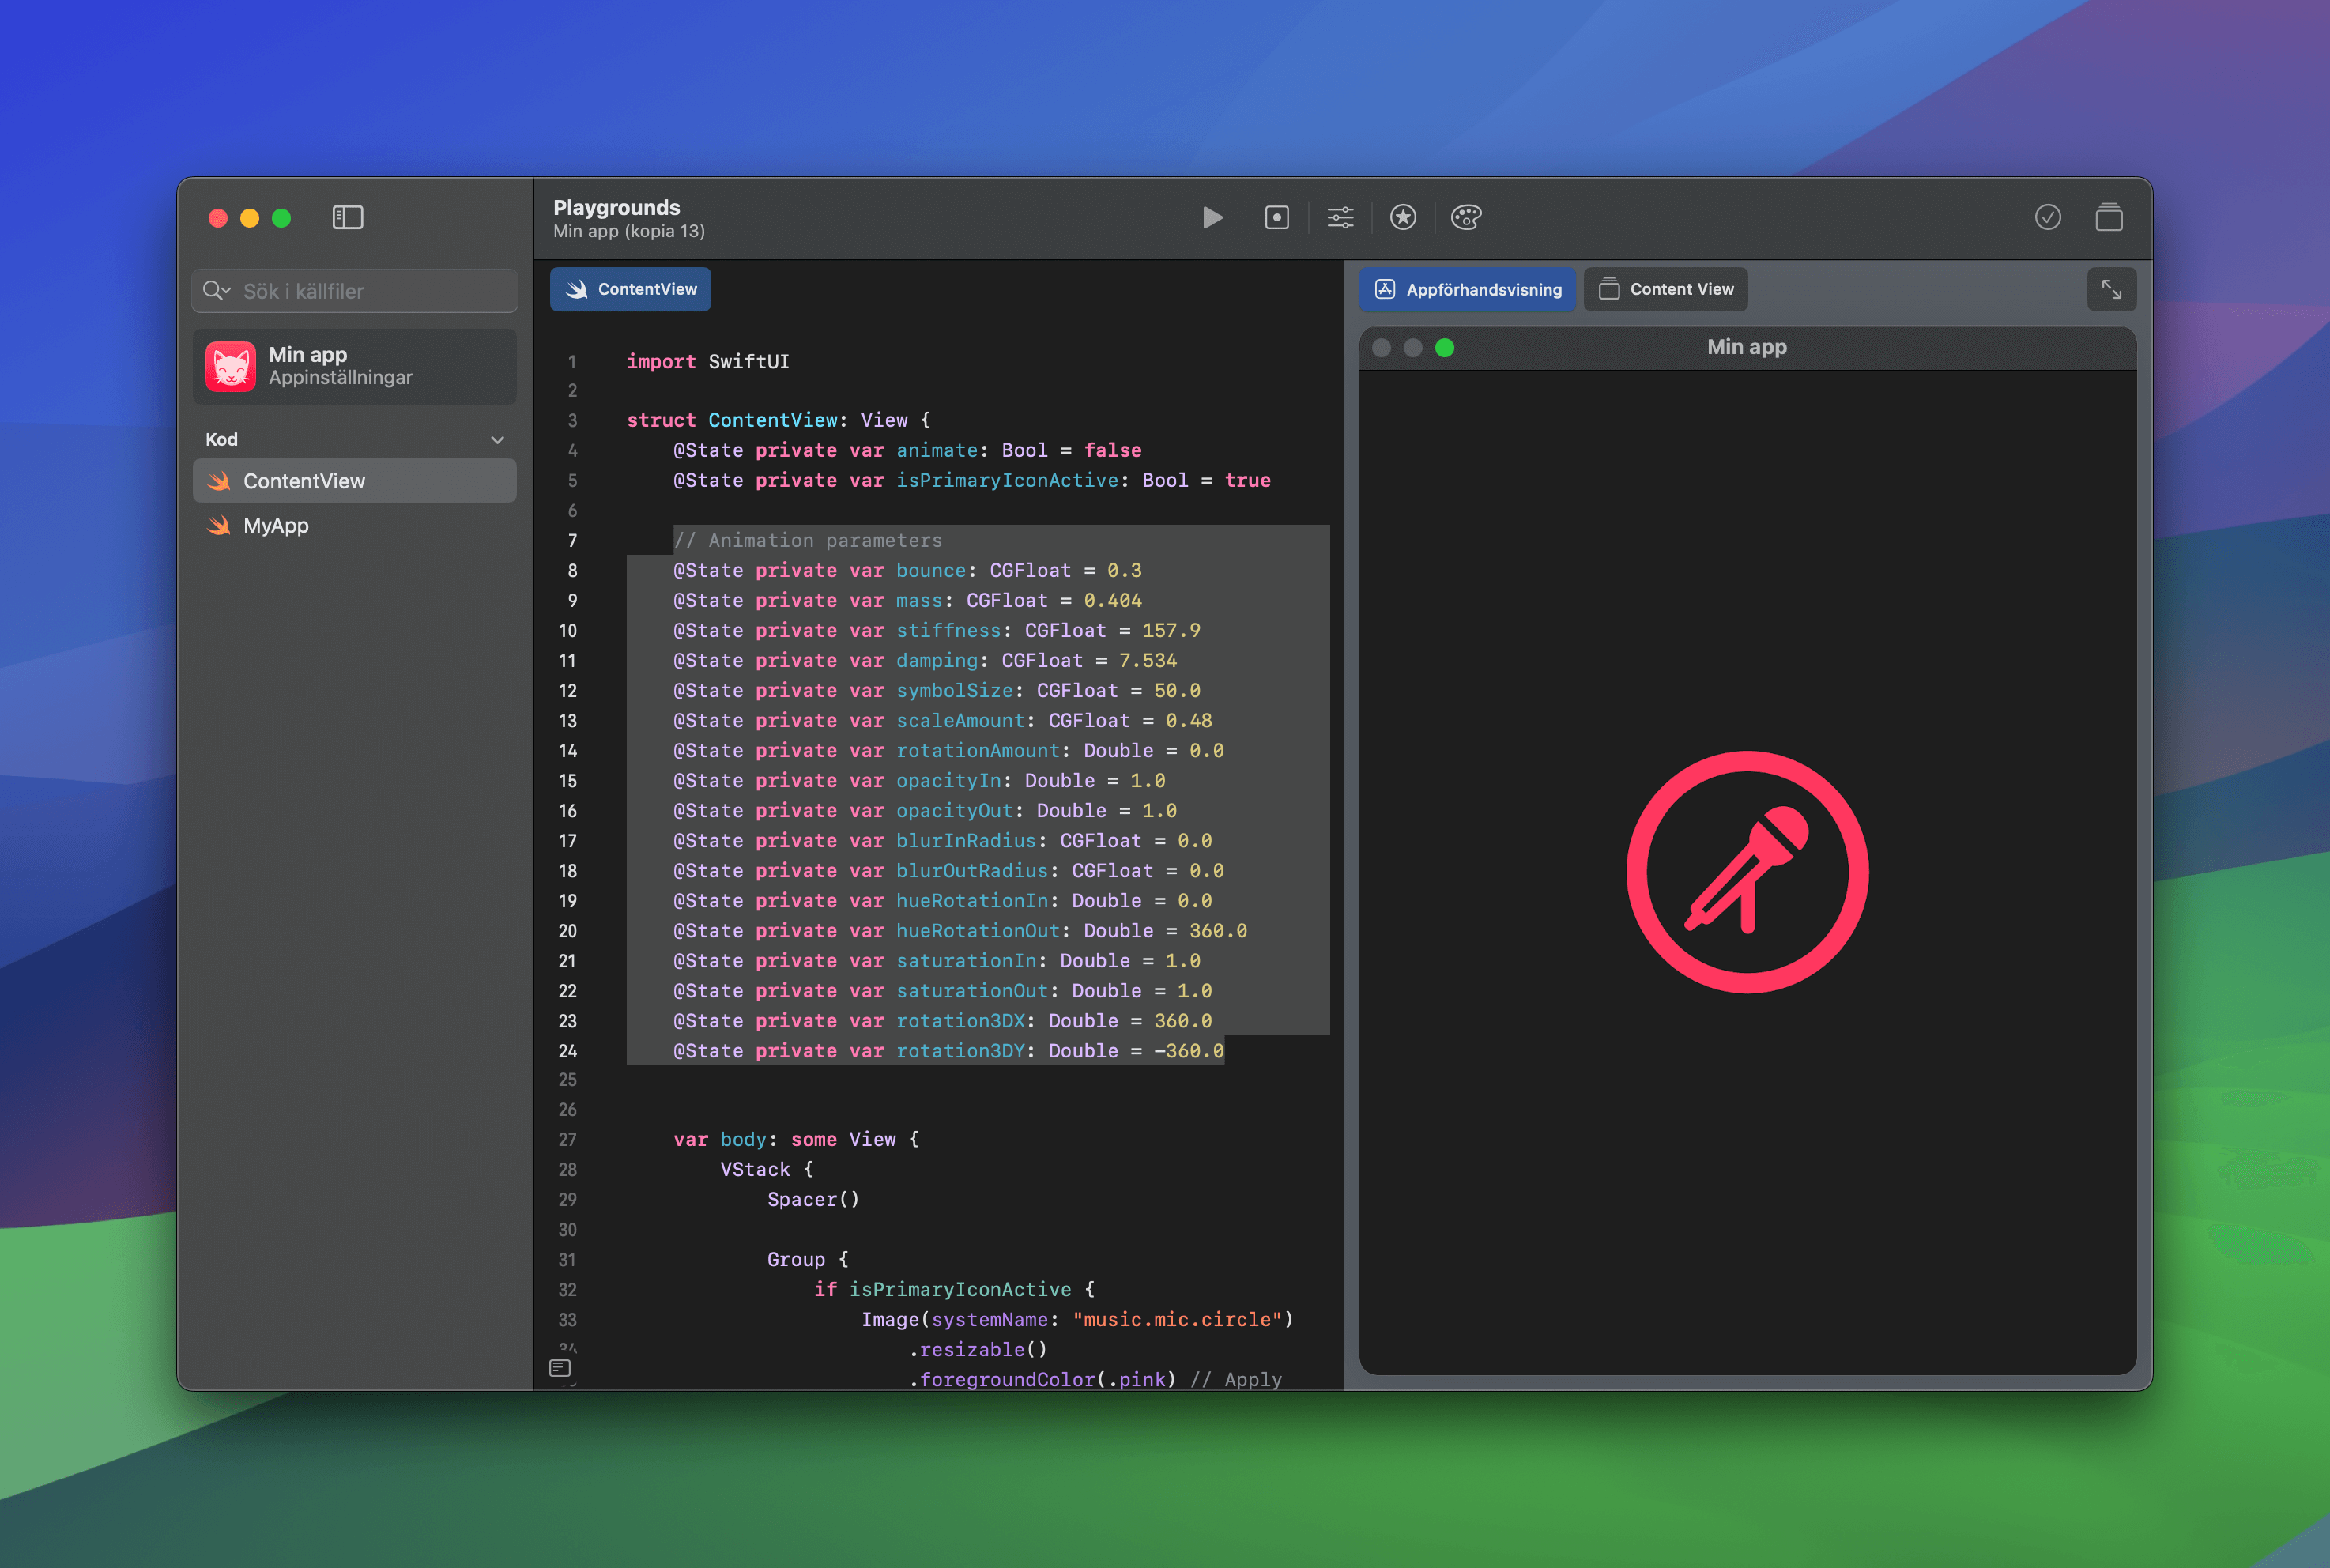
- In Swift Playgrounds, make sure you have selected the SwiftUI file named ”ContentView”.
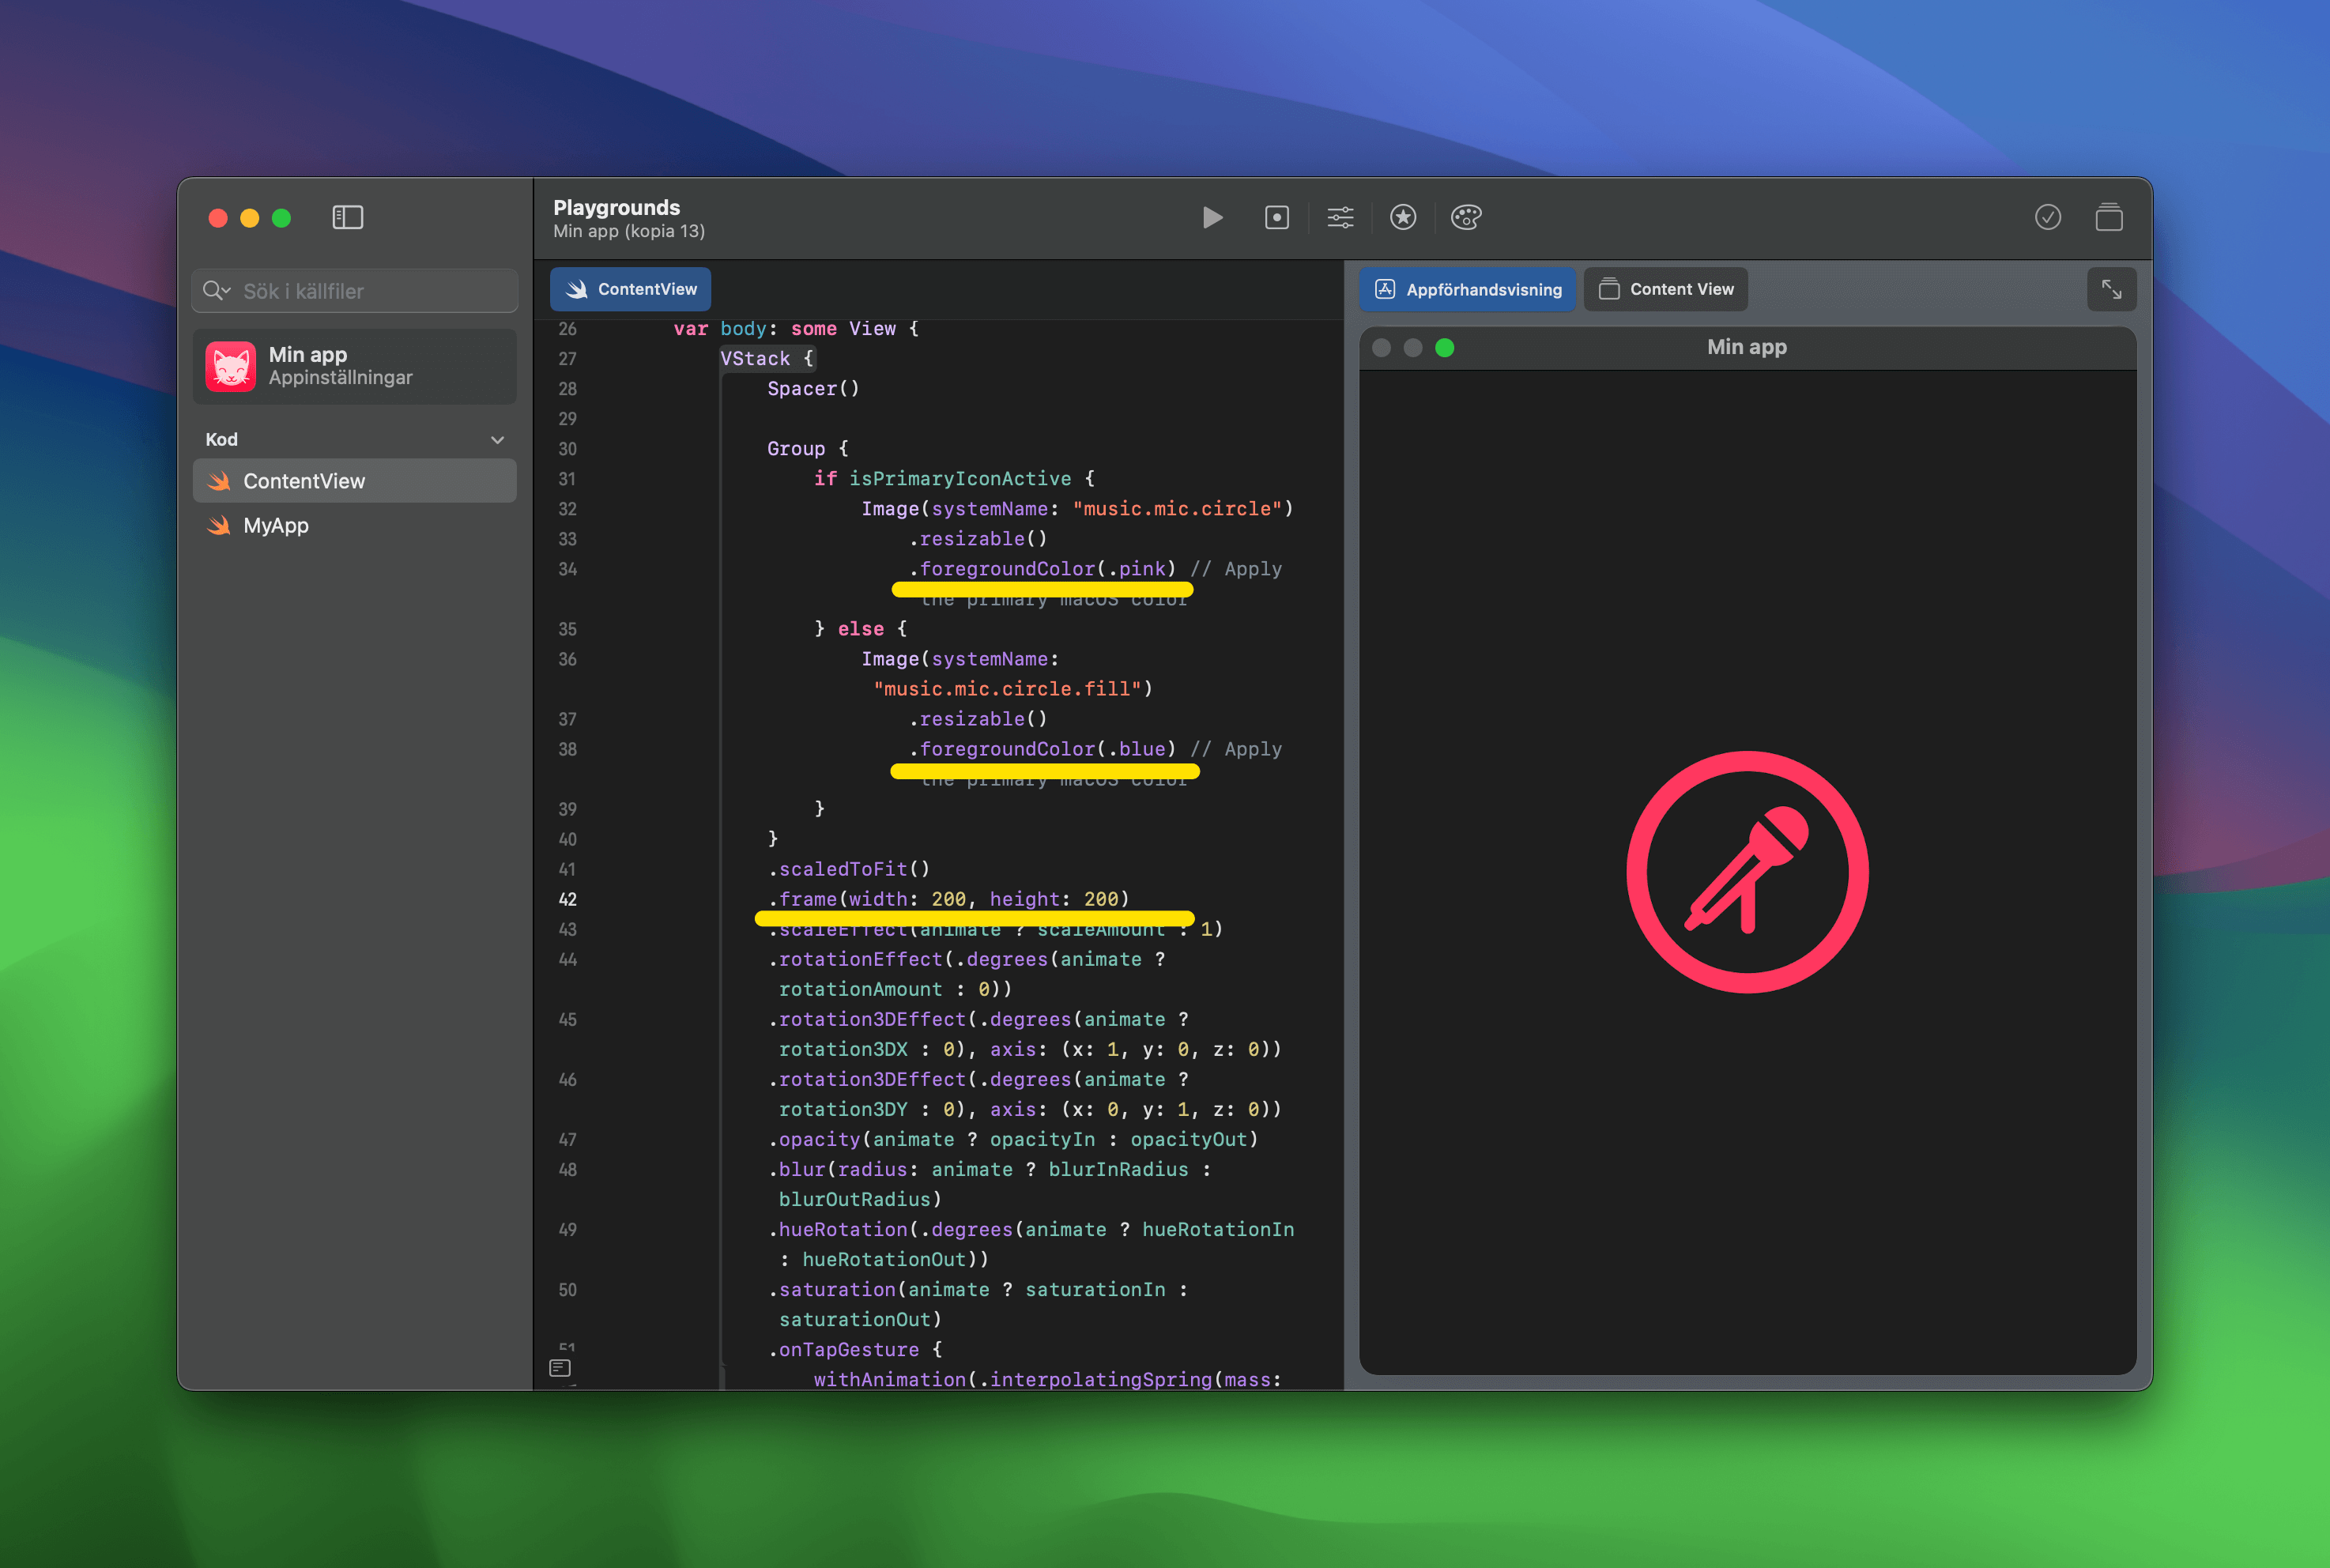
- Replace the template code with the code from SpringUI, just select everything in ContentView and use Command+C to add the copied code from SpringUI. My example looks like this:

Nice! Now click on the SF symbol and see what happens. Hubba hubba. Lets make it a bit bigger, for demo purposes and also, let’s add a color to the symbols, that is not the primary default one:
- Scroll down to Line 34 and change from ”.primary” to ”.pink”, then scroll down to line 38 and change from primary to ”.blue”.
- Let’s make it bigger! Scroll down to line 24 and change ”symbolSize” to 200 for both the width and height:
The ”final” animation
Mine looks like this, yours will probably look different. The cool thing now is, you can change this as many times as you need to. Just go back to SpringUI, change some parameters, and click on the ”Copy code” button again.
- Go back to SpringUI, and change some things
- Click the ”Copy code” button
- Open up Notes or the Text editor app on your Mac, is not relevant. Paste the new code, mine looks like this:
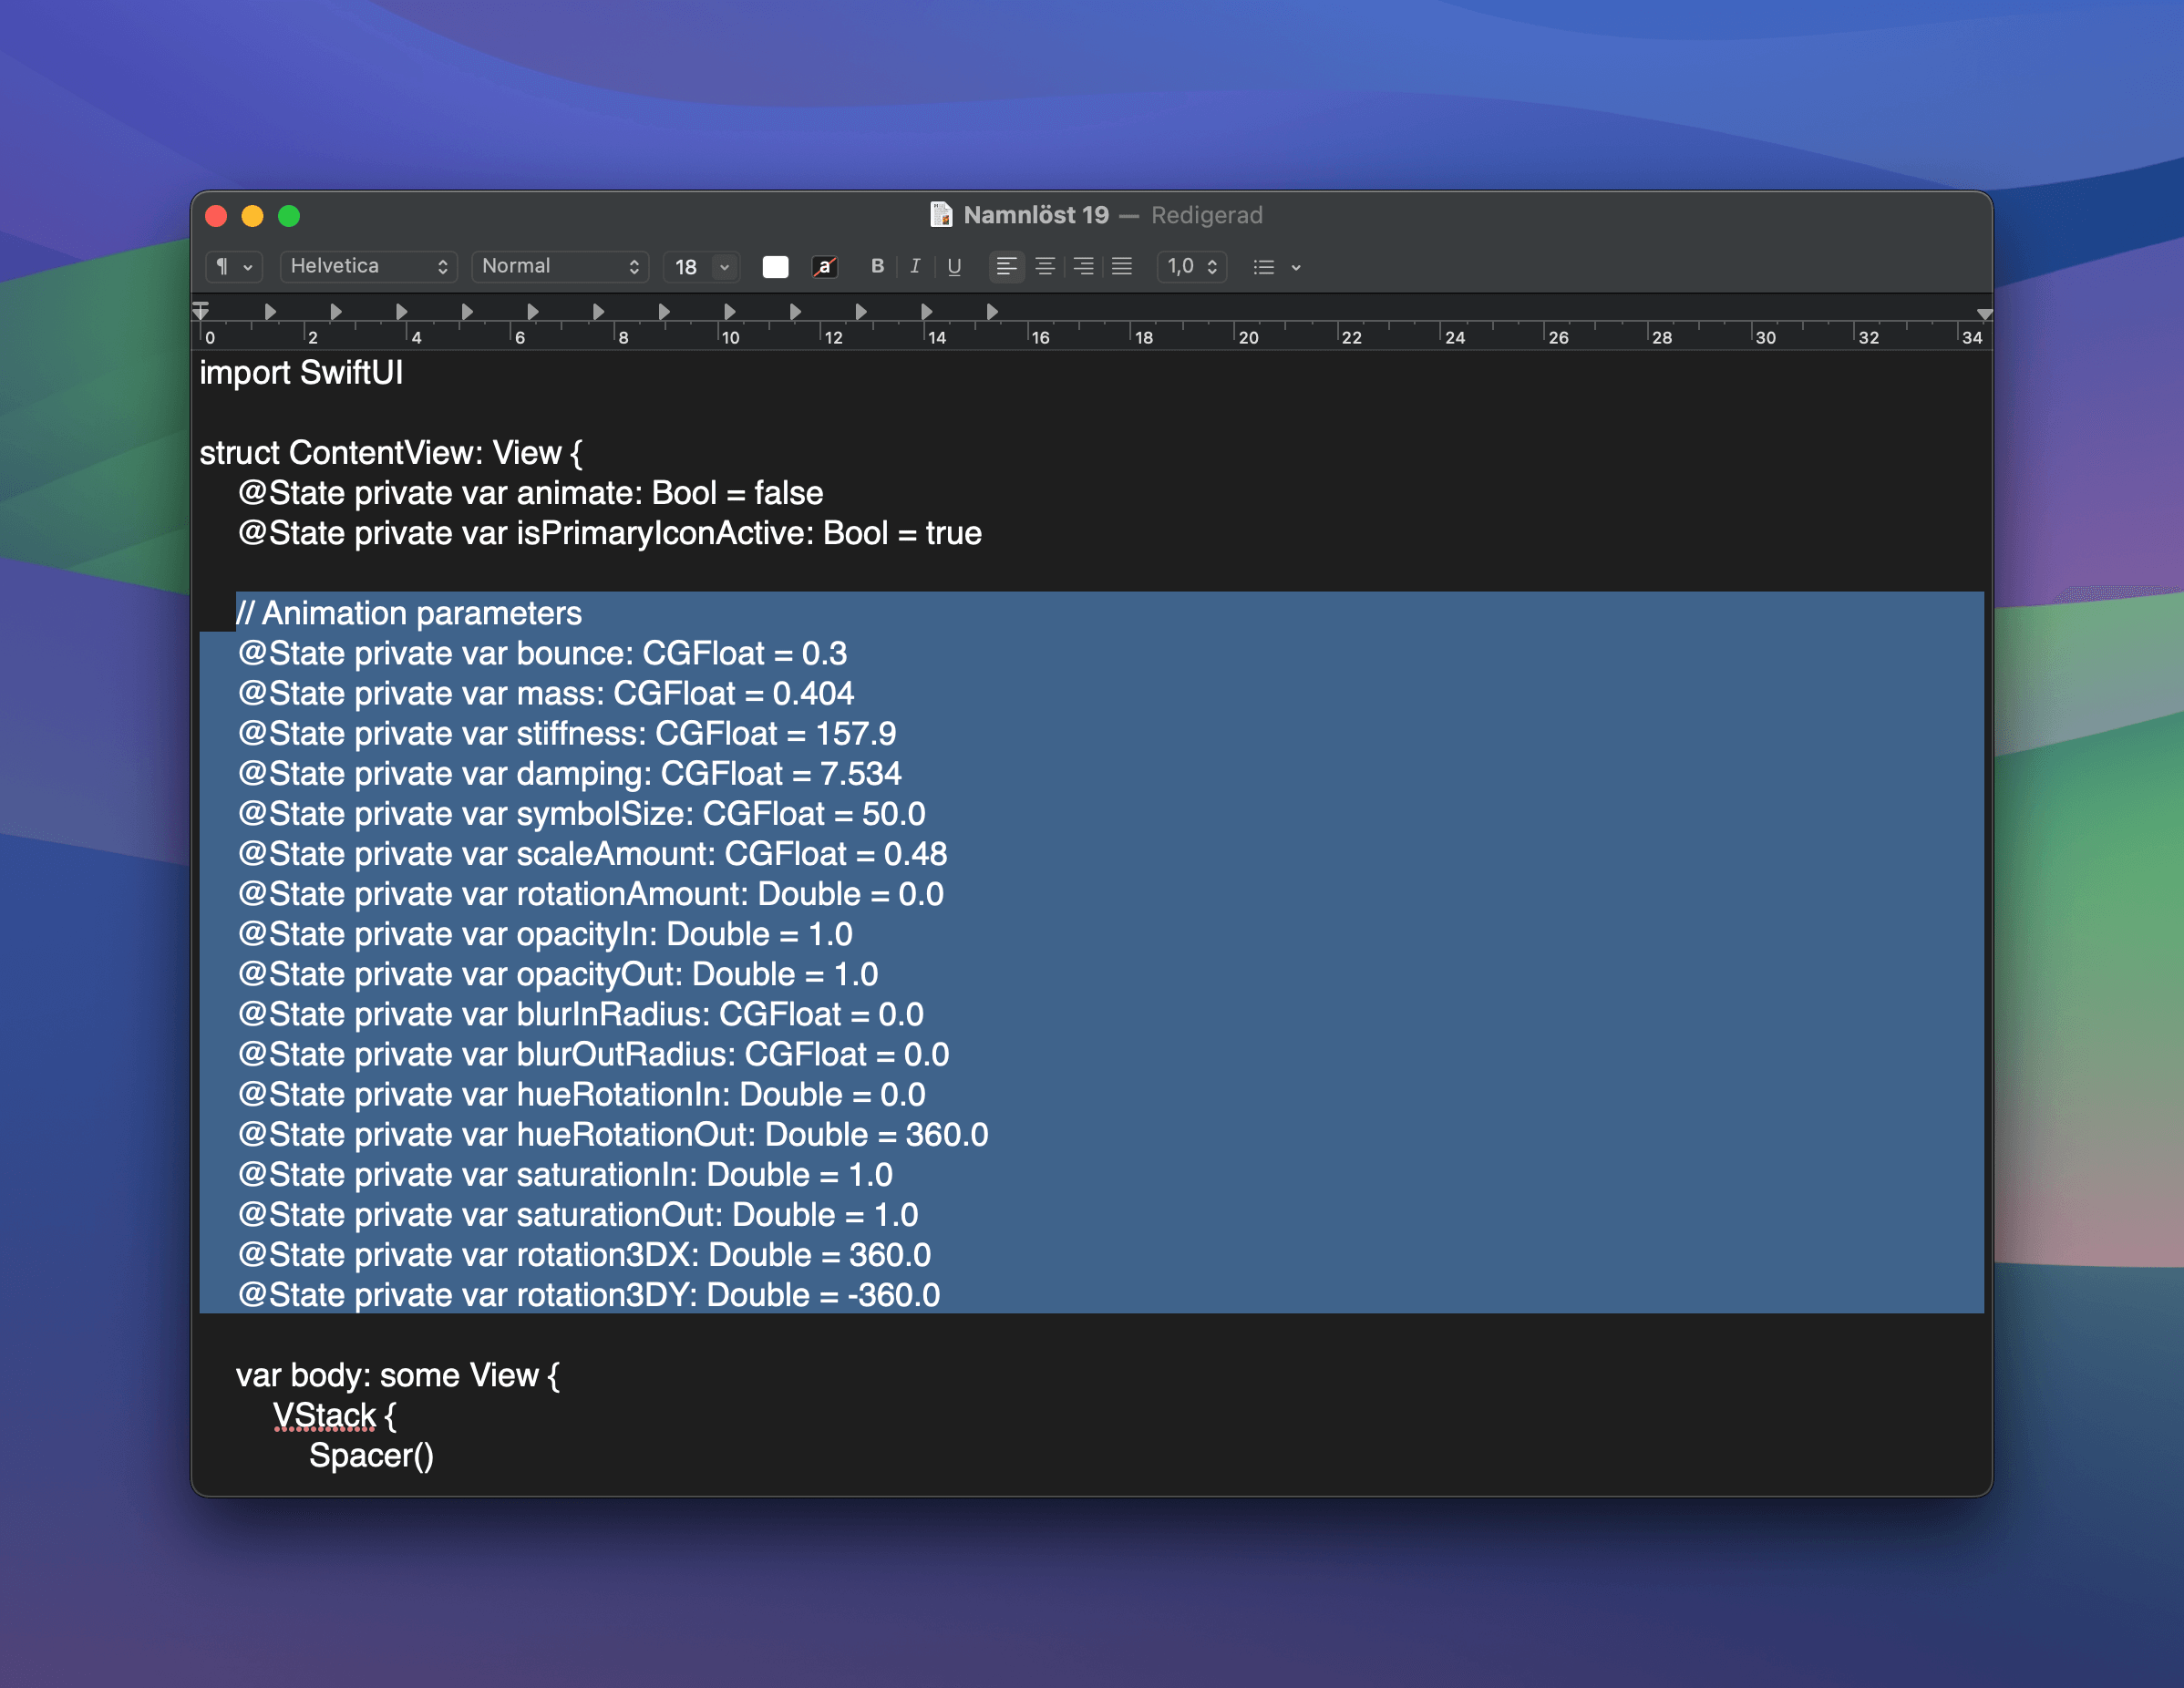
Currently, you will only need to copy these parameters into our Playgrounds app project. Scroll down to line 7, select everything down to line 24 like this, and copy in the new animation parameters. Done!
The ”final final” version
That’s it, hope you enjoyed this tutorial and that SpringUI will bring you much joy. It also supports adding custom images, perfect when animating anything from your own icons library to anything really. SwiftUI has animation support for so many component and states that it would take me forever to list them all.
Have fun!