Ever since we first introduced Sketch2React we have gotten this question:
“Looks great but does it work with Anima or Paddy?”
Before that question was Nope. But today we say Yes! Why? Because the fine folks over at Anima app released a brand new version of their free amazing plugin that comes with a new feature: Group Padding!
And what lives inside Groups? Just about every complex Sketch2React Bootstrap Component that we have.
We tried this with our buttons and best thing is, it doesn’t break how our framework needs to be inside of Sketch for it to output HTML5 code. And, in a very near future, React code and components. Have you started salivating yet? ??
Just solve this for me, like now
Feel like just jumping in and ignore how this was done? We totally feel you.
Easy, just download this .sketchfile, it already has a ready made button with Anima padding attached to it that also works with our Render App. Man is it already Christmas? ??
Important: You need the latest version of the Anima Toolkit (2.3.2) for this to work.
Also works with Stacks!
Did some fast tests today and great news, using the fine feature Stacks within Anima also works great with Sketch2React. Note! You still need to name things correctly, use our [classnames], put things inside Groups, call the the correct things etc.
Anima just makes sure things look extra neat inside of Sketch, saves you the hurdle of needing to move things around manually. One approach that we see working really well is first make sure things are correctly set up and Then use Anima Stacks and Group Padding.
But hey I really want to know man!
Okey let’s break it down for you. It took some figuring out but we are extremely (borderline) stubborn here so yeah we solve things like this no matter how many hours it may take us. We just see potential here, a way to help you with your designer workflow even better than before.
Tutorial time!

Text node set to Auto
For some reason this works much better than not having it like this. Don’t ask us why.
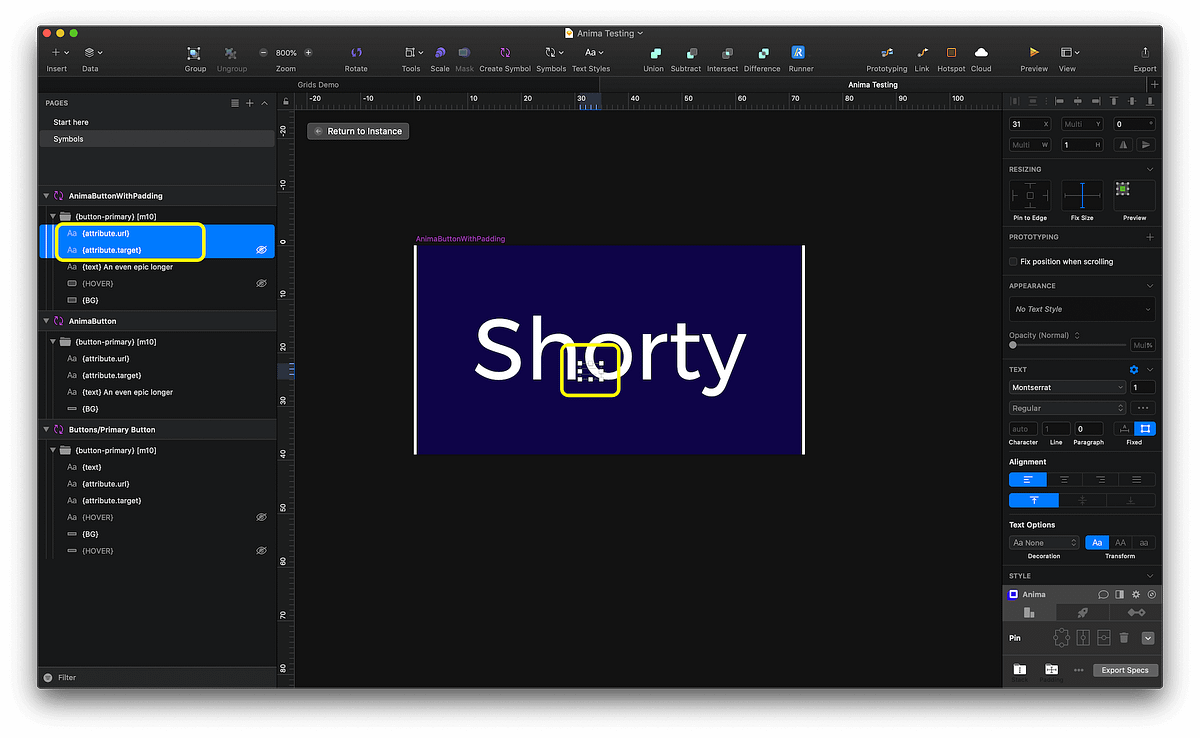
Invisible files need to be really small
All of our interactive components have one or more ”invisible files” that do really important stuff. Basically these are regular Sketch text nodes (T) that just points to important places in our Previewer/Render App.
They are like little smurfs running around doing all of the hard work so that you need to do very little. We call them invisible because they have 0% opacity inside Sketch.
Now you may ask this question: If they are so important wouldn’t it be a really great idea to lock them inside of Sketch? No can do. Sadly they stop working if you lock them. So don’t lock them and don’t delete them.
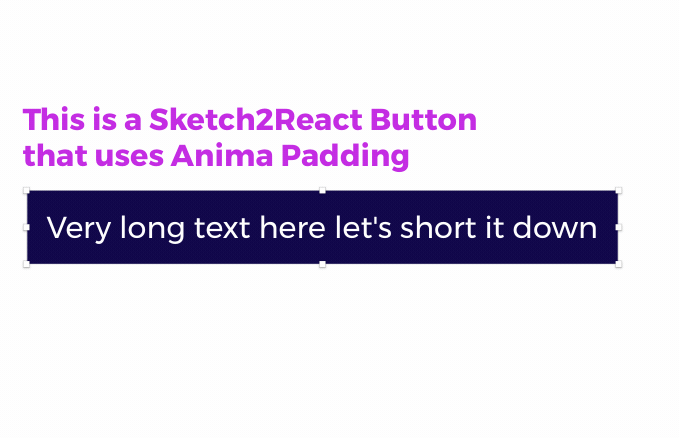
In order for Animas Padding to work correctly we made attribute.url and attribute.target really really small (1pt) and put them centered inside the button group. Do not move them! If things start looking bonkers inside of Sketch they may have moved causing the Anima plugin to include them in the groups padding. We don’t want that. You don’t want that.
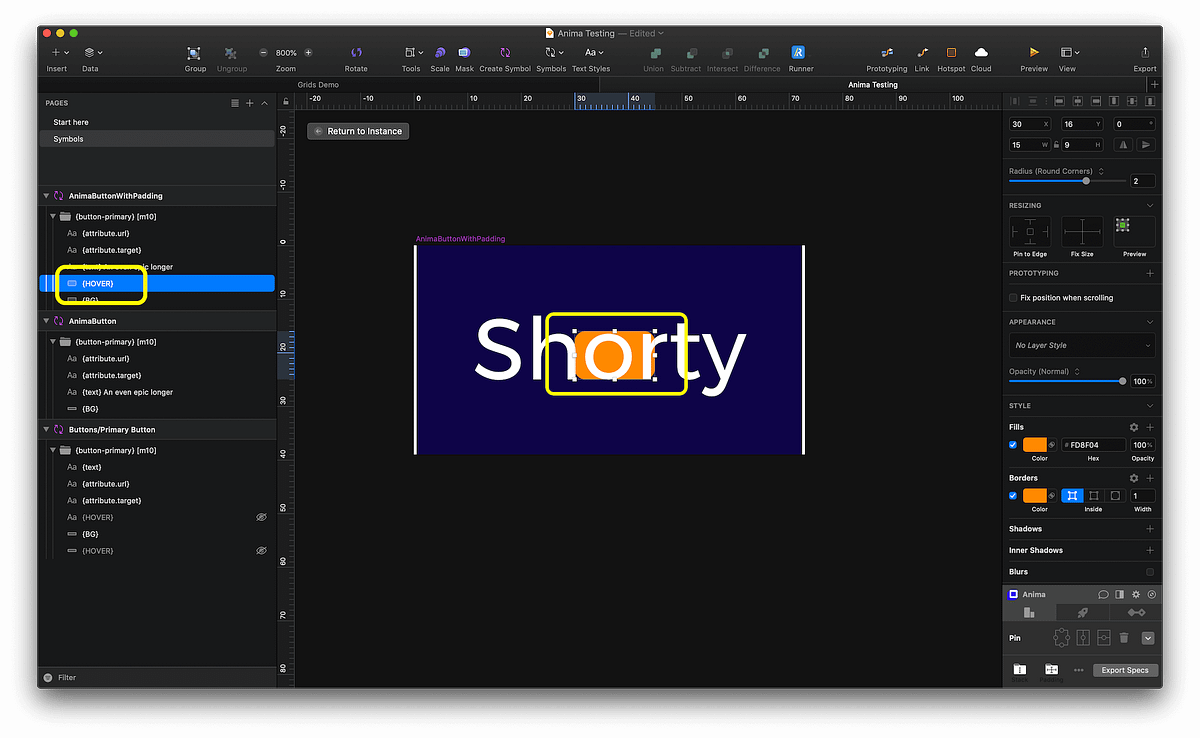
How to change the button hover color
What is a button without a hover color? Nothing we say! It’s like cake without icing — dull Goddamnit!
In order to get the HOVER rectangle working we instead used the Rounded Rectangle (U) and made that also very small. Also important is to have it smaller in size than the main Text Node inside your button.
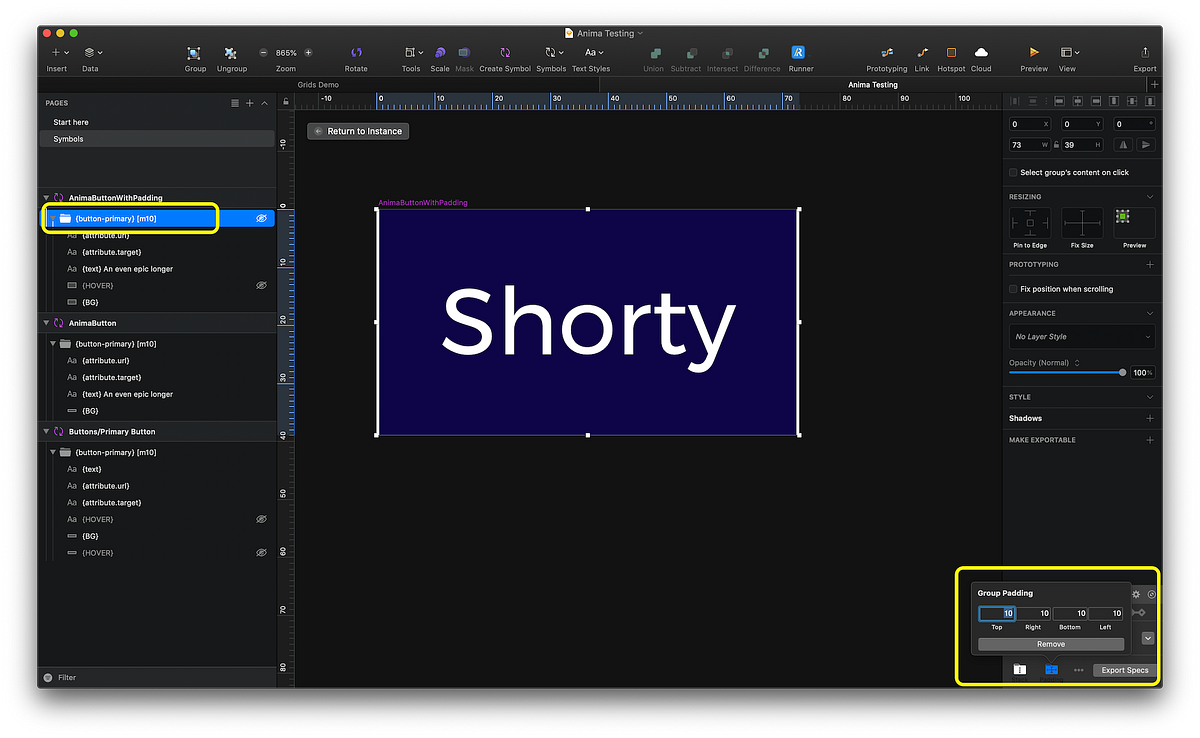
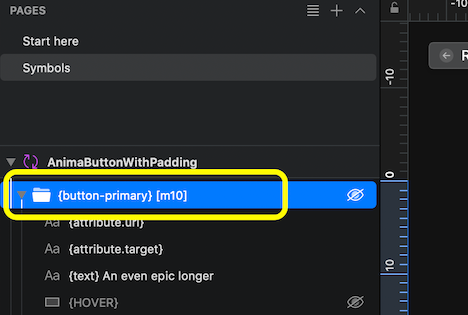
How to change the padding settings in Anima
To change the Group Padding you just click on the that little folder icon you see up there ☝️
SUPER IMPORTANT! Don’t forget to change the padding inside our {button-primary} [m10] or it will not change in code. Anima Group Padding takes care of making sure things look neat inside of Sketch, it will not look the same in code if you don’t put in the same settings inside our [classname] thingies.