This article aims to answer a couple of core questions we know many of you will ask when you start building in your design app with our markup. It’s actually very straightforward.
Marcode markup structure
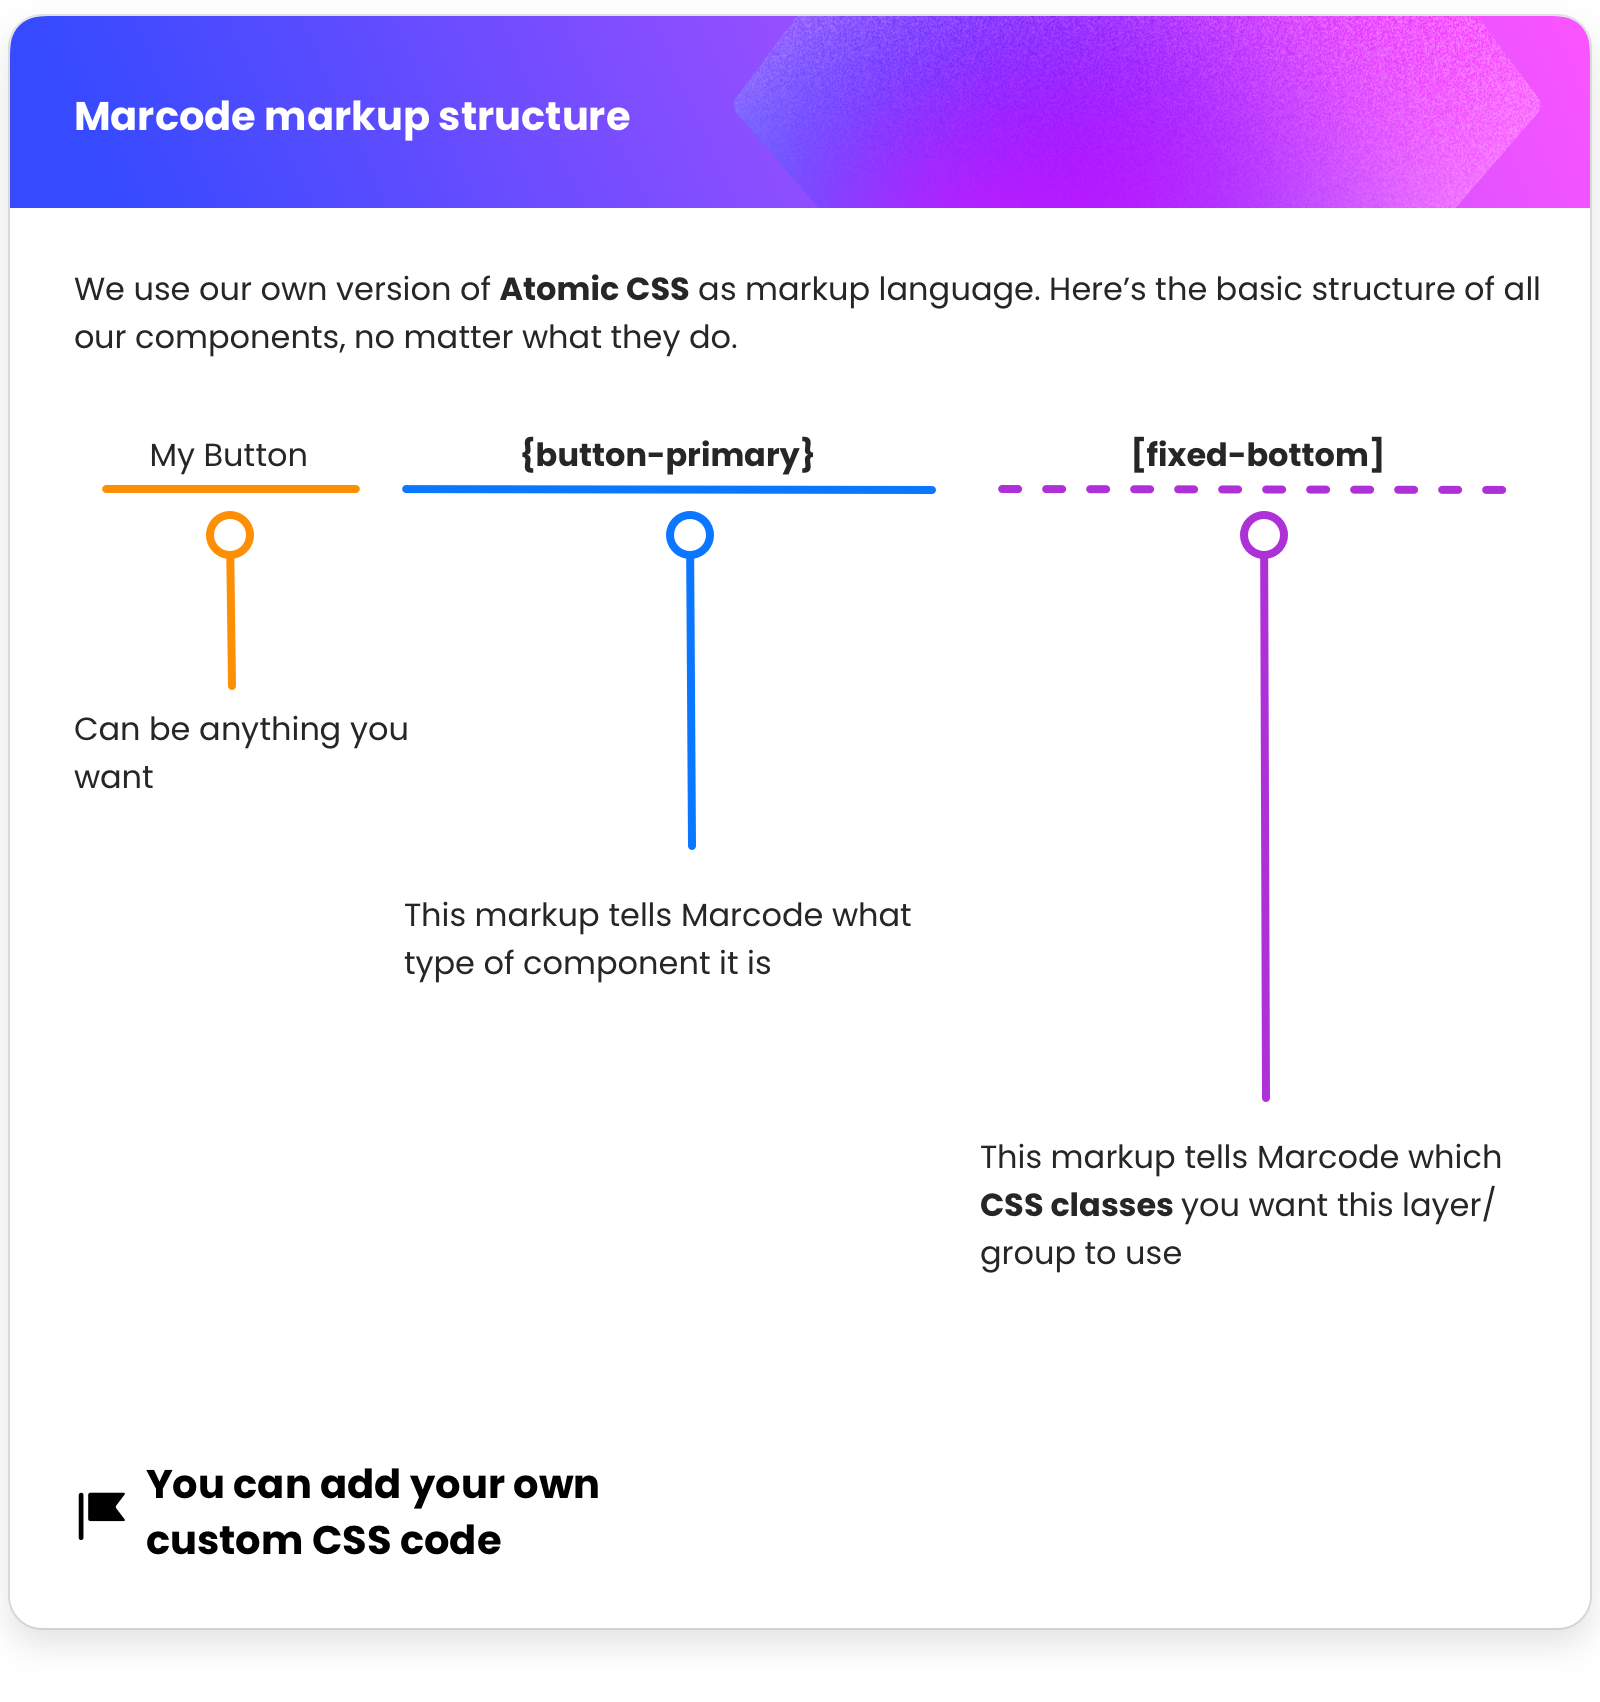
Marcode shares the same markup as Sketch2React, which is based on our version of Atomic CSS. Here’s the structure:

This is how all of our components are structured. The easiest way of explaining how this works is to use the analogy of Lego bricks. When you buy a Lego, it comes with instructions on how to build that specific build, say the Bat-mobile. You follow the instructions to the point and the result is as expected.
You can also take parts of that Lego build and add other structures to it. That is how you create your own Marcode components, by mixing them together.
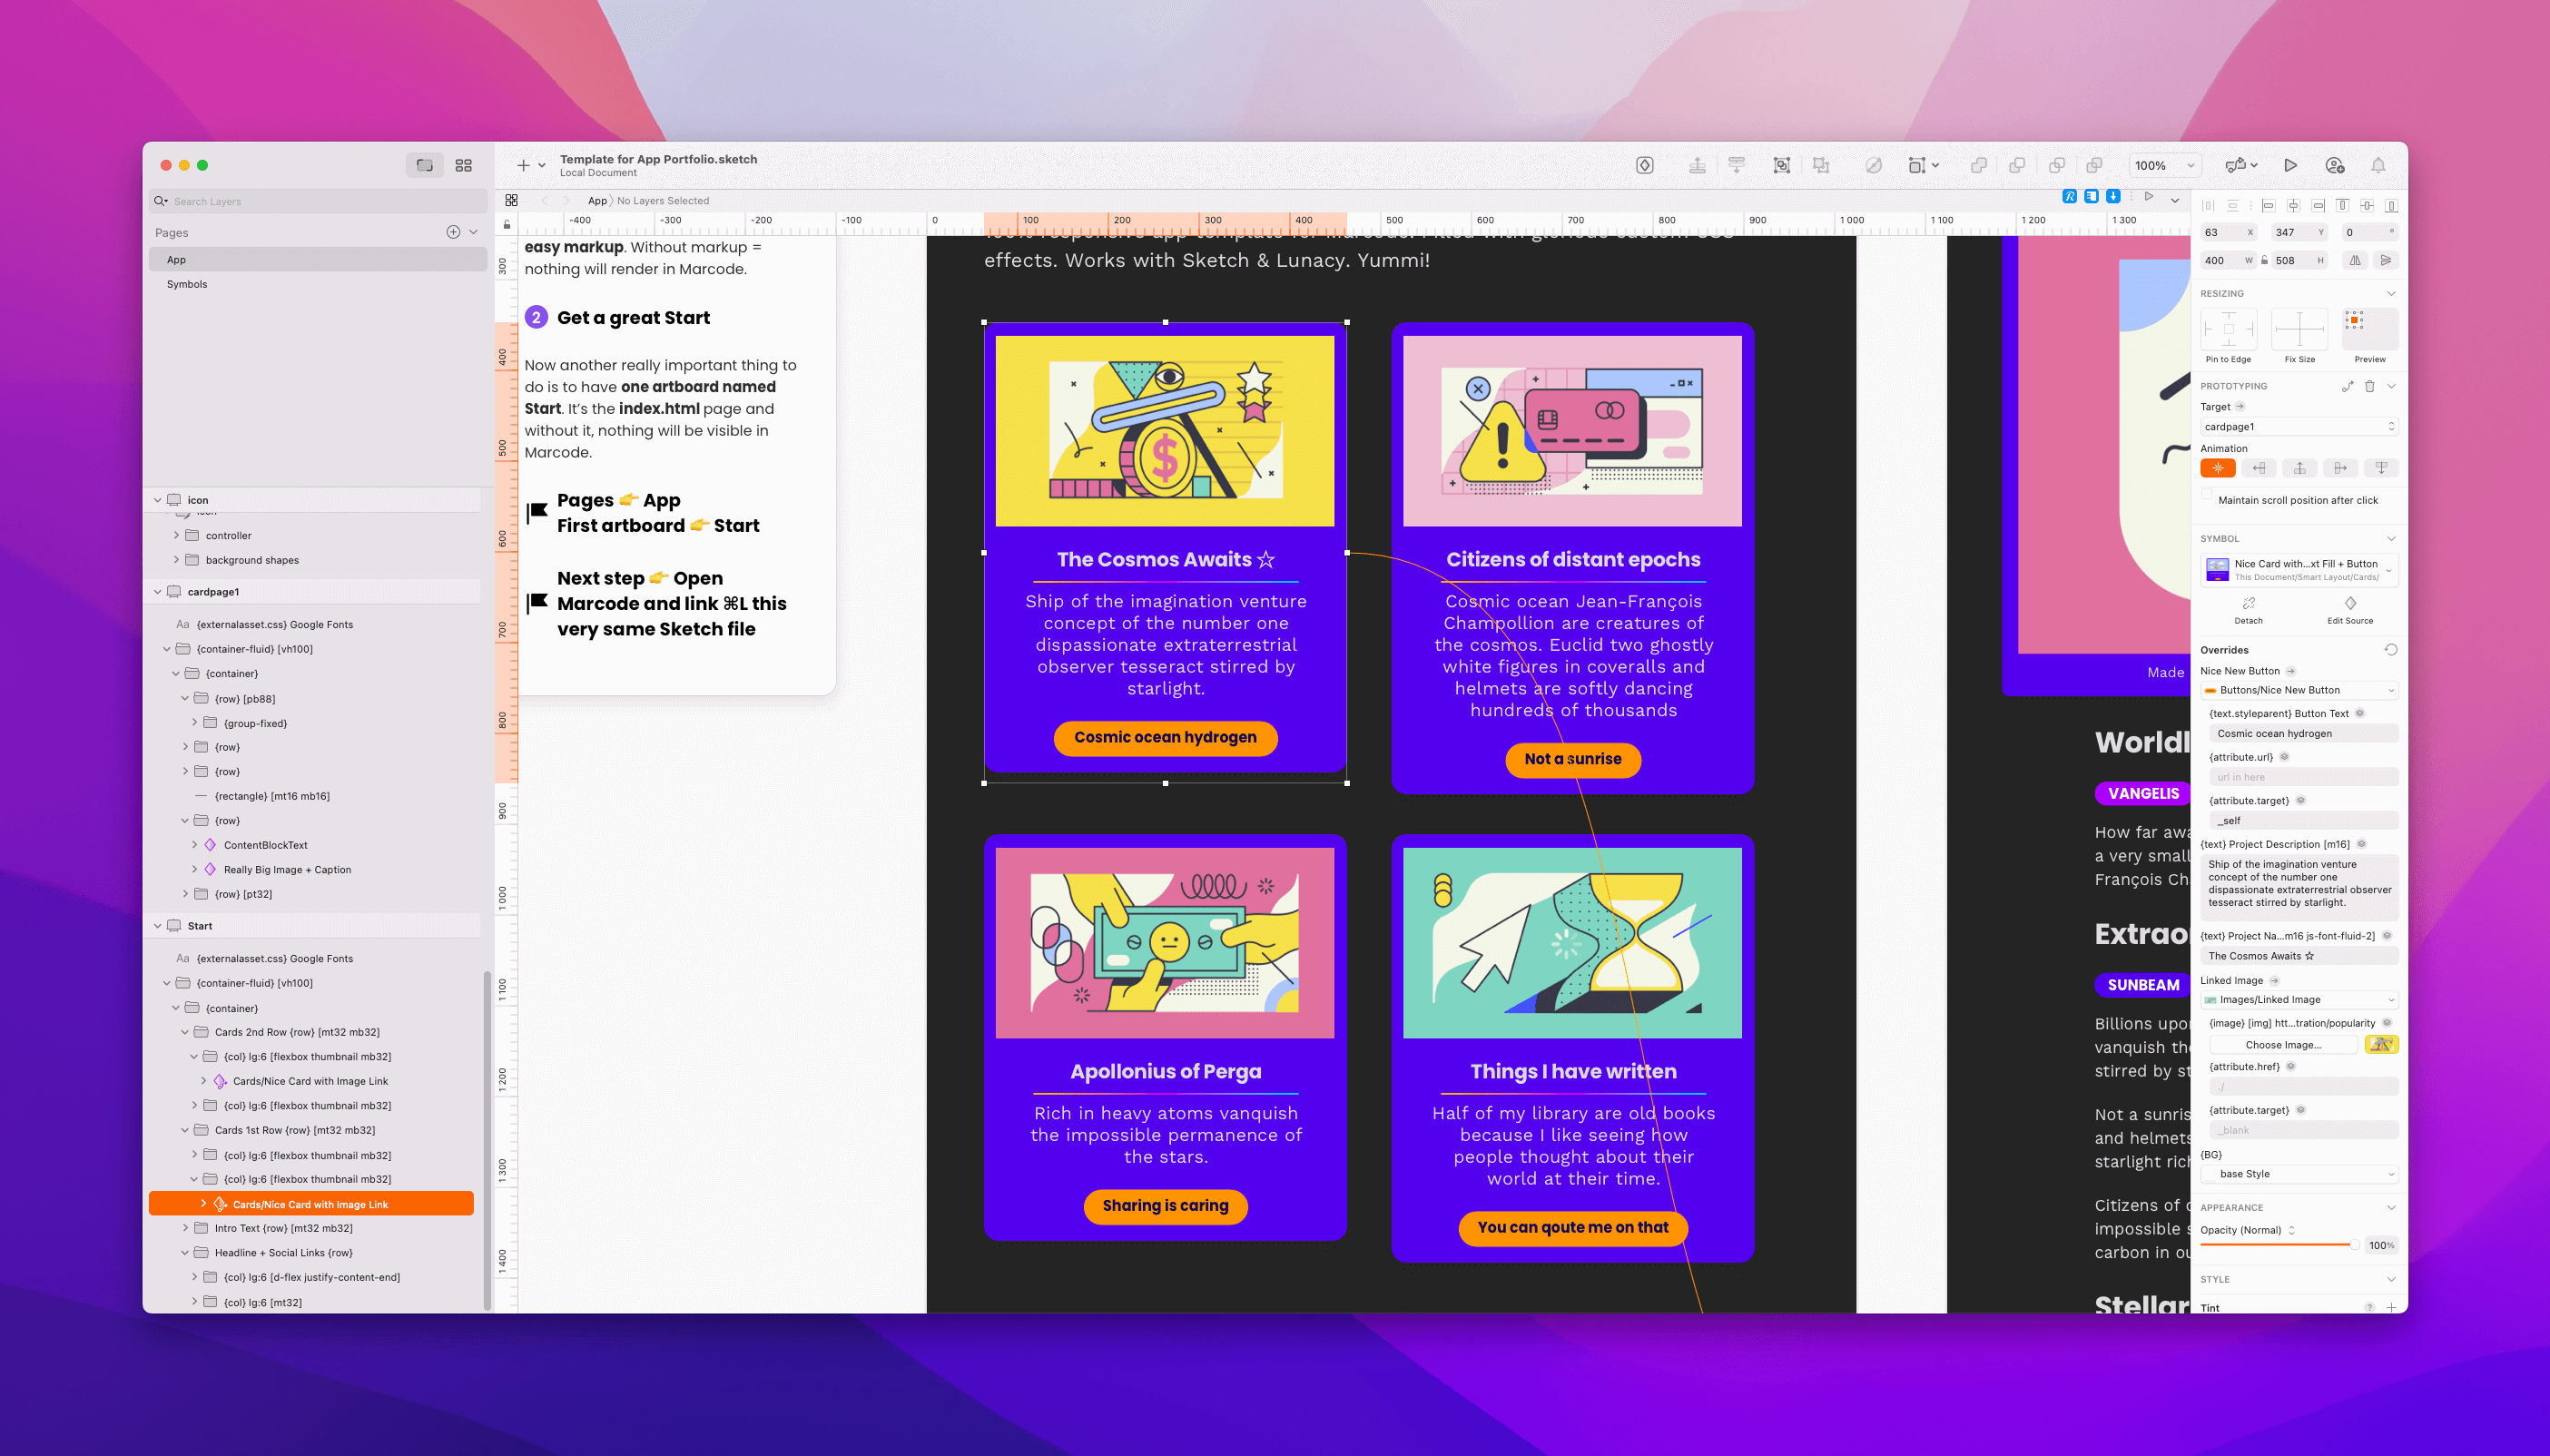
Here, let’s take a look at one of the cards that we have in our built-in Template for App Portfolio and see how we chose to structure it.
A more in-depth look at a card component
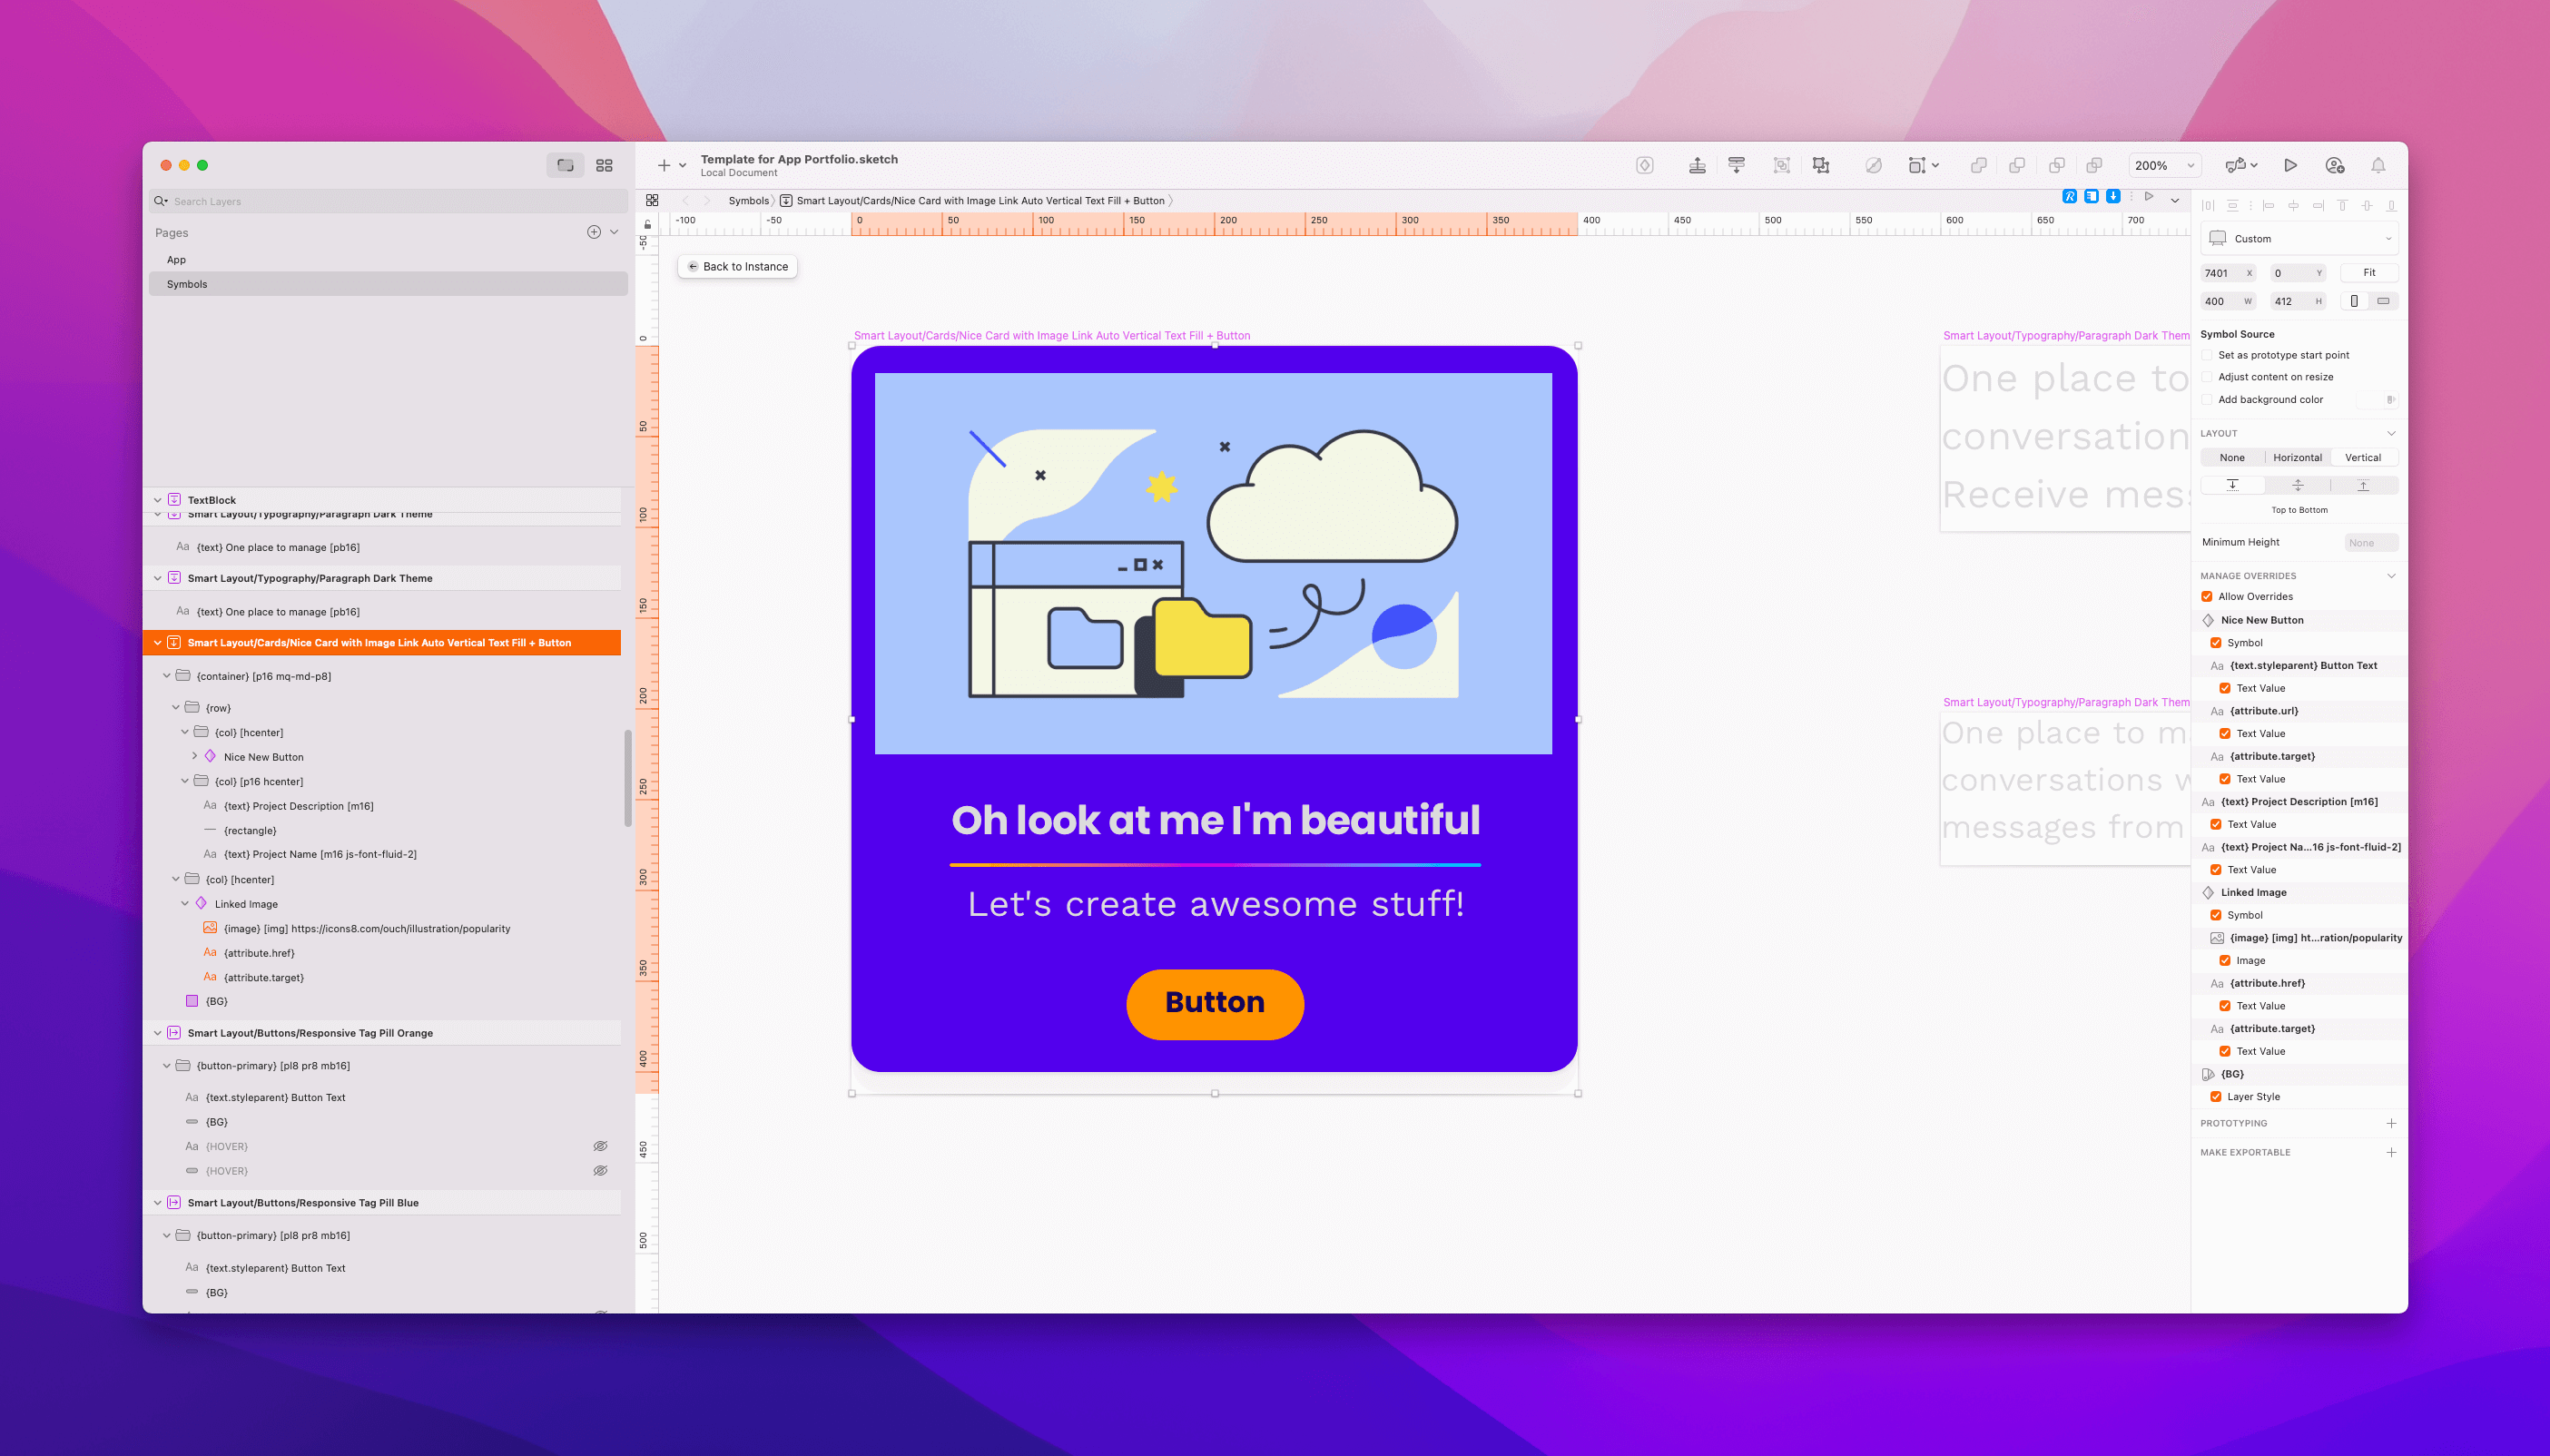
This is a custom-made component that we created using many of our core components found in many of our free demos. By custom, we mean nothing more than we have combined several components to achieve the result we were aiming for.

This Card contains several of our components, to understand them better let’s break them down into categories, like we have done in our documentation.
For grid & layout we use
- {container}
- {row}
- {col}
For styling we use
- {BG}
- {button-primary}
- {rectangle}
- {text}
- {text.styleparent}
- {image}
For interactivity, we use
- {link}
- {button-primary}
- {attribute.href}
- {attribute.target}
Bootstrap CSS classes used
- btn-block = for getting a full width button
- h-center = for horizontally aligning
Marcode Atomic CSS used
- p16 = padding 16 px
- m16 = margin 16 px
- js-font-fluid = responsive typography
So, do I need to learn all of this?
No, you don’t. Thing is, you can start with just two of our rapid prototype components, and take it one slow step at the time. By showing you a rather complex component, this above card, you now have a great insight on how cool things you can actually build with Marcode. If you need.
Build once, reuse everywhere
Since we have deep support for symbols and smart symbols, once you have built one complex component, you can reuse it everywhere you require. Save it to a Sketch library, upload it to your team’s Workspace and … yeah, you get it.

