

If I could give out one single advice on creativity is to always stay curious. With that super strength, you will amaze yourself over and over again. Curiosity generates creative energy, energy that is yours to keep and make whatever you need from it.
I’ve been learning Blender during the summer and let me tell you, I adore Blender. It’s totally mind-blowing that it’s 100% free.
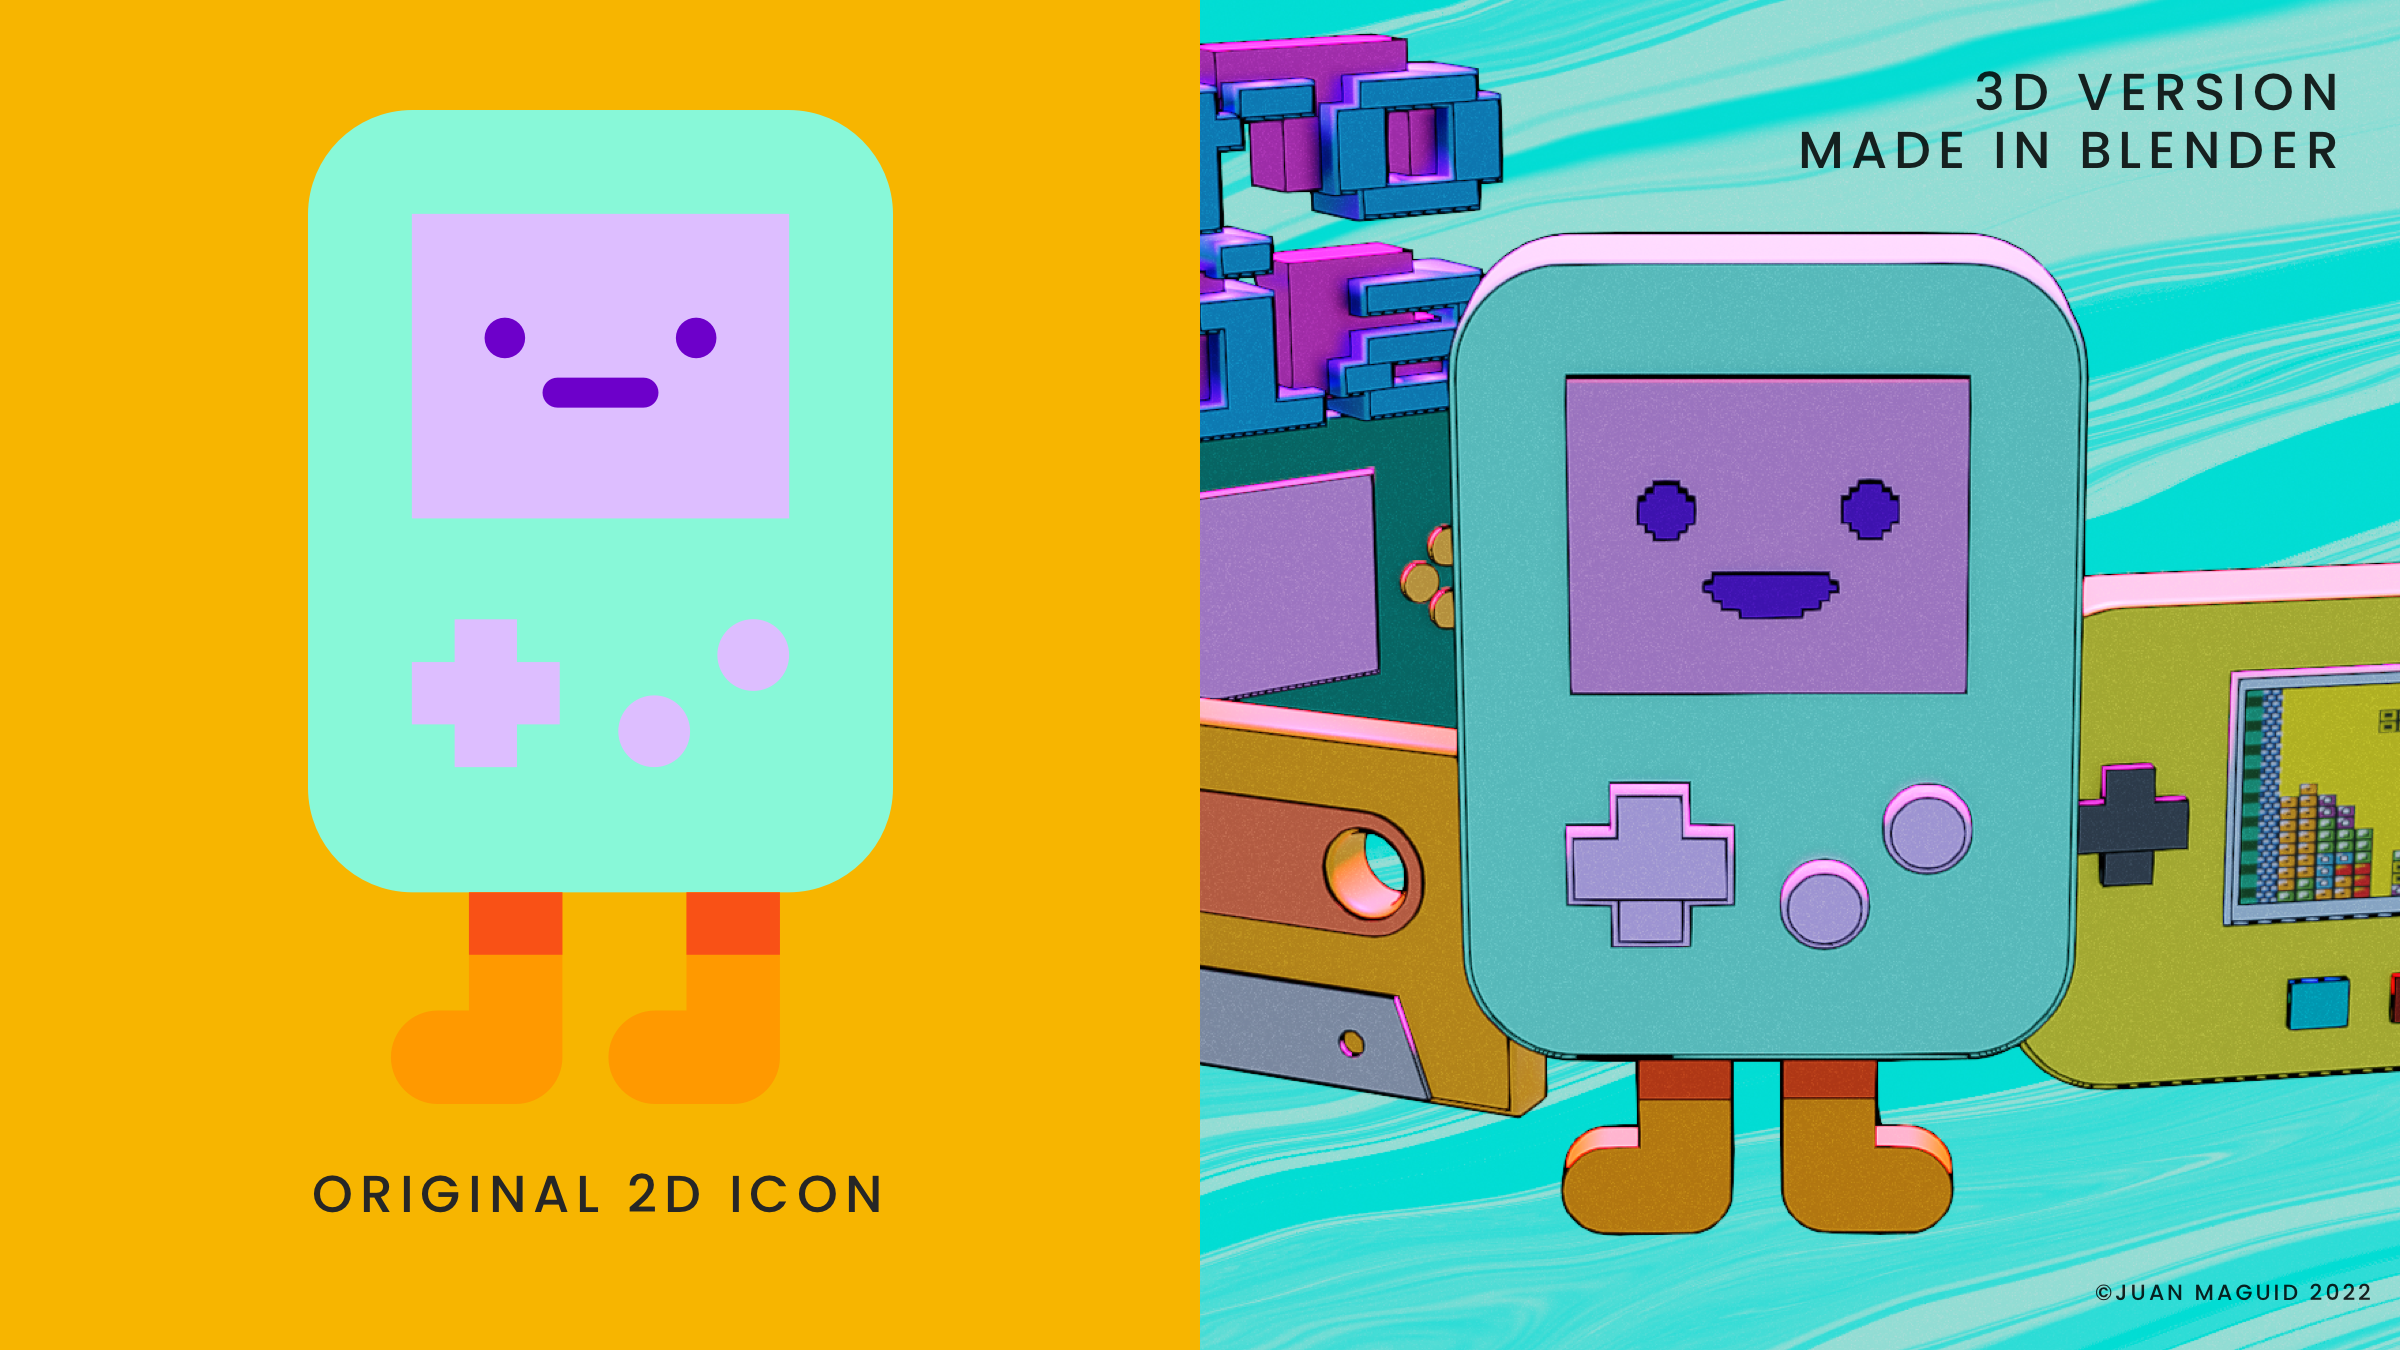
Just look at the illustration above. 100% made inside Blender using a couple of clever tricks I’m going to teach you. Forget about requiring any 3D modeling skills, I will show you how to take a flat 2D vector SVG and turn it into something way more exciting. Something that you call your own, even.
Why this workflow?
I never liked the actual modeling part of 3D, always found it super boring, tedious and really not interesting enough. Thankfully, though, after watching a Blender tutorial on YouTube I found this effortless way of just skipping the traditional way of modeling altogether (oh the joy!).
In this tutorial, you will learn
- How to import SVG’s into Blender
- How to extrude vector data into 3D data
- A few nifty shortcuts
- How to adjust the camera
- How to add a Sky Texture (simple lighting technique)
- How to use two of the different rendering engines available in Blender
Learn Blenders shortcuts
You can customize about anything in Blender, which is really remarkable. One word of advice. If you have used other 3D software, you will have certain shortcuts for navigating the 3D space well integrated into your muscle memory.
Even if Blender has a setting for mapping the keys on your keyboard to ”industry standard” do yourself a favor, use Blenders default mapping. Why? Because every tutorial out there (and there are many, trust me) refers to Blenders default settings. The same goes for all the documentation and books available.
Actually, after a few starting bumps here and there, the interface and how you navigate, use shortcuts, feels really natural and user-friendly. I’ve come to love how Blender works in a very short amount of time.
Blender is blazing fast
When you think about 3D software, you might think you need a planet sized super computer to make it flow like water. No need, my friends. I’ve been using my five-year-old MacBook Pro, and it works really fine. Of course, if you have a faster computer, it will run even better. Specially when it comes to rendering your masterpieces.
Ready? Okey, Teen Titans Go!
1. How to import SVG’s into Blender
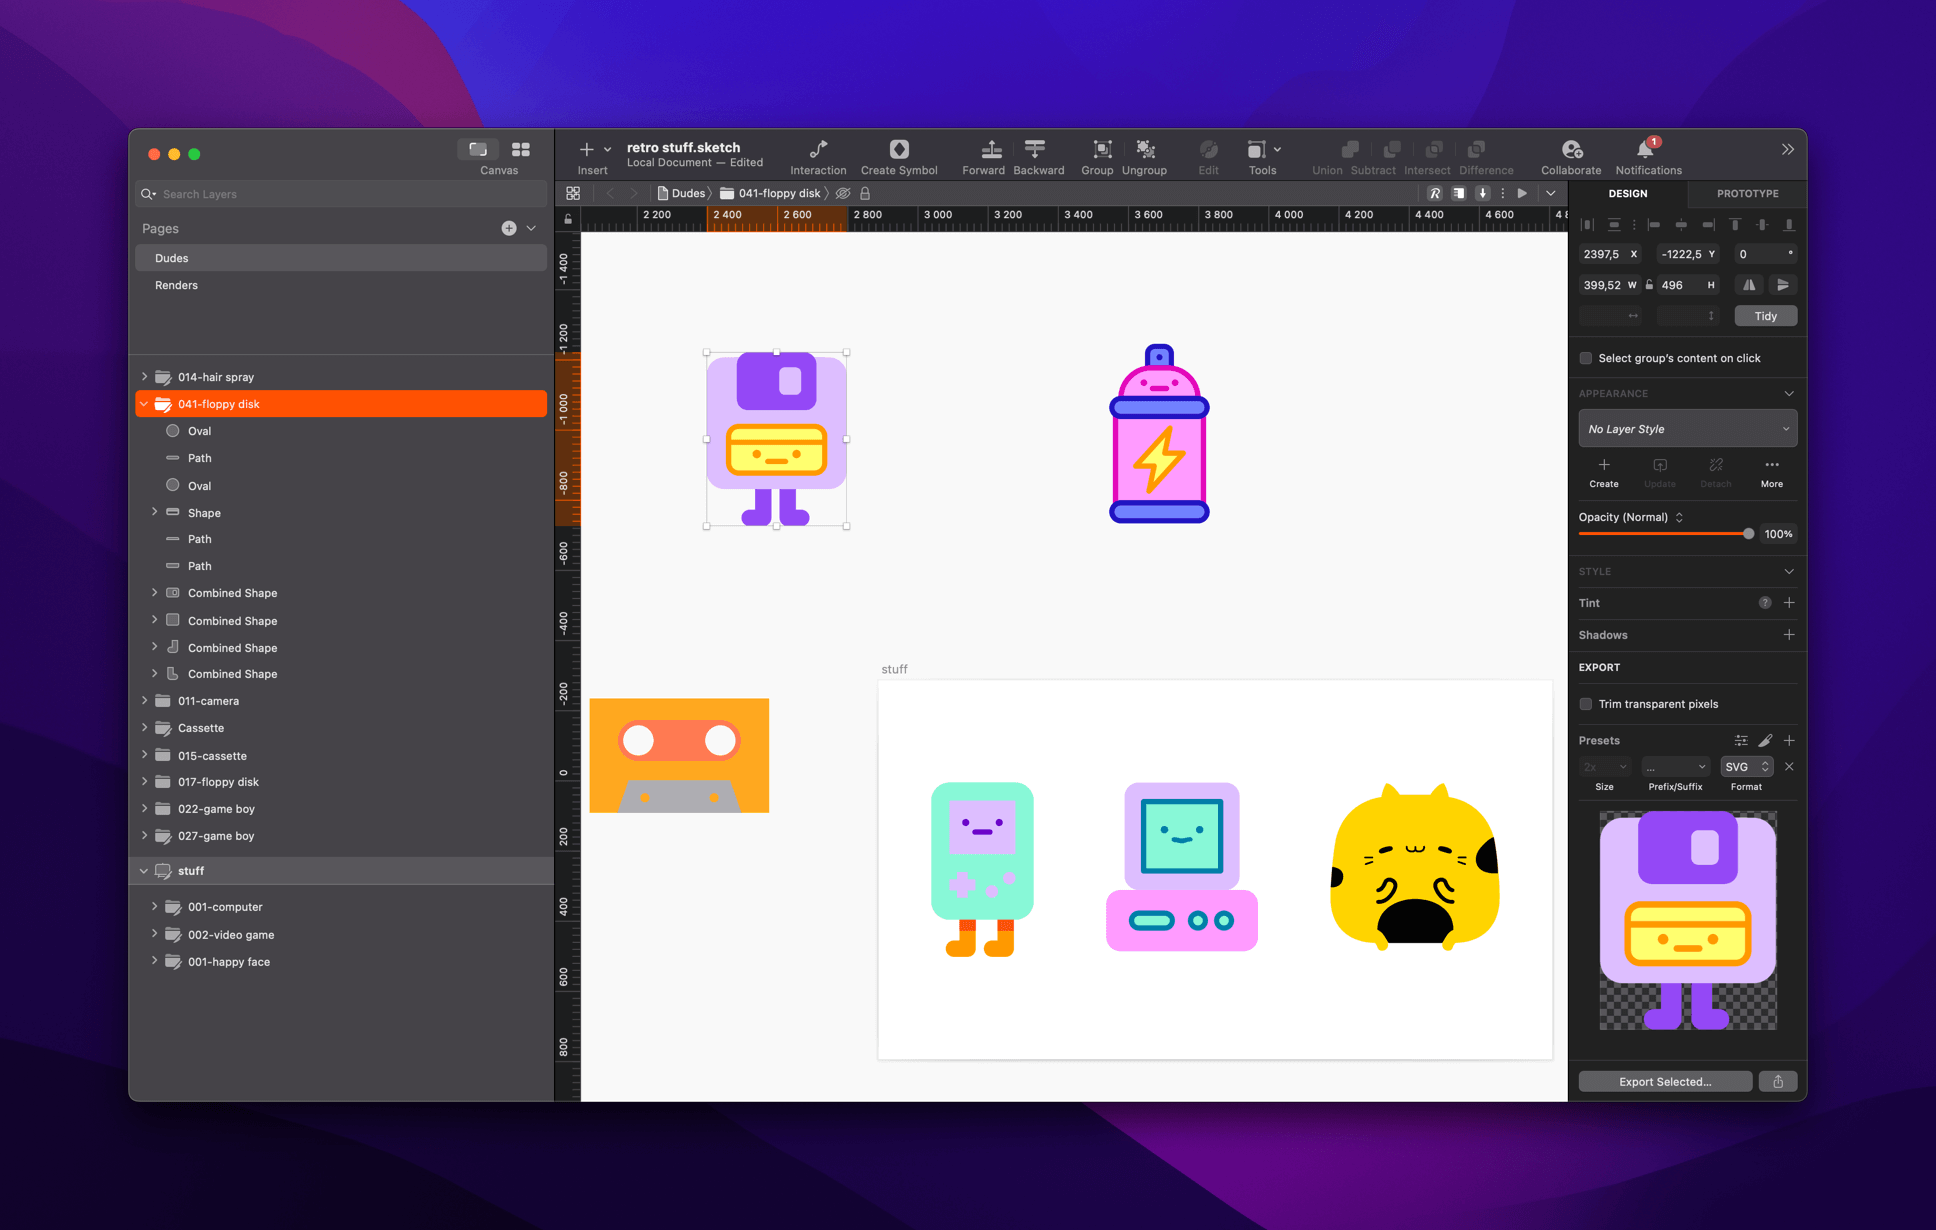
1. Take any SVG, either you create one in Sketch or you do, like I did, download from, e.g., the excellent stock vector service Flaticon, which I’m a proud-paid supporter of.
2. Make sure it has a flat design, you don’t need a fake 3D effect in the vector since you are actually going to make this into real 3D objects. Avoid isometric 2D illustrations since, again, we require a flat frontal surface to get the best results.
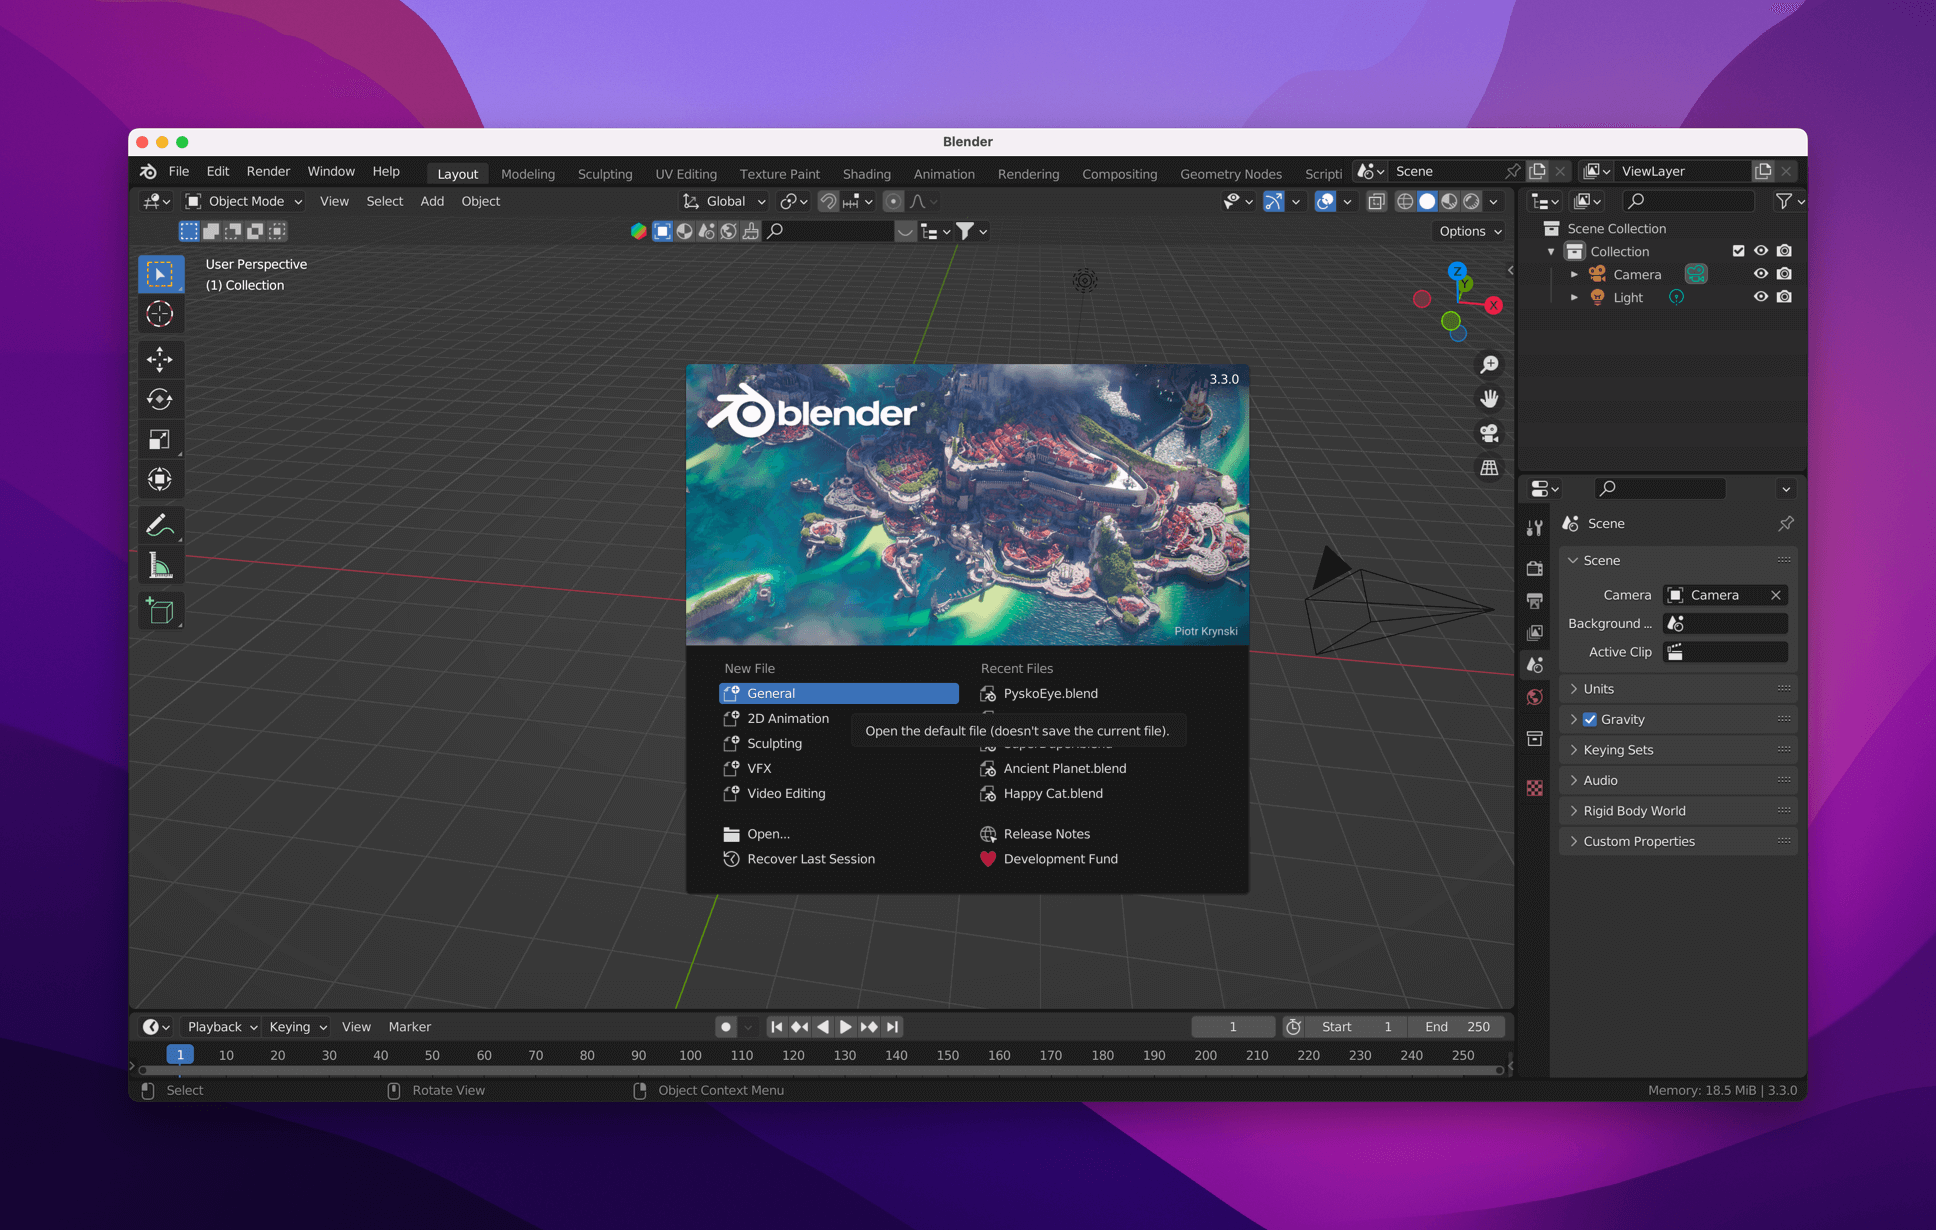
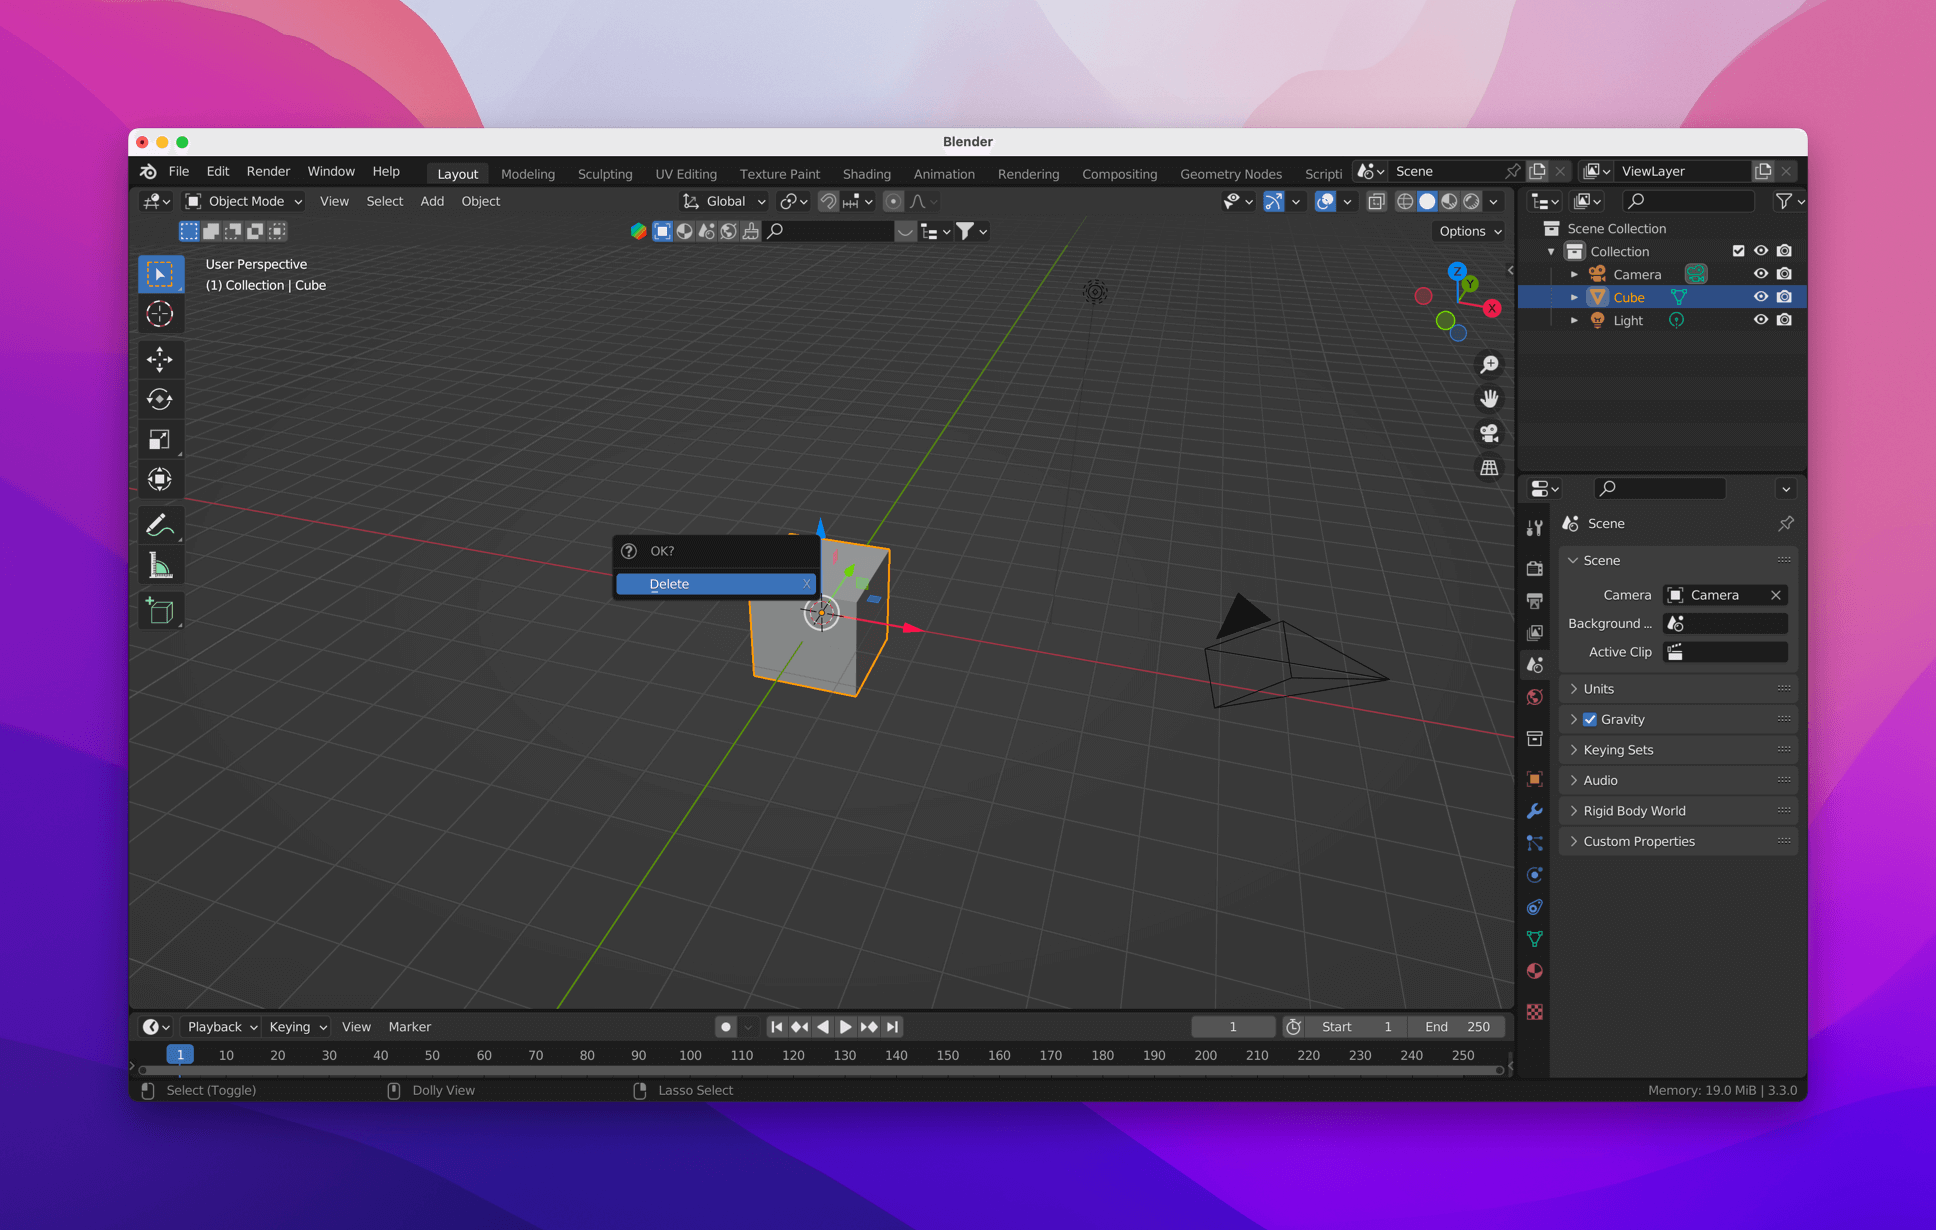
4. Open up Blender and select New File 👉 General from that fancy start thingie. If this is the first time using Blender or you haven’t customized the start templates, you will see a 3D cube in the middle of your scene. Delete the cube, we don’t need it. You delete in Blender with the key X.
6. You can keep the Camera and the Light, since you actually require both when rendering.
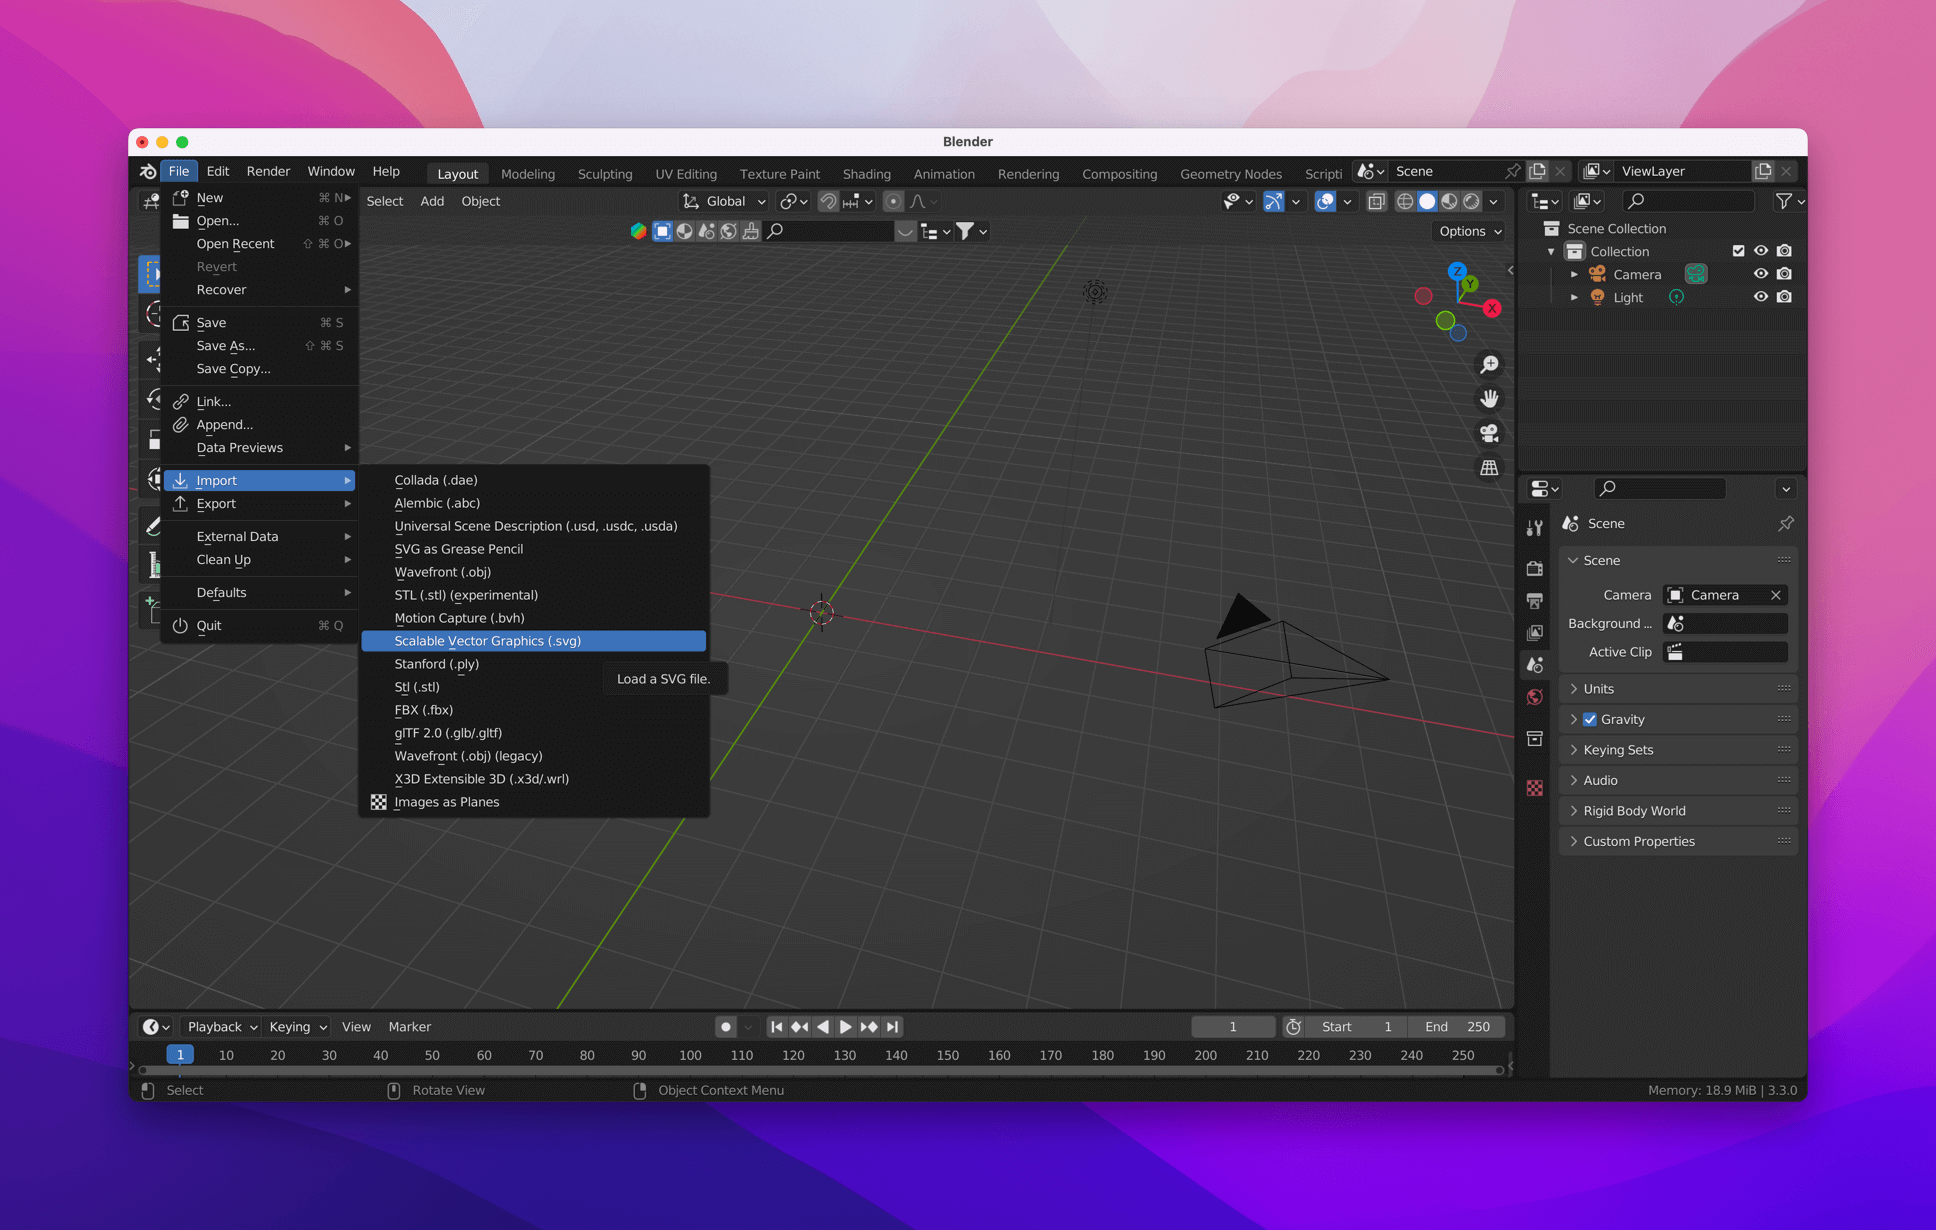
8. Go to File 👉Import 👉Scalable Vector Graphics, select your SVG and hit Import SVG. It will look like nothing happened, right? But it did! It’s just very tiny, like zapping something with a Tiny Tron 3000 blaster, if that existed.
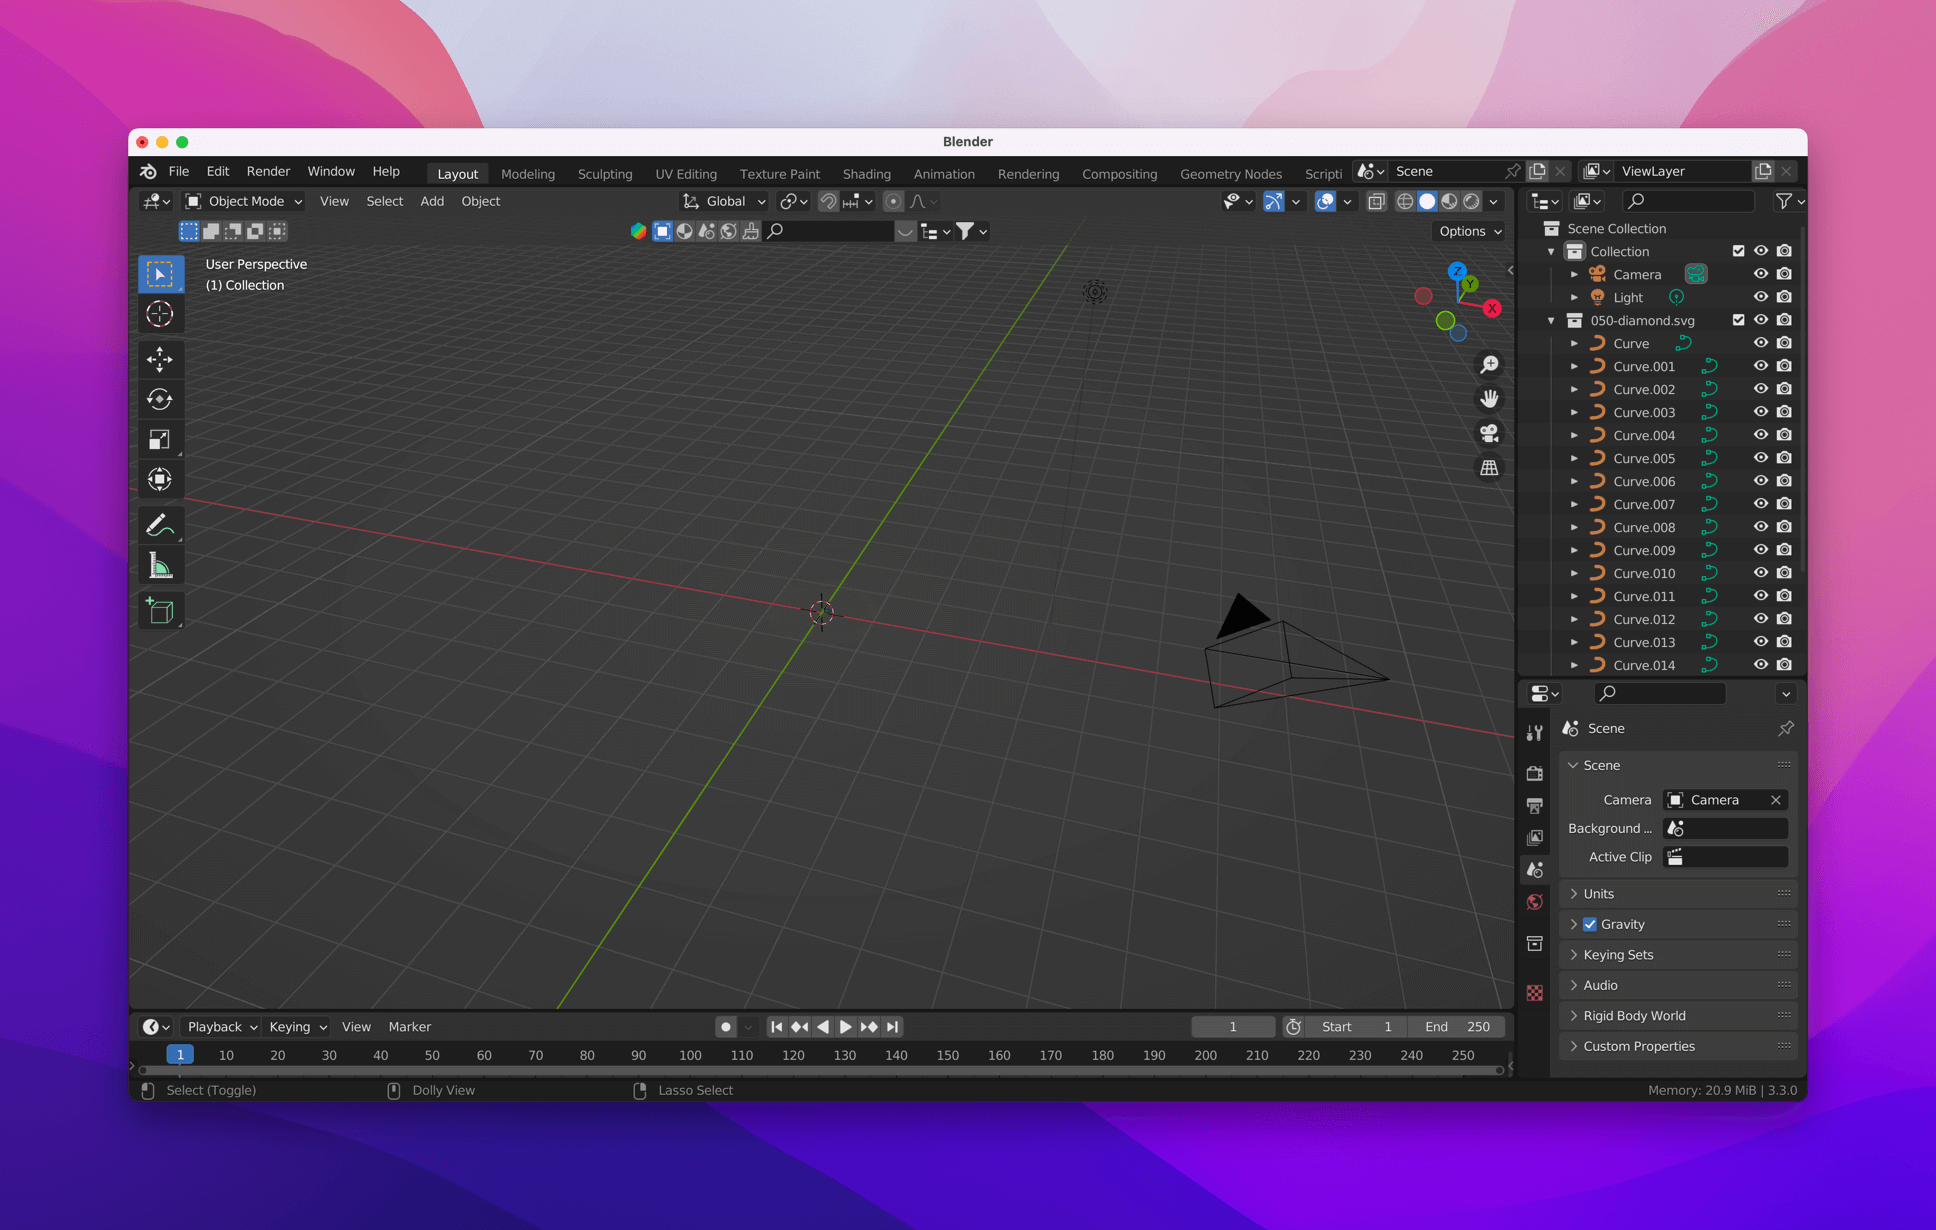
No worries, I’m here to help! What you need to do now is scale everything up so that it actually makes sense in Blender’s 3D space. Watch my recording, there are a few steps involved in the process 👇
Neato! Now comes the really fun part:
How to extrude vector data into 3D data
Technically, your imported SVG is still what Blender calls Curves, but we don’t need to get overly technical, so let’s just go on with our joyride. You can always use the excellent built-in Help section if you are curious enough.
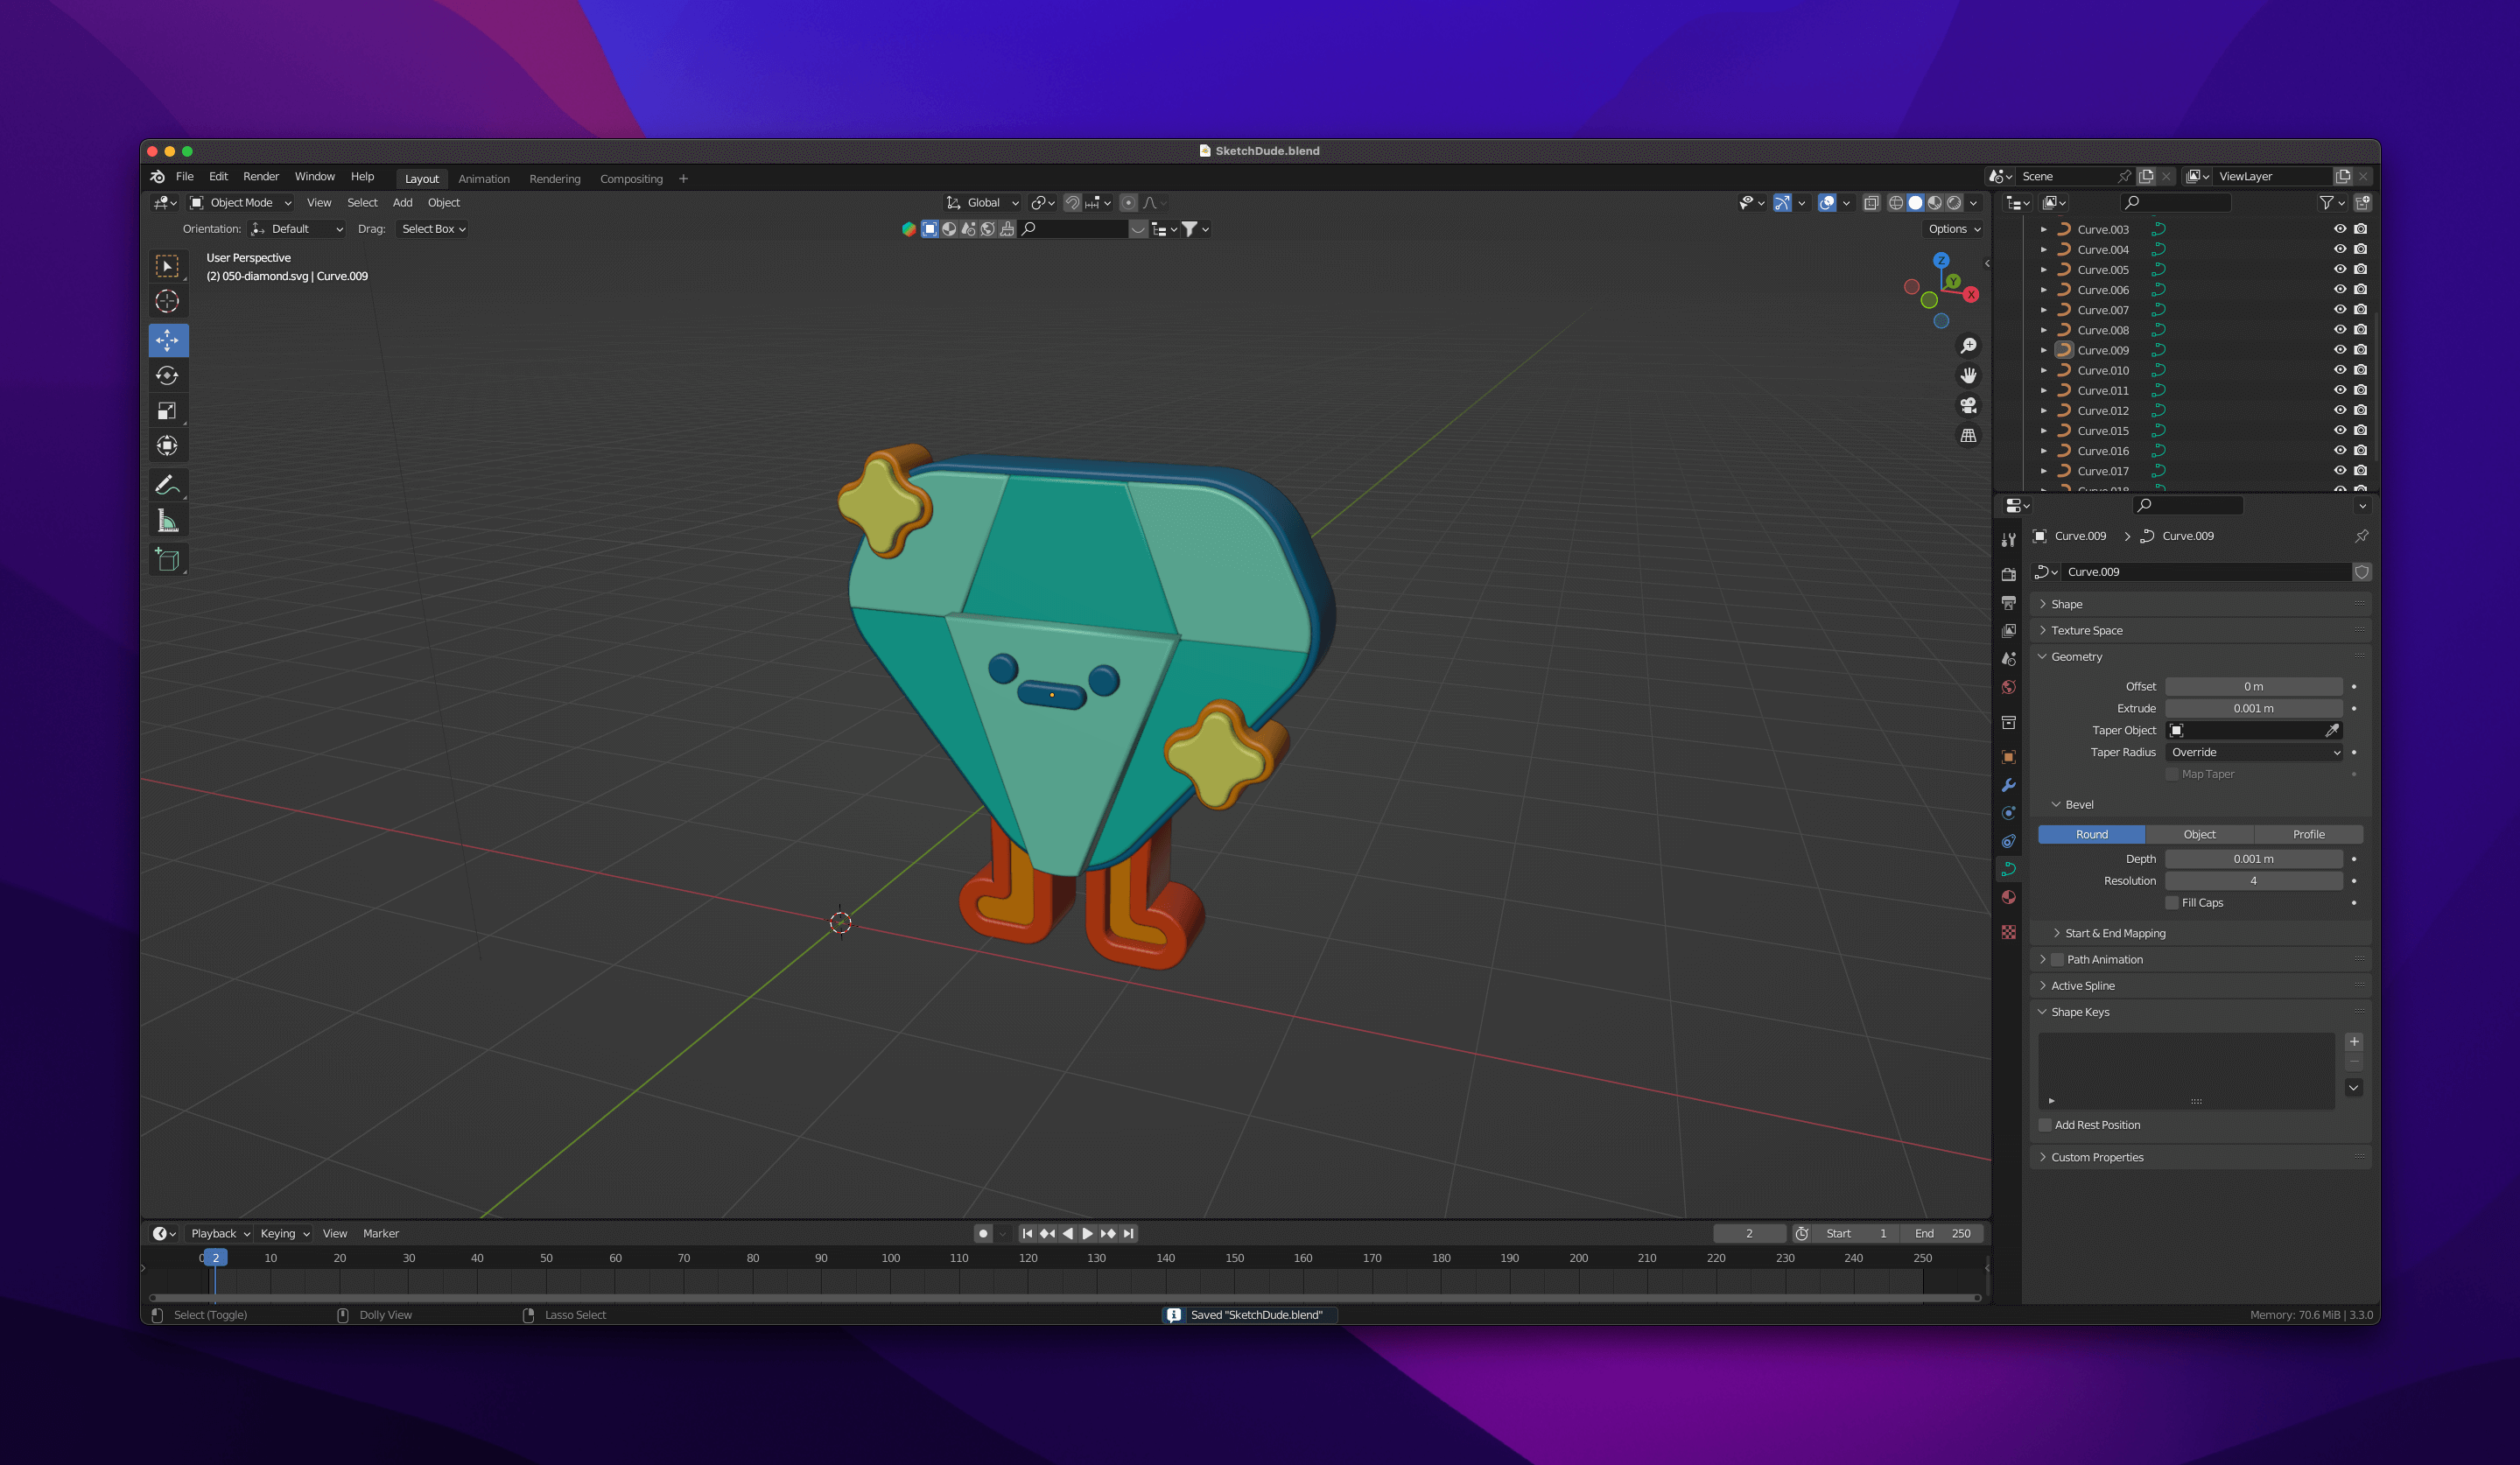
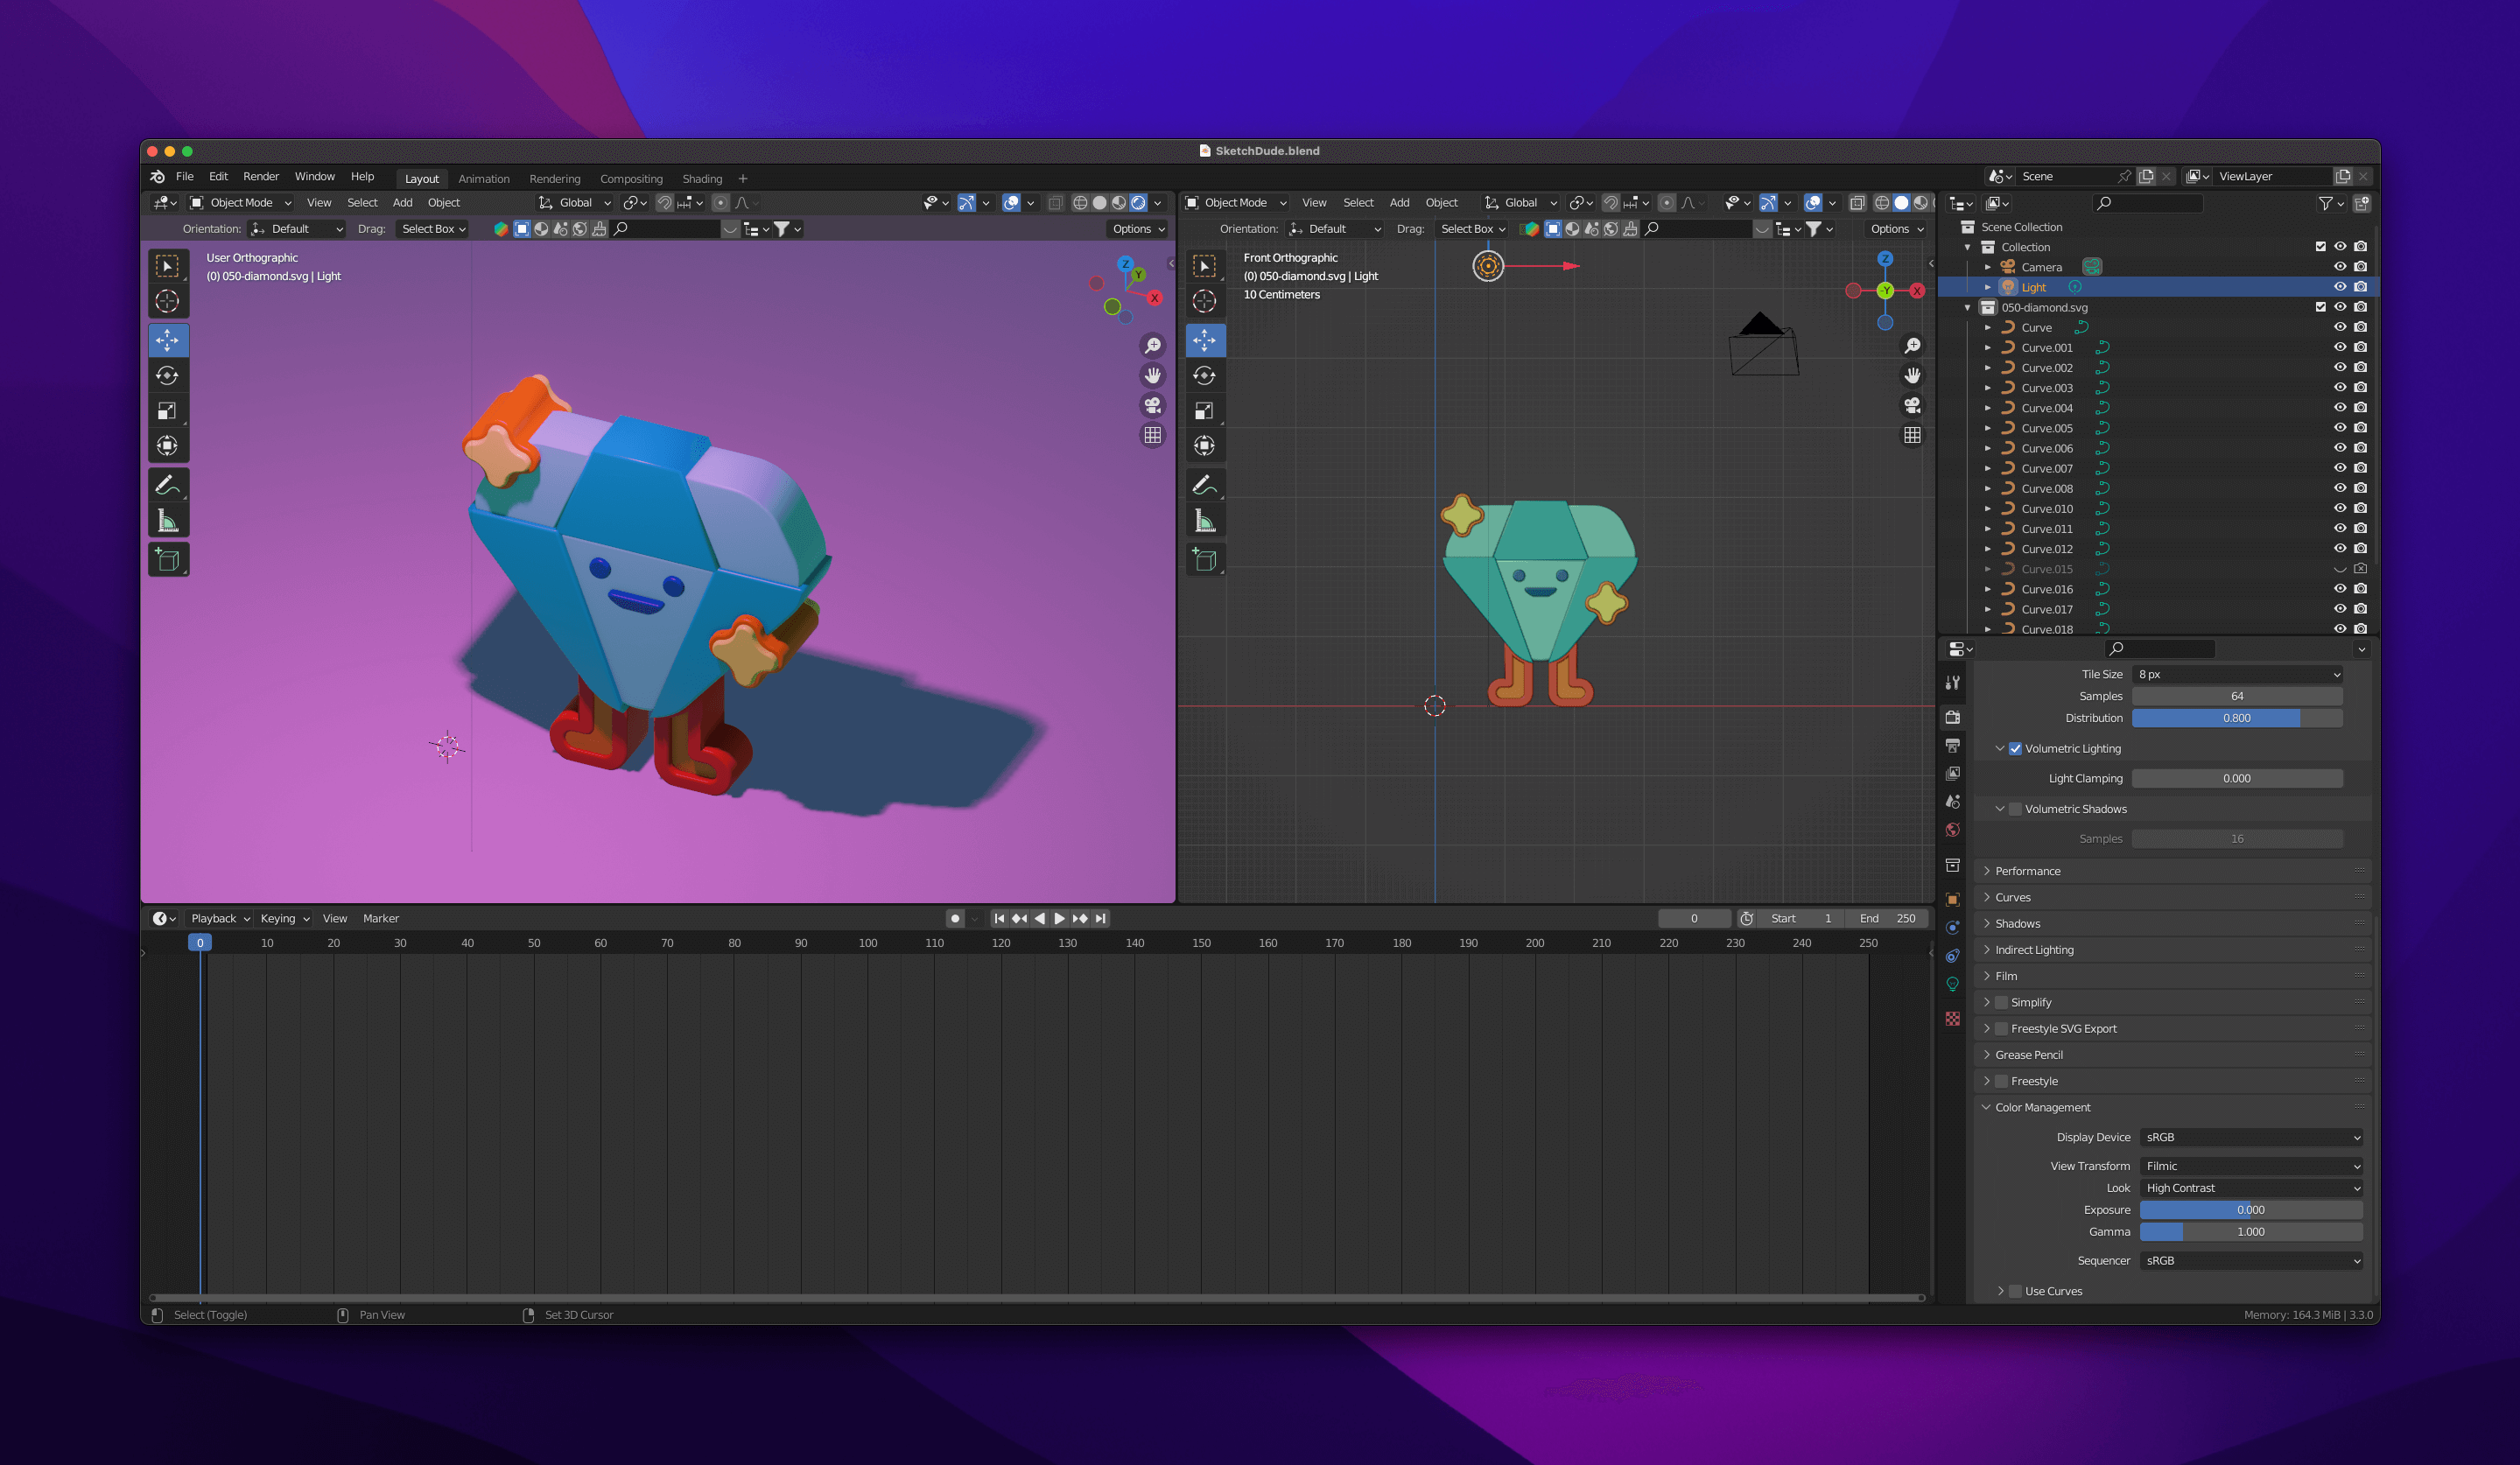
1. All the Curves from your imported SVG are neatly collected inside a folder with the name of the file, in my case it’s called ”_050-diamong.svg_” since that is the name of the SVG itself.
2. Select one of the curves and scroll down to the section named Object Data Properties (hint, it has the same icon as your Curve, that green bezier thingie.
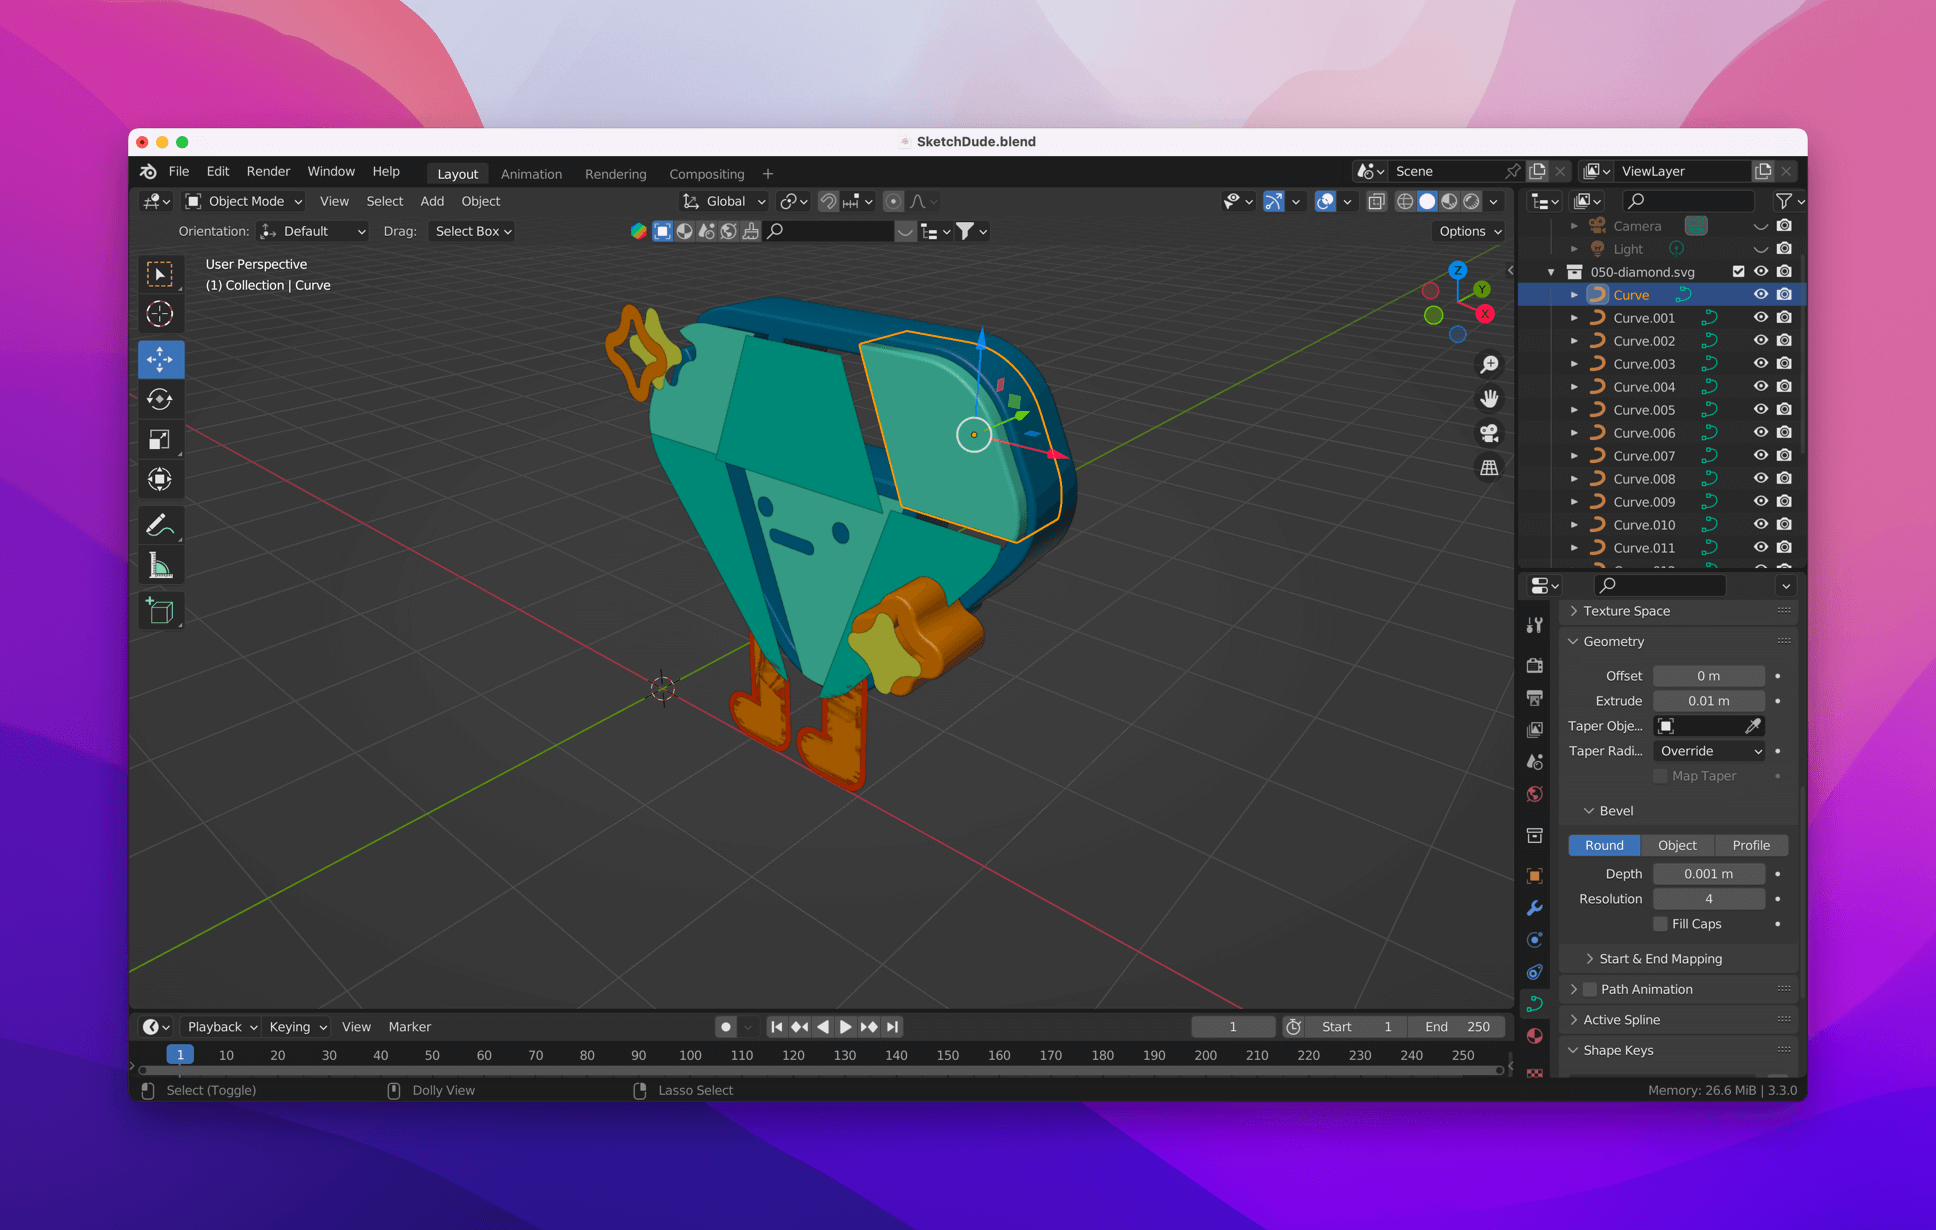
Under the section Geometry, work with Extrude and under the subsection Bevel, work with Depth. This video will make it easier understanding where you actually do the extrusion part. 👇
Repeat this for all of your Curves. I actually find it very soothing. Furthermore, it helps to move the curves in Z space when extruding. Use the Move tool (G).
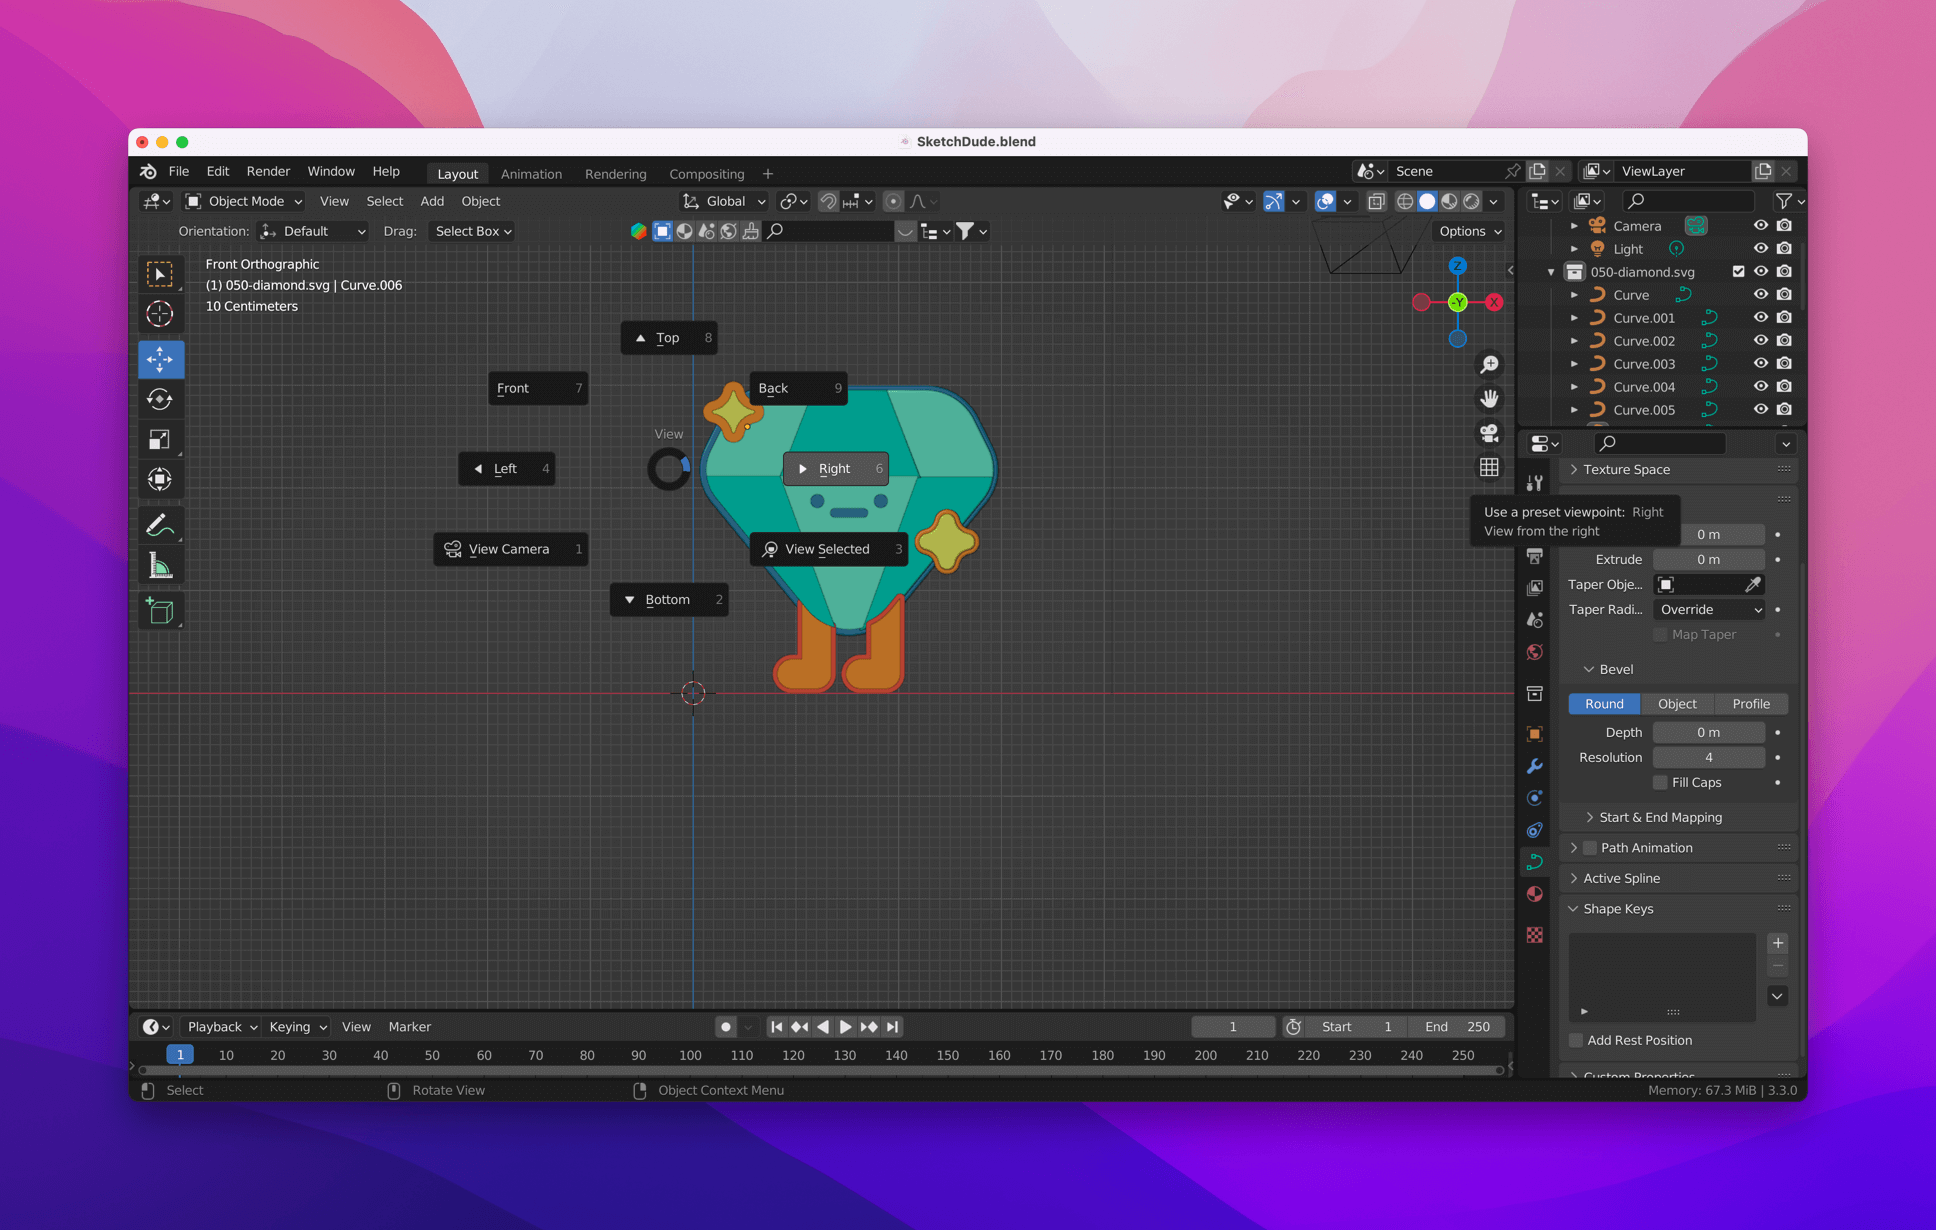
ProTip! Align Origin to Geometry
One thing that really bugs me is that, every single imported SVG Curve seems to have the **Origin** (aka anchor point) down in the corner. Which makes it really hard not only to move around, but also when you get to animation, a real pain in the behind parts. Let’s fix that! We need to do this 👇

I’m right-clicking to get the context menu opened. Moreover, it helps not to select both the Camera and the Light, or you may affect them too.
A few nifty shortcuts while you work
Learning Blender’s shortcuts is one of the most important things to get a nice workflow going, just like any other app you spend time with. Here are two that I use a lot while in 3D view:
1. Holding down Z opens up the different ways of viewing your 3D model in the 3D view, perfect for when you come to lightning for example.
2. Holding down the \< key opens up another really useful shortcut, the different Views (Top, Left, Right etc.) You can also switch between these views using the numerics on your keyboard (1, 2, 3, 4 etc.) Really helpful!
When you are done extruding every single Curve you are ready for the next exciting step, rendering!
Render me surprised
Rendering techniques is an essential part of getting visual out of Blender.
1. Go to Render 👉Render Image
2. Meeeeeeh! What happened? This doesn’t look exciting or gorgeous at all, you scream into the skies.
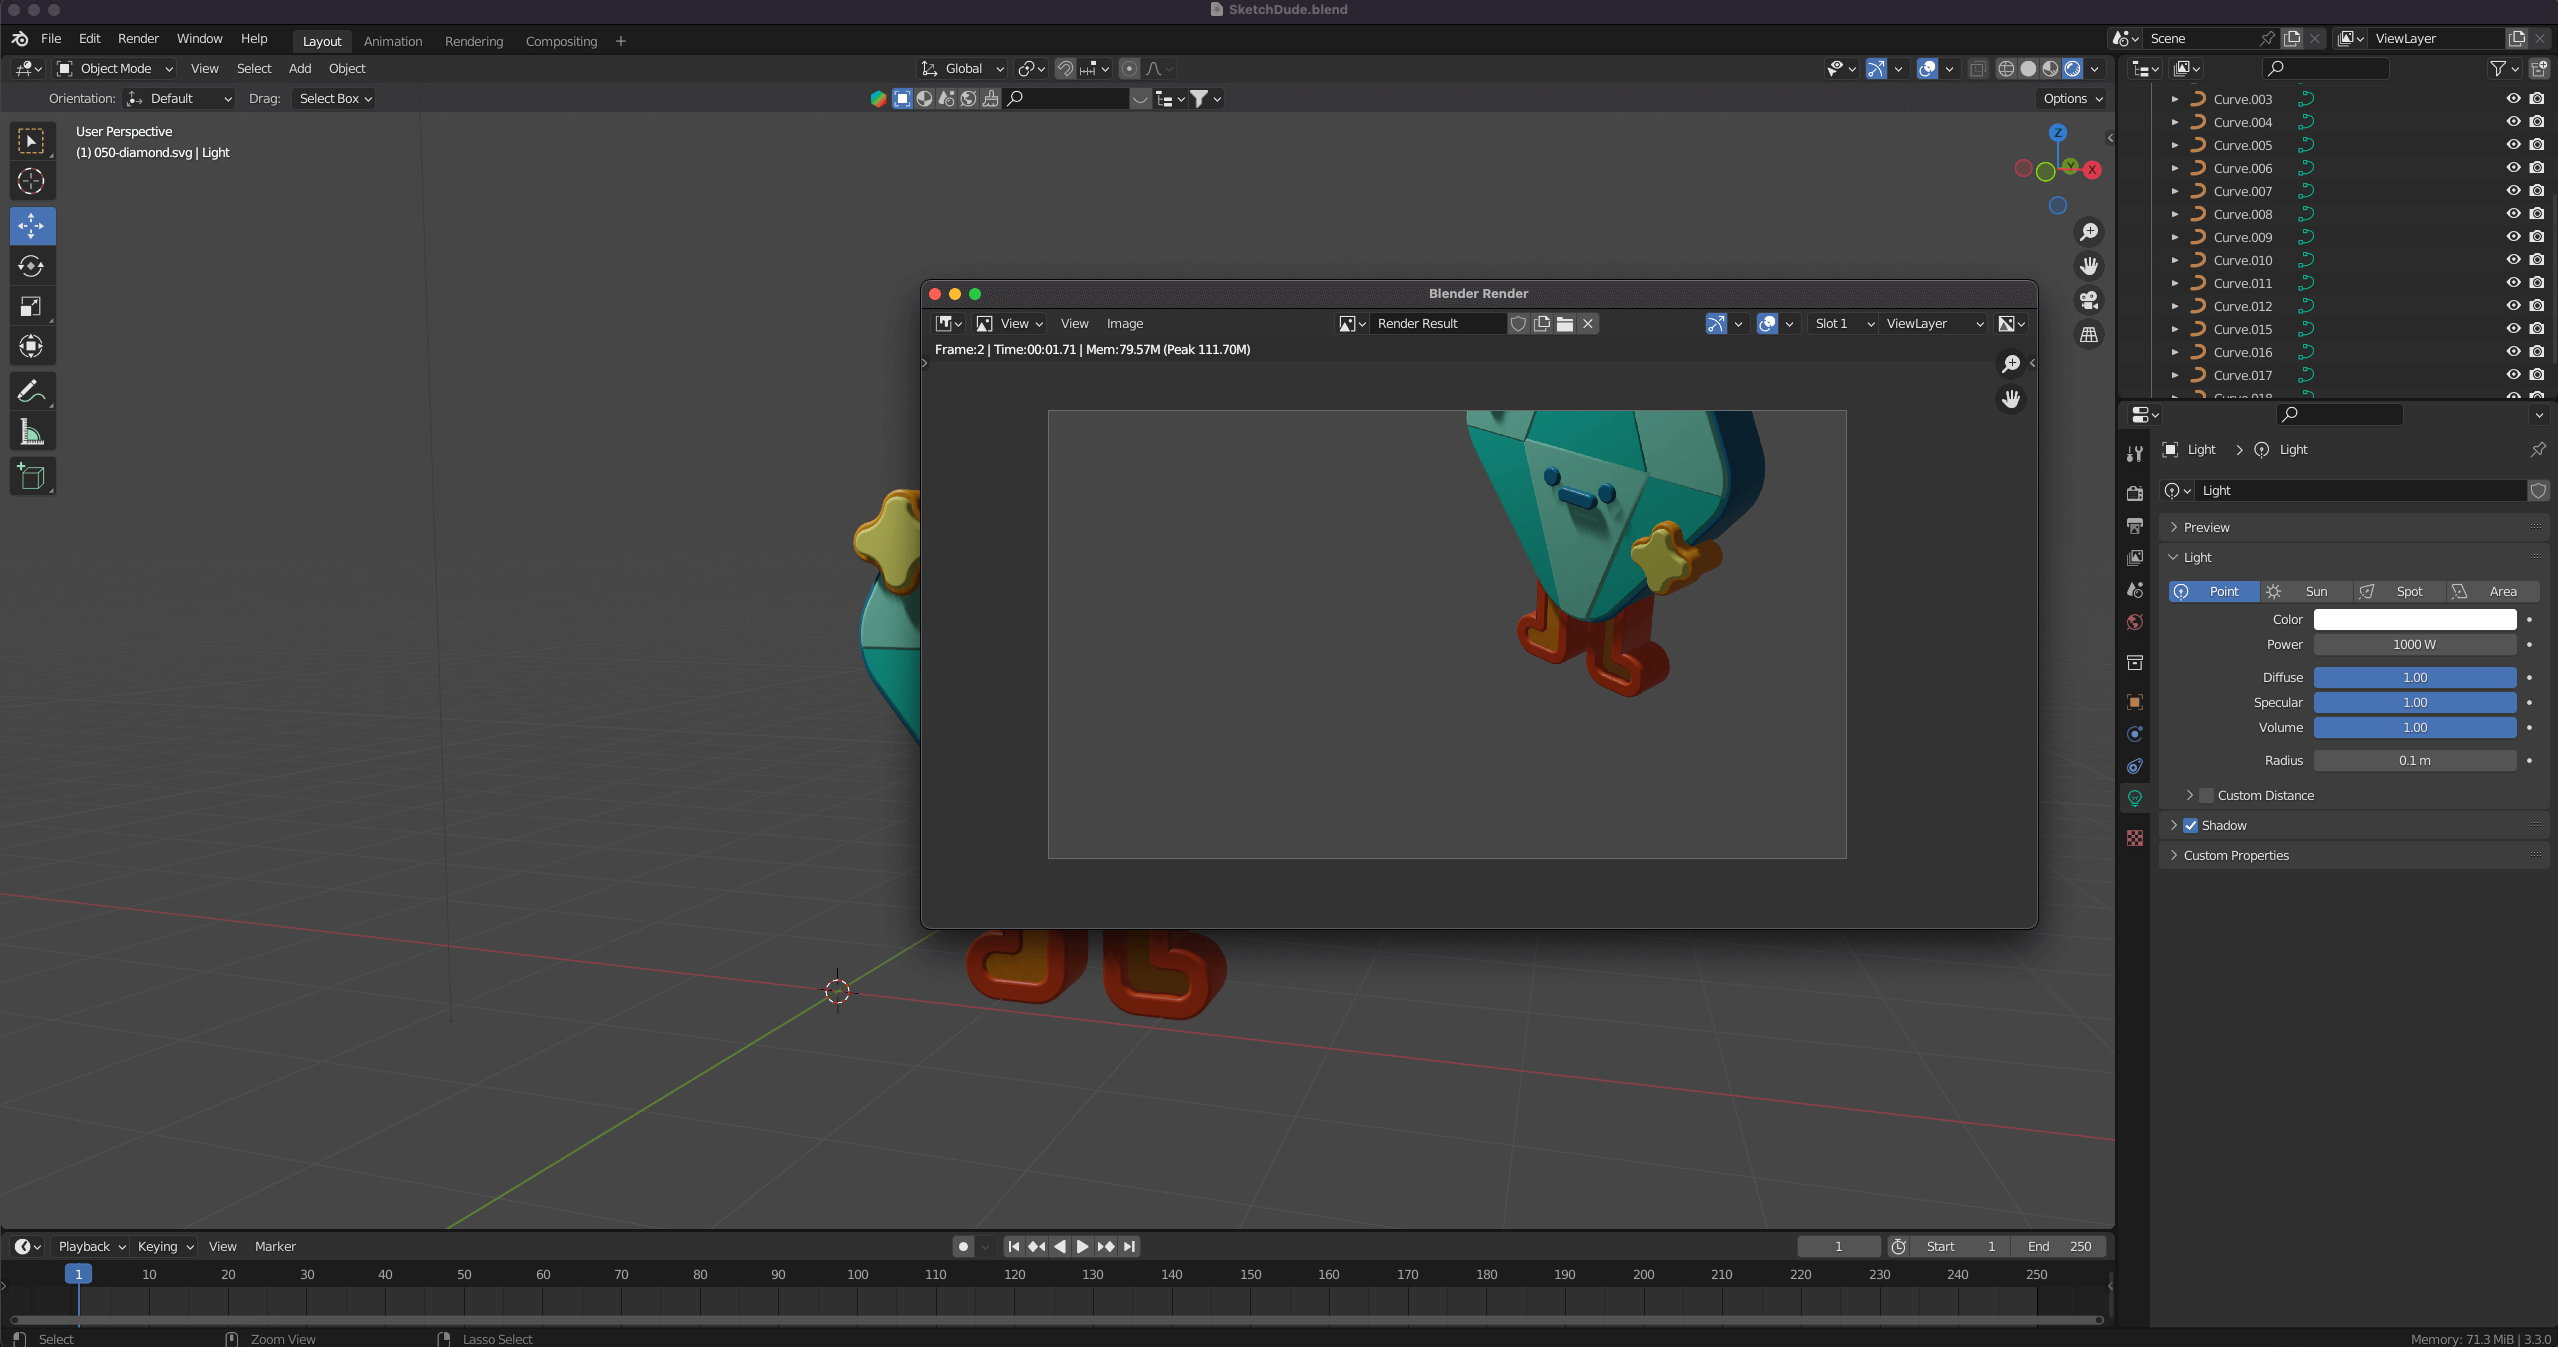
Well, dear reader, now is when the real work actually starts. How you light your scene is an essential part of the result. I could write an entire book about light and magic, but fortunately for you, I will not.
Let’s cheat all the way to great looks
In reality, you can’t cheat with your looks so much. In 3D, however, you can do about anything. Firstly, I really don’t like how the camera is aligned in this shot.
1. Press 0 (zero) on your keyboard. This will show you what your camera is seeing
2. Select the camera in your layer list and press G. This enables you to really move around the camera in relationship to your 3D objects. Neato!
3. If you want to zoom in our out, use the handy little pop-up box that appeared down in the left corner.
4. Render again. Mine looks like this 👇
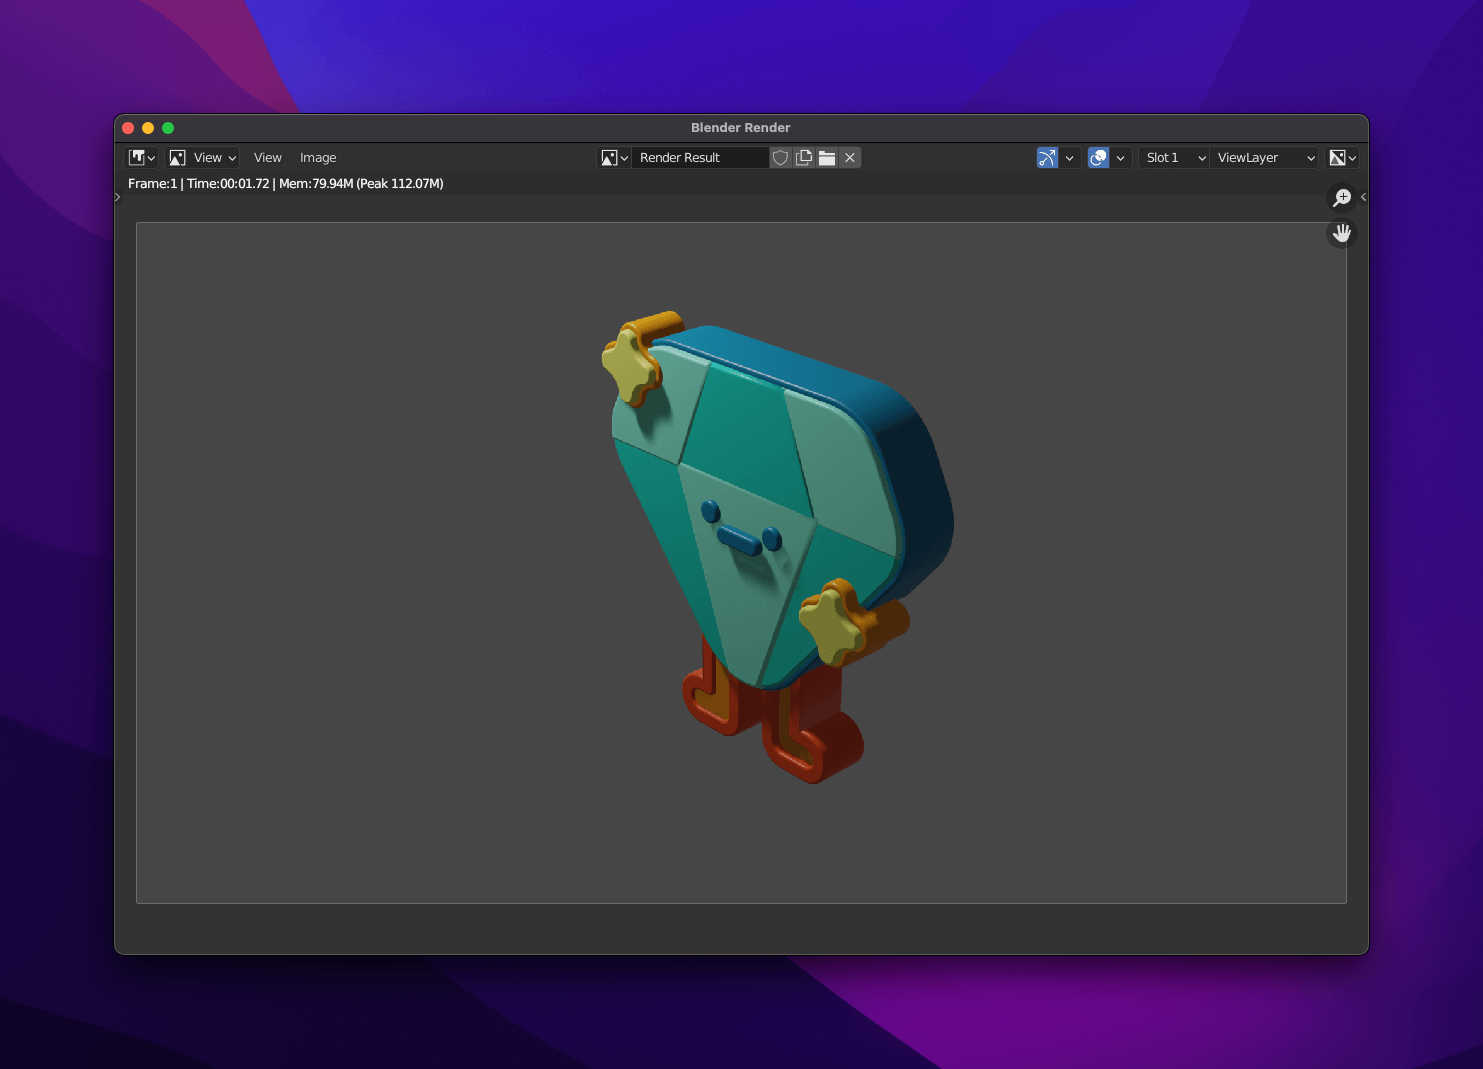
A rapid way of getting anything to look better
Here’s a quick and dirty technique for getting anything to look better. You could fiddle around with the different light types in Blender, but for now, let’s pretend we are in a real hurry.
1. Go to the tab Shading
2. Select World in the little dropdown (watch my video, way easier to explain)
3. Add a Sky Texture
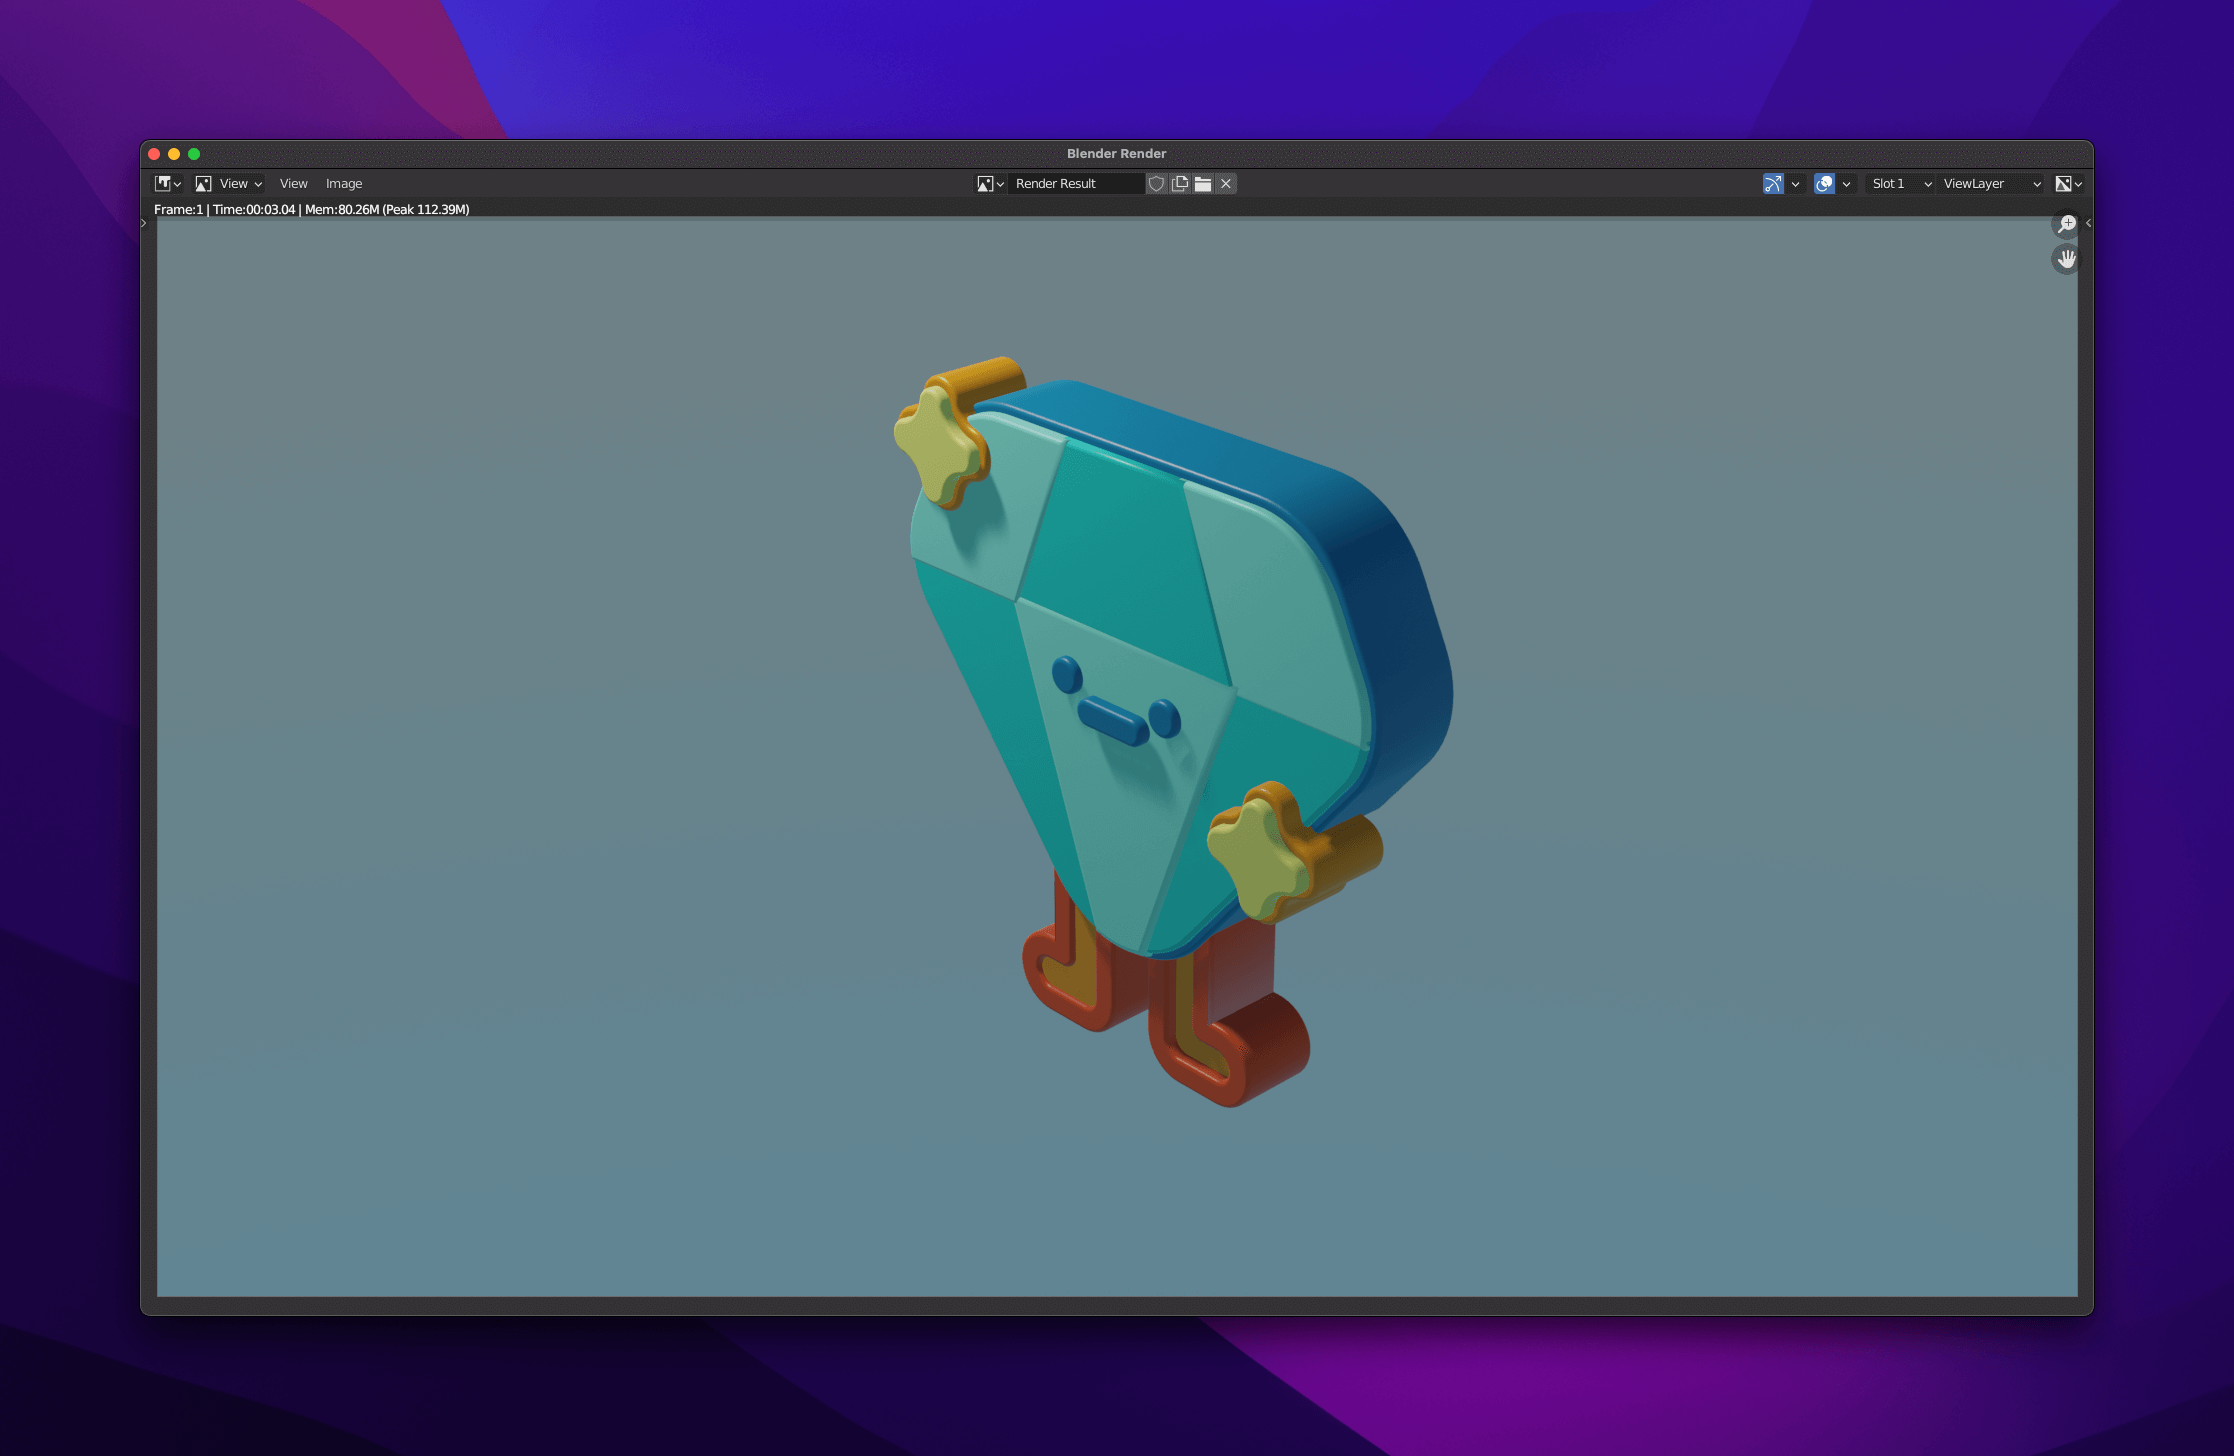
4. Render again, and voilà so much better right?
The time has come to look at the two most used rendering engines that come shipped with Blender, Eevee and Cycles.
Until now, we have been using Eevee. There is more!
Eevee and Cycles rendering engines
One good thing about Blender is that it comes with three different rendering engines, and tons of tutorials are out there on how to use them to the maximum. Keep it simple and stick to:

– Eevee while building your 3D scene, it’s blazing fast, and you can produce spectacular results. Eevee is the preferred engine when exporting animations from Blender.

– Cycles when you want to do the ”money shot”, its ray tracing engine is a very fast way of getting a ”luxury look” for your scenes
Actually, I have become to really fall in love with Eevee, the more you play around with it, the more fun it becomes. It’s so fast compared to Cycles, and if you want to animate anything in Blender, you are going to use Eevee if you would rather not be of old age once your animations has finished rendering 🤣
Here’s an example of a simple animation I did the other day using only Eevee:
Bonus beats – Adding a Modifier
Blender’s modifiers are mighty and really fun to play around with. I was not happy with my Sketch diamond dudes mouth, so I added a SimpleDeform modifier to make him happy 👇 😸
The final result
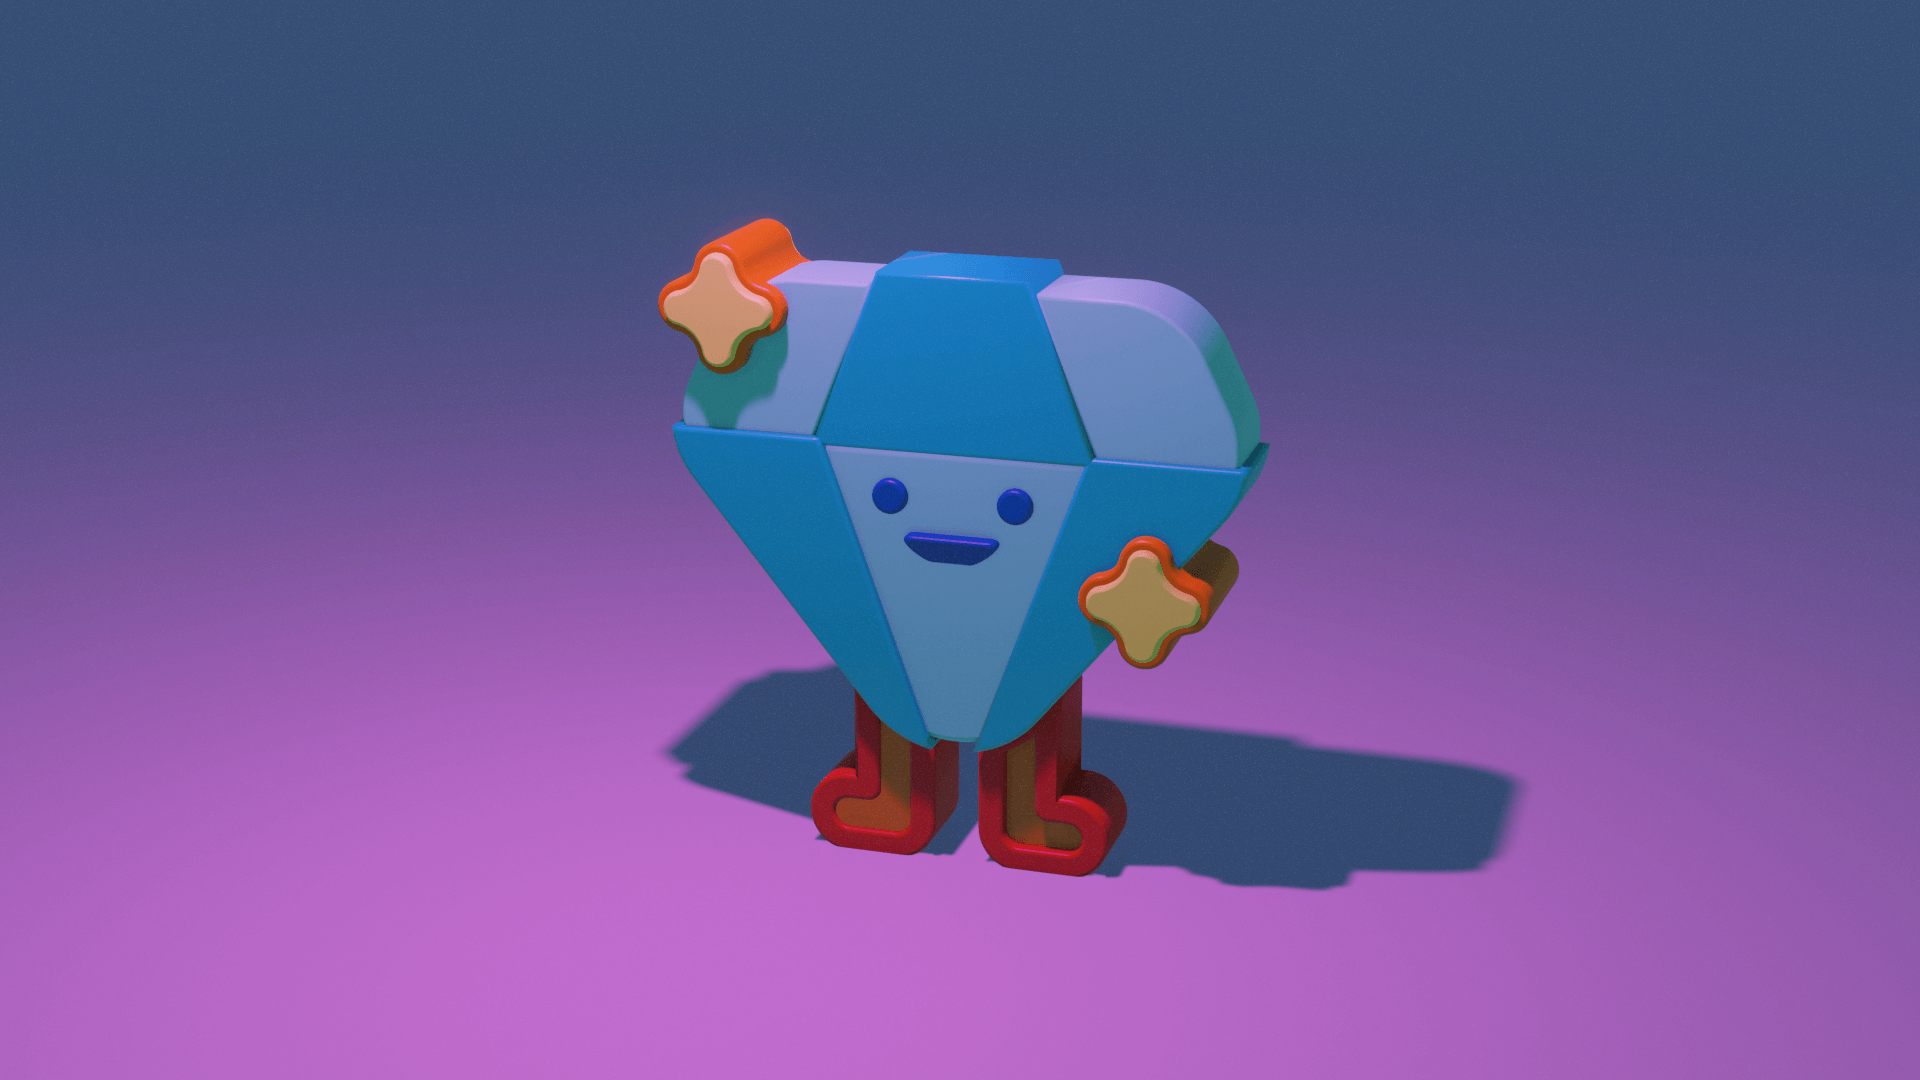
I added a plane, colored the scene light pink, did a few post-processing tricks and finally, something I think looks pretty neat. Another great trick is to scale geometry up and down, so that things get a bit more interesting. Nothing fascinating in life is 100% symmetrical, and the same goes for 3D.
All of this done 100% inside Blender. Not bad right? You don’t need Photoshop to make those final, crucial color correction tweaks.
That’s it for this time folks, I hope you enjoyed this tutorial.